We have a strict honest review policy, but please note that when you buy through our links, we may receive a commission. This is at no extra cost to you.

In this updated Canva review, I take a look at an increasingly popular browser-based design tool that aims to let users without graphic design skills create professional visual assets. Is it right for your business, or are you better off using a more established solution like Photoshop or Illustrator?
Quick verdict
Canva is an excellent design app, and arguably one of the most useful tools a small business can have in its arsenal. It lets you create an astonishingly large range of assets — including adverts, infographics, videos, and even websites — easily, cheaply, and quickly. You don’t need much in the way of graphic design experience to get good results out of it, and its AI-powered ‘Magic Studio’ features open up a large number of creative avenues to users.
In terms of Canva’s disadvantages, the key drawback to be aware of is that Canva’s export options are relatively limited — meaning that the projects you export from the platform can’t always be edited in other (more professional) tools. Additionally, Canva’s AI-generated images and videos aren’t provided in high resolution; it doesn’t offer phone support; and the options it gives you for backing up your work are limited.
Our overall rating: 4.5 out of 5 | ⭐⭐⭐⭐½
How to get started with Canva
I’ll start my full review with a quick overview of what Canva is.
Canva: an overview
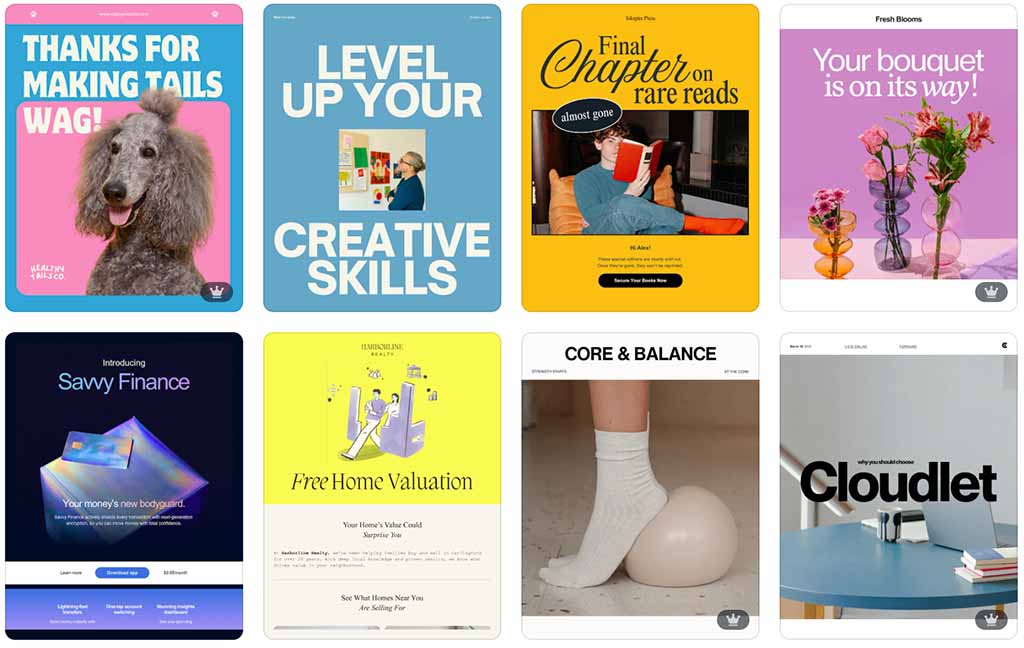
Canva is a graphic design app that aims to let you design visual materials without needing extensive graphic design experience. It can be used to create social media graphics, simple videos, presentations, slides, posters, and other visual assets — and a wide range of customizable templates, royalty-free images, and AI features is provided to help users do so easily.
Unlike traditional graphic design tools like Adobe Photoshop and Illustrator, Canva’s learning curve is designed to be extremely gentle. This means that its feature set is considerably more basic than these sorts of ‘pro’ solutions — but its pricing is a lot lower than them too.
Launched in 2013 by technology entrepreneur Melanie Perkins, Canva is now a hugely popular solution for creating designs — as of January 2026, it boasts over 260 million monthly active users (MAUs) in over 190 countries.
Over 30 billion designs have been created with the tool and 5,500+ people are employed by the company.
But how does Canva actually work?
How does Canva work?
Canva can be used either in a web browser or as a downloadable app (for Mac, PC, Chromebook, iOS, or Android).
It gives you four key things to help you create your design:
- templates — pre-designed layouts that you can use for a wide range of applications (for example to create presentations, videos, adverts, business cards, infographics, or charts)
- ‘elements‘ — royalty-free photos, videos, and graphics that you can add to your Canva templates
- AI tools — AI features that let you create new content for your projects (or manipulate existing designs in interesting ways)
- a drag and drop editor that lets you move elements around a template.
Additionally, Canva provides controls for editing the typefaces and colors used on a template, and it lets you create custom templates too.
The idea is that you simply pick a template, drop some content into it, make a few edits and then export your design for use online or as a printed item.
But how easy is it to actually use the platform?
Ease of use
When you log into Canva, you are presented with a question: ‘What will you design today?’
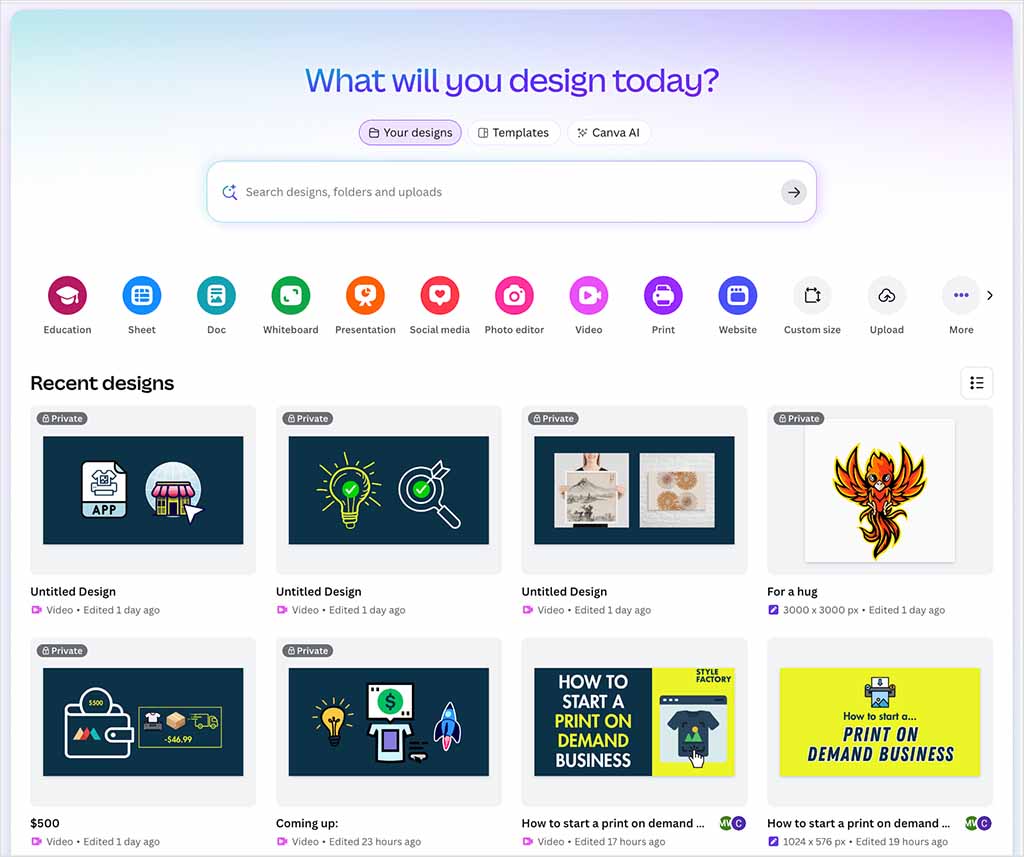
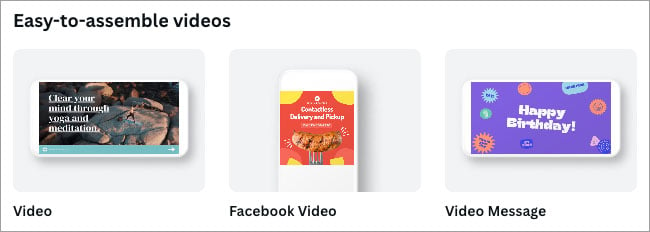
You can answer this question by entering design ideas in the search bar provided, or clicking the icons underneath it. Doing so will give you access to suggested layouts for presentations, social media posts, videos, printed products and more.
Either way, you’ll end up with a wide range of templates to choose from. You can pick one of these as the starting point for your design.
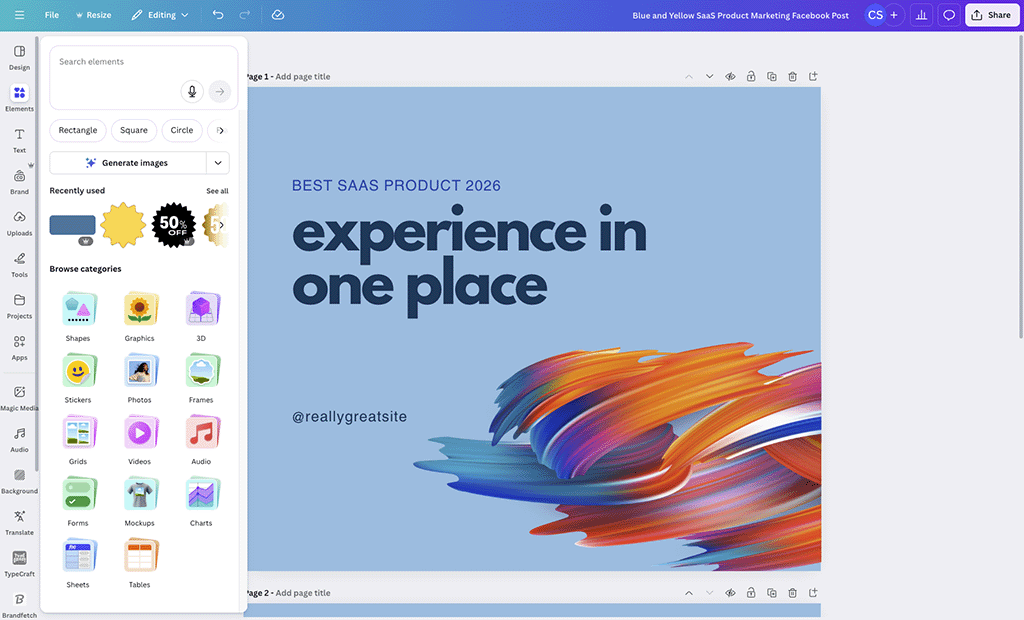
From there, it’s a case of editing the template so that it meets your requirements. You can do this by clicking on one of the design’s elements (text, visuals etc.) and using the controls that appear above it to change that element.
Alternatively, you can replace the placeholder content with your own images or text (or add additional pictures and copy).
To add an image to a template, you can either search for an element from Canva’s ‘elements’ library (hundreds of thousands of these are available, and I’ve yet to come across a search phrase that isn’t adequately catered to).
You just click on an element to add it to your design, and you can resize it easily to suit your purposes.

One annoying thing to note, though, is that if your design contains only a single premium graphic, Canva won’t let you export it — whenever you try to do this, you’ll see a message saying that premium images “can’t be exported on their own” (see my screenshot below).
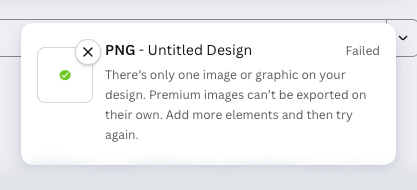
Even applying a background color doesn’t solve this problem; you’ll need to add at least one other distinct element to your canvas before Canva allows you to download the design. This is a frustrating limitation of the platform.
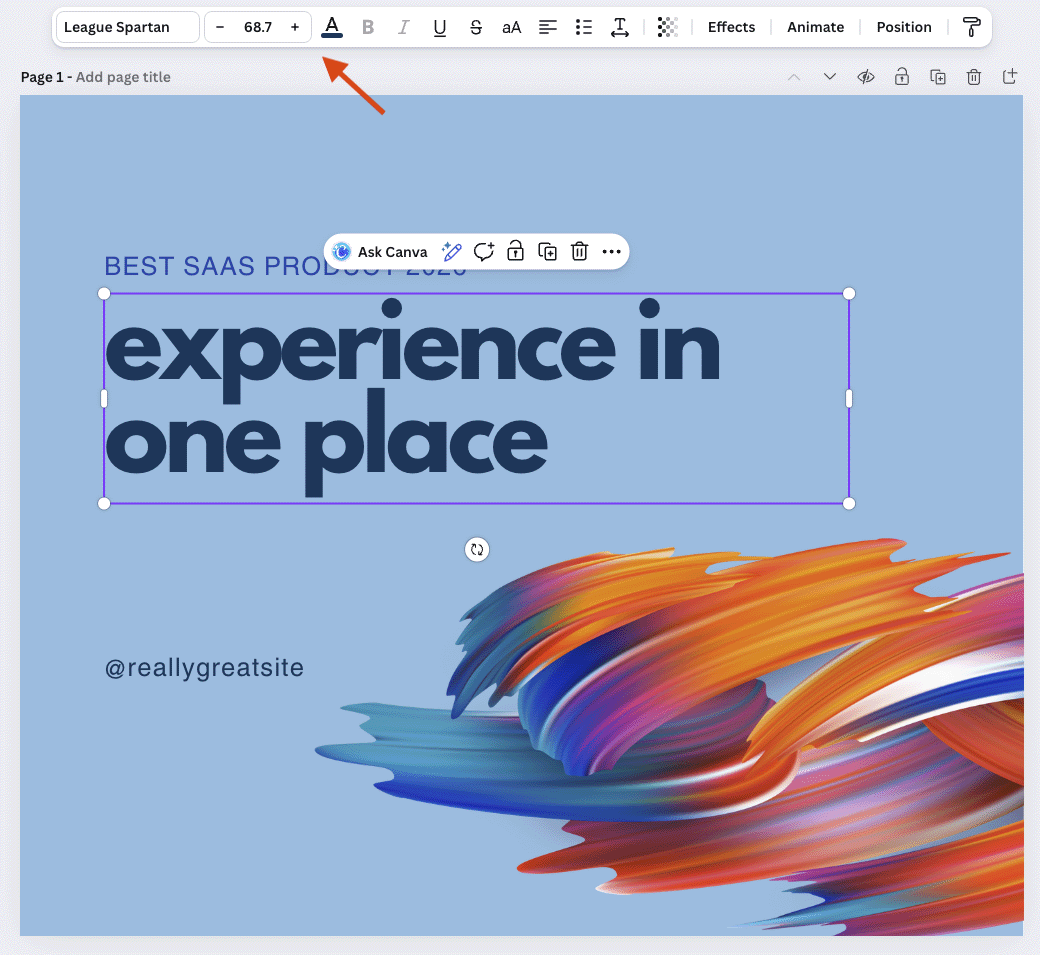
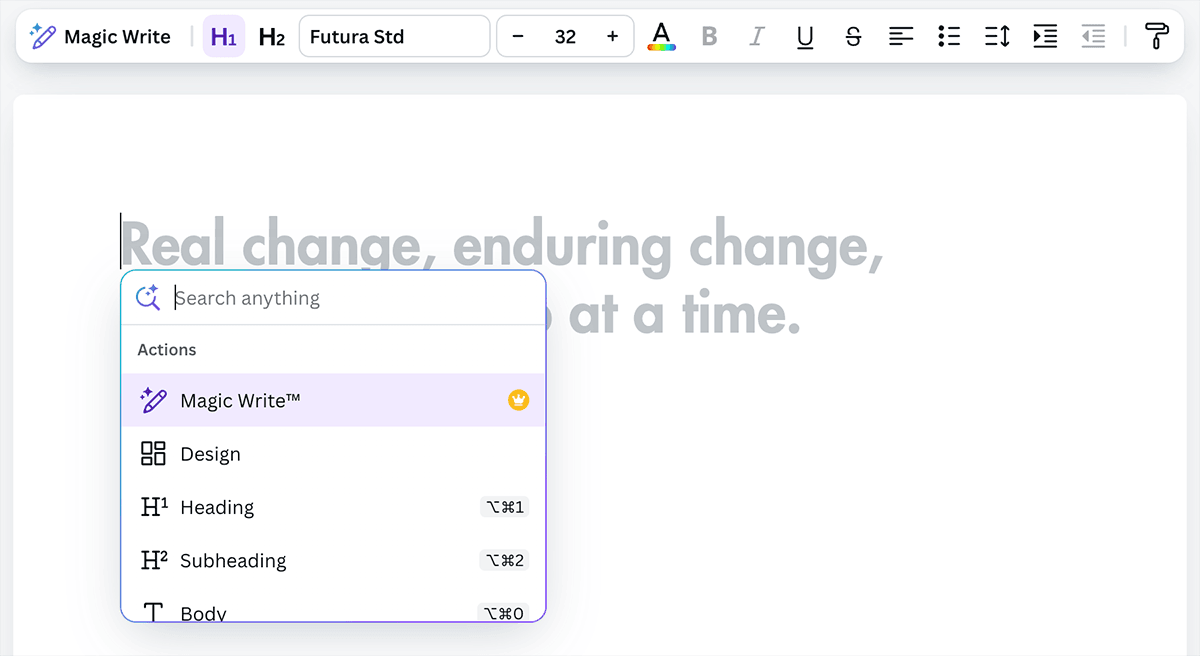
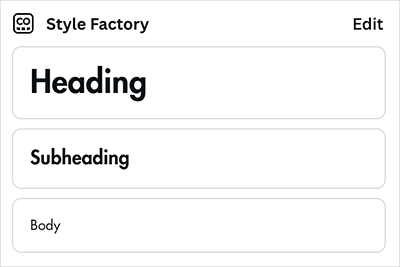
Where changing text is concerned, it’s simply a case of overwriting the existing copy, or using the ‘text’ tool (pictured below) to add new headings or body text.

Ultimately, the process involved in creating a design in Canva is simple and its interface is extremely user-friendly — anyone who’s used a word processor or a simple graphics tool won’t face much of a learning curve.
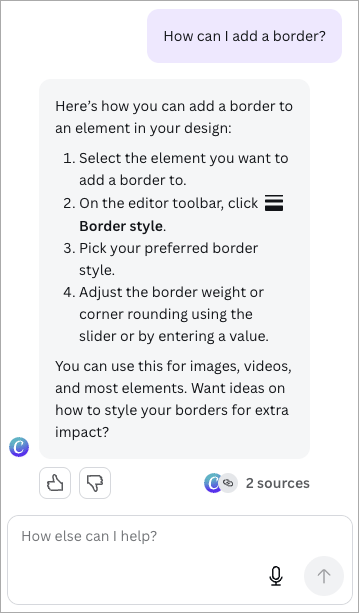
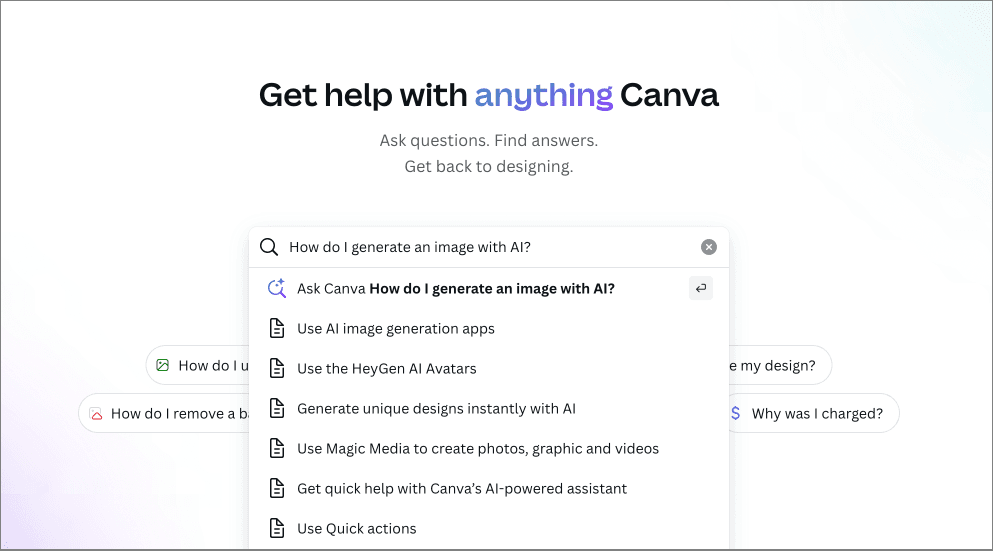
And this learning curve has been made even more gentle with the addition of Canva’s AI-powered ‘Help Assistant‘ tool (accessible at the bottom right-hand side of the interface). This gives you a search facility that lets you easily access either graphic design elements or individual Canva tools (the video editor, the presentation maker etc.).
The screenshot below shows you the sort of help I received when using this tool:
Finally, the fact that Canva’s interface is available in over 100 languages helps matters from an ease-of-use point of view too.
So all in all, it’s fair to say that Canva meets its goal of making graphic design extremely accessible to non-designers.
Using AI to create or manipulate content in Canva
Over the past couple of years, Canva has launched several AI-powered features and bundled them into a new ‘Magic Studio’ feature set.
This contains 20+ AI tools, with key ones including:
- Magic Eraser — a tool that lets you remove elements from images easily
- Magic Resize — a tool that automatically repurposes or translates existing designs for other platforms / markets
- Magic Morph — a tool that lets you transform the appearance of images and text based on instructions provided by the user
- Magic Grab — a feature that lets you separate the subject of a photo from its background
- Magic Expand — a ‘picture expander’ that lets you generate a bigger background for an image (for example, an awkwardly framed one)
- Magic Animate — a tool that lets you animate aspects of your designs (or add movement to them)
- Magic Write — a copywriting tool that uses ChatGPT-style prompts to create text
- Magic Media — a text-to-image generator that creates graphics or photos based on the prompts you give it.
- Magic Charts — a tool that lets you quickly create data visualizations from spreadsheet information.
- Highlights — a tool for generating highlight reels automatically from your video footage.
You can view a quick demonstration of these AI features in the video below.
In terms of how well these new AI features work, when testing them, I was pretty impressed overall — particularly so with the ‘Magic Expand’ and ‘Magic Eraser’ features, which I felt worked as well as equivalent features I’ve encountered in high-end graphic design software like Adobe Photoshop.
I found the ‘Magic Write’ tool to be rather less impressive, though. It’s powered by an OpenAI GPT model, with the latest information from OpenAI suggesting that this is GPT-4. Given that ChatGPT is now on version 5.2, you can expect better copywriting results from ChatGPT itself, or Google’s Gemini 3. For basic text generation purposes, Magic Write is fine, but I wouldn’t write blog posts with it!
As for the ‘Magic Media’ tool, I was a bit disappointed by its image generation capabilities. All the images it produced during my tests were output in a low resolution — meaning that none of them were usable in my designs.
(I did find a workaround for this issue: if you generate the images outside of a design using the ‘Canva AI’ option, and then click the ‘Boost resolution’ option, you can get higher-res versions of AI images. But this makes for an awkward workflow.)
Additionally, Canva’s AI images seemed to suffer occasionally from some ‘uncanny valley’ problems when it came to the depiction of hands (see my screenshot below for an example).
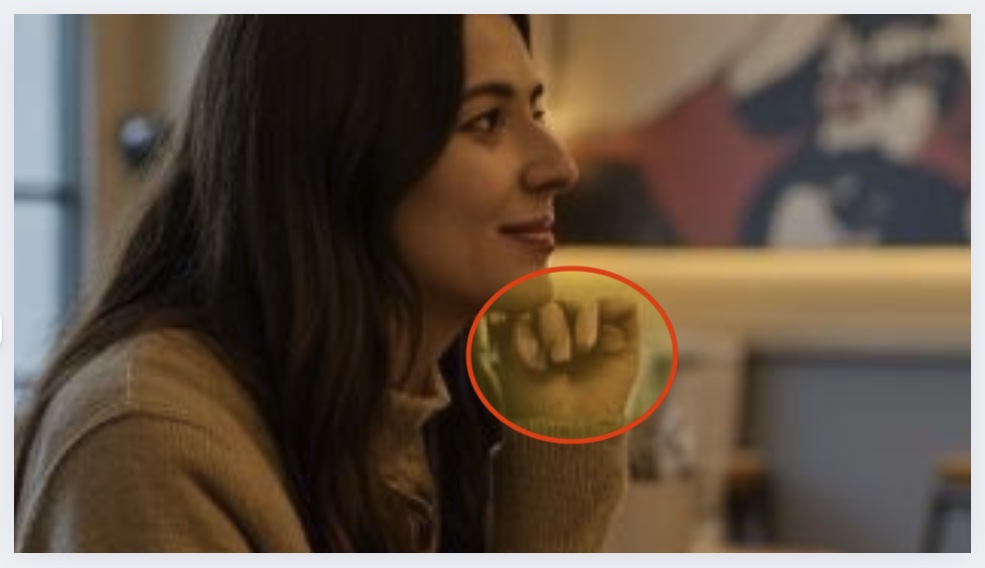
I had better luck with images created in other styles (anime, watercolor, retro etc.), but ultimately, if you want to incorporate AI-generated images in your Canva projects, you will for now be better off making use of a more established AI image generation tool — like Midjourney, Nano Banana or DALL-E — and importing your output from it into Canva.
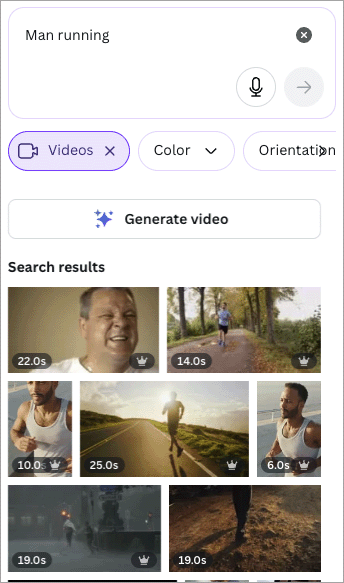
As for AI video generation in Canva, depending on the prompts I deployed, I found this to be reasonably good — but as with the images it produced, all the video output was relatively low-res (1366 x 768 pixels), meaning that it wasn’t really usable in professional contexts. As with image generation, if video generation is one of your key aims, I’d look in the direction of other tools.
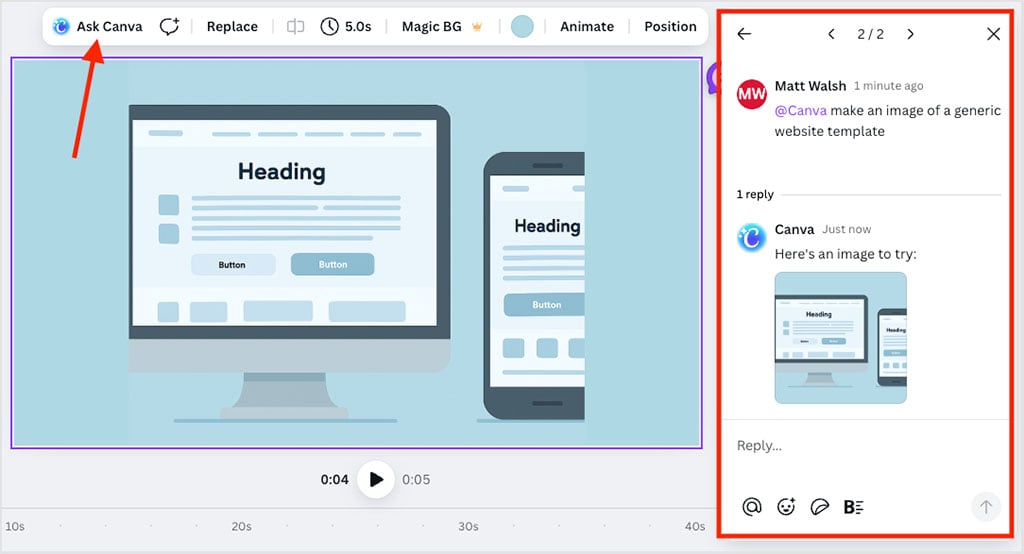
One thing I did really like about Canva’s AI tools is how easy they were to access, thanks to the platform’s ‘Ask Canva’ feature. This appears in the toolbar above your design and lets you request immediate help from Canva with whatever you’re doing. You can ask it to generate text, make an image, or give design advice, with answers or content provided instantly (see screenshot below for an example of this in use).
Finally, it’s worth noting that if you’re on a premium Canva plan, you get access to some of the pro AI features provided by ‘Canva Affinity’ — a recently introduced desktop app that provides advanced photo editing, vector illustration and multi-page layout work (tasks that users typically turn to the likes of Photoshop, Illustrator and InDesign to perform). These include access to Affinity’s background removal, generative fill, and image generation tools.
What about adding your own assets to Canva?
Although a key aim of Canva is to give you everything you need to create designs all in one place — photos, videos, typefaces, templates etc. — it also lets you import your own assets too.
This can be done via its ‘uploads’ section, which allows you to import images, documents, videos, audio and fonts to your Canva account. Accepted formats include AI (Illustrator), PSD, HEIC, HEIF, JPG, MP3, MP4, PNG, SVG and WebP.
Microsoft formats like DOCX, XLSX and PPT can also be imported, and OTF, TTF and WOFF fonts can be uploaded too (more on fonts in a moment).
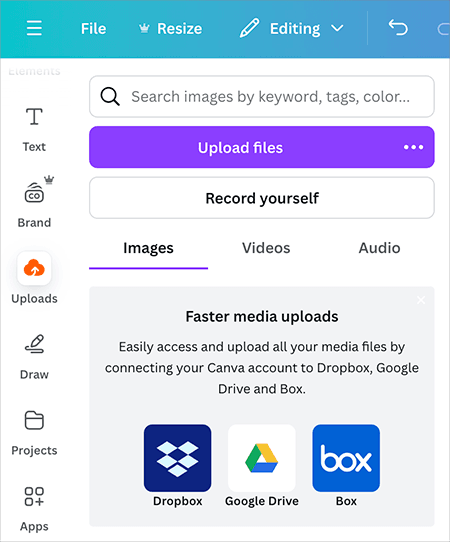
Another way of importing content is by recording a video of yourself — this will reside in the uploads section too.
Once you’ve imported an asset, you can simply grab it from the ‘images,’ ‘videos’ and ‘audio’ tabs provided and insert it into your projects.
Photo editing options in Canva
When you add an image to a design, you can tweak it easily using Canva’s photo editing tool.
To access this, you just click on an image contained in one of your projects, and then on the ‘Edit’ button.
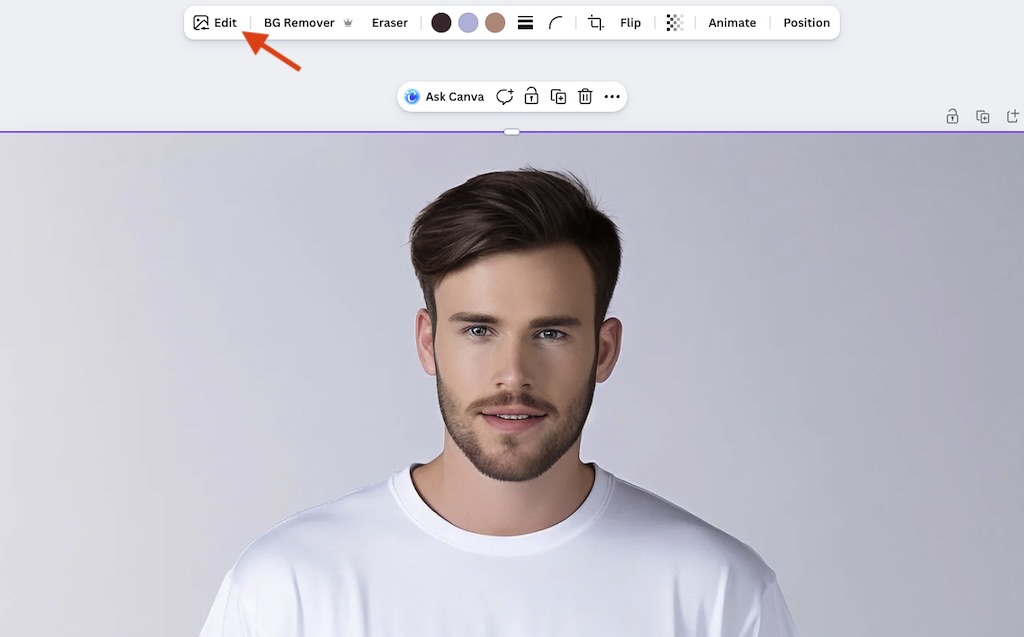
This gives you access to a set of simple controls that let you alter that image’s appearance in various ways. Sliders to adjust brightness, contrast, highlights and saturation are provided (along with several others), and you can also make use of Instagram-style filters.
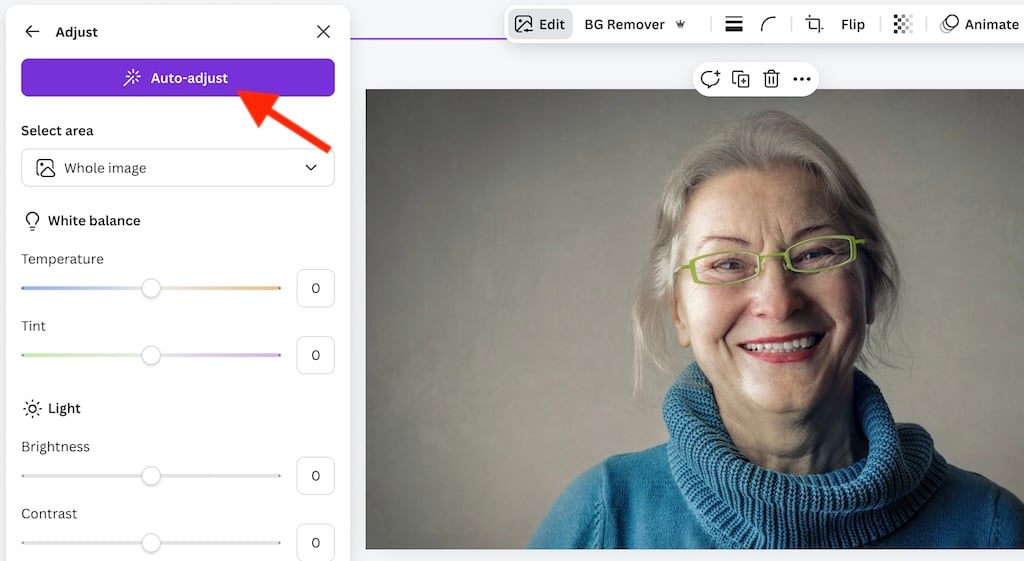
You can apply changes to your whole image, its background, or the foregrounded object (see my screenshot below for an example of Canva controls being used).

You can also make use of an ‘auto-adjust’ option for correcting image colors.
One thing I particularly like about the image editing options in Canva is the background remover feature provided. This is a handy tool that, as its name suggests, lets you remove or replace the background from photographs. It works well and is particularly useful for creating headshot photos for websites or email signatures and thumbnails for YouTube videos.

Another photo-editing tool worth mentioning is Canva’s ‘Color Edit’ feature (pictured below). This automatically extracts the main colors from a photo into a palette, allowing you to incorporate them into other parts of your design — text, shapes, graphics etc.
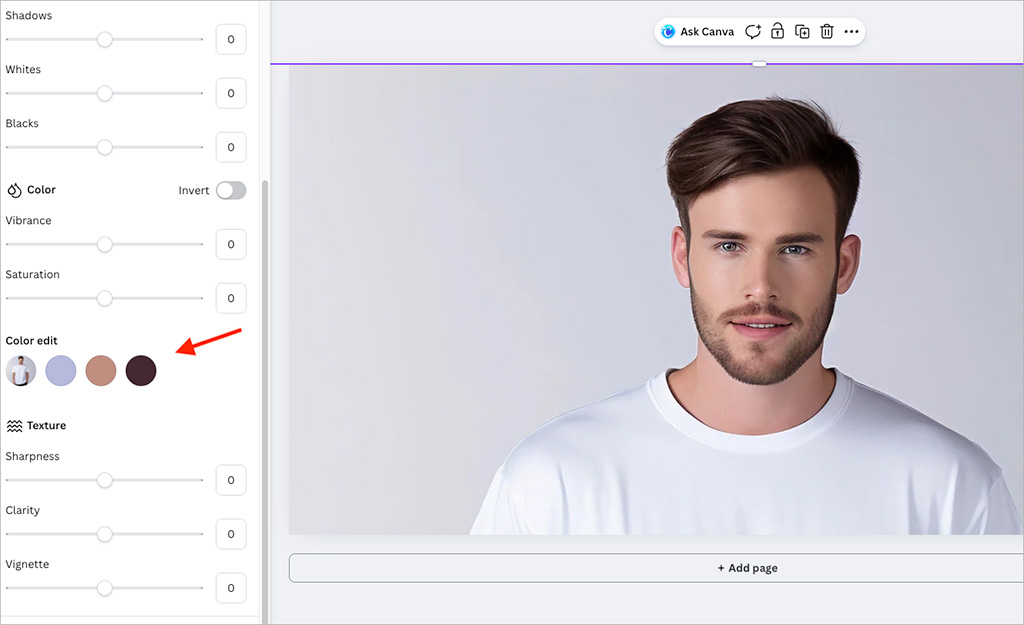
Ultimately, it’s fair to say that Canva’s image editing tools are of a relatively ‘cut-down’ nature. But they are nonetheless powerful and easy to use (the whole point perhaps), and they give you access to the features that are arguably the most relevant to effective graphic design work.
Editing videos in Canva
In addition to letting you create ‘static’ designs, Canva allows you to create videos too. The process for video creation works in a broadly similar way to designing static content — you pick a template, tweak it, and add clips to your video as necessary.
Clips can either be imported to the uploads section, or you can add them to your video timeline using Canva’s extensive library of stock videos (which you’ll find in its ‘Elements’ section). Alternatively, you can use your webcam to record video directly into Canva.
One particular editing feature that’s worth singling out as being particularly impressive is Canva’s video background removal feature (pictured below).
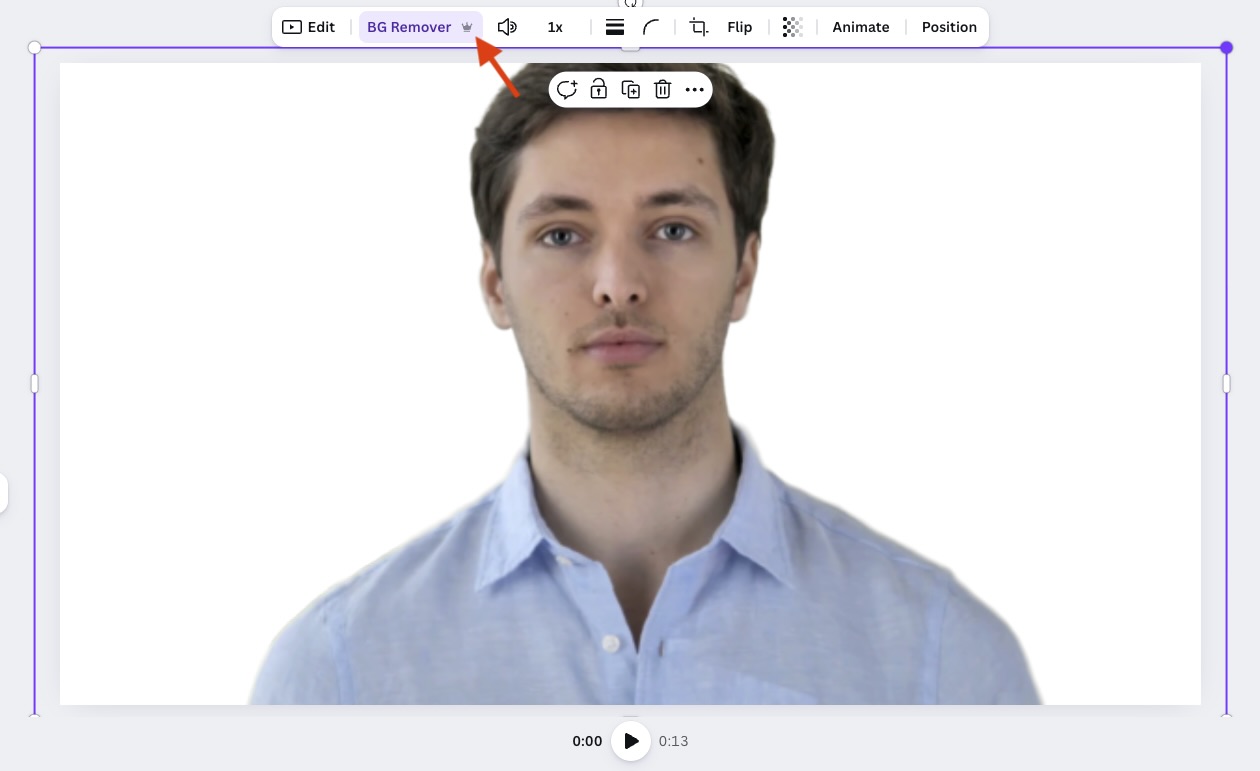
This is surprisingly effective at stripping out busy backgrounds behind speakers — and just as easy to use as Canva’s background removal tool for static images. When testing it I was pleased to discover that it worked with quite long video clips — I could remove backgrounds from videos that were up to ten minutes in length.
Another nifty feature that helps simplify video editing is Canva’s automated ‘beat sync’ tool. This automatically matches your clips, footage, and accompanying animations to the tempo of the background music you’re using in your video.
Recently, Canva has started rolling out a beta version of its video editor. This introduces more precise timeline editing and improved responsiveness, making it easier to fine-tune clip timing.

Ultimately, it’s fair to say that the video creation functionality on offer from Canva is not as extensive as that which you’d find in a dedicated video editing application — you won’t be able to play with a particularly wide range of transitions, or professionally grade your video content, for example.
Perhaps most significantly, Canva’s video editing tool gives you no real control over what quality your video is exported in. You can choose an export resolution (which on the plus side includes 4K) but you don’t get any control over things like which codec to use, or bitrate settings.
Overall though, Canva’s video editor is generally useful and usable, and its built-in library of stock videos brings with it the potential to save users a lot of money. For putting simple videos together, it’s fine.
You can learn more about editing videos with Canva here.
Using royalty-free music in Canva videos
Canva lets you add audio to your video from a royalty-free library of over 500,000 pieces of music / sound effects.
However, despite technically being royalty free, unless you are careful with how you work with these audio files, you may end up triggering copyright claims on YouTube.
This is down to Canva’s ‘one-design-use’ approach to licensing, where every time you export a video that contains audio from Canva’s library, Canva treats that export as a distinct use of the music, and requires you to generate a license information for that specific video (which you then add to your video description in YouTube.)
This isn’t ideal. Let’s say you’ve created a short branded intro clip for your YouTube videos — one that uses a Canva-sourced music track. Every time you publish a new video, you’ll need to re-download that intro for each upload, so that each one had its own license. The result is a time-consuming, irritating process — and one that may nudge you in the direction of services like Epidemic Sound or Artlist, which integrate directly with YouTube’s Content ID system and let you avoid situations like this.
Creating presentations in Canva
A key use of Canva is as an alternative to Microsoft PowerPoint (or Google Slides, if you’re a Google Workspace user).
Now, it doesn’t give you all the bells and whistles that Microsoft PowerPoint does (there are no 3D models or maths equation features to play with, for example, and the types of graphs you can create are more basic than those you can make with PowerPoint).
However, the range of tools on offer is still pretty extensive, and the interface for designing presentations is extremely easy to use — in my view, a lot easier than PowerPoint’s.
The template range is much bigger than PowerPoint’s too: as of January 2026, Canva gives you 20,050 templates to choose from, which come in 3 formats (16:9, 4:3 and ‘mobile first’). By contrast, PowerPoint gives you around 30 out of the box.
(You can read our full Canva vs PowerPoint comparison here.)
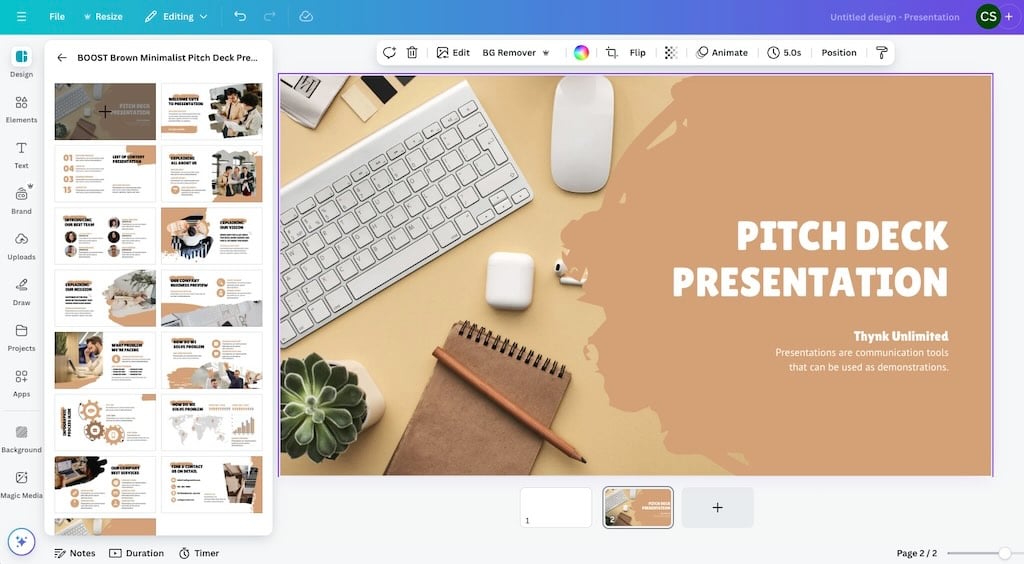
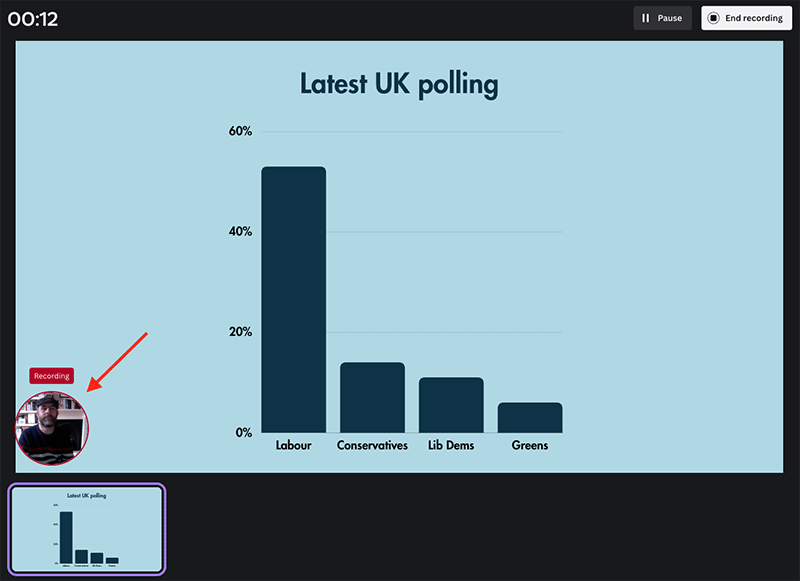
Recording a presentation in Canva is simple too; you can use your computer’s webcam and built-in microphone to record a video of yourself as you present the content (a circular video of you appears in the bottom left corner of the presentation when you do so — see highlighted section in screengrab below).
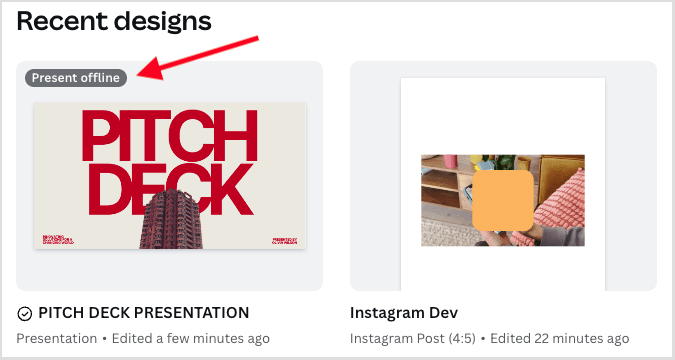
Importantly, Canva also lets you present your presentations offline — so long as you enable the option to do so in your presentation’s settings. This is an important (and welcome!) departure from the otherwise ‘online-only’ nature of Canva — the last thing you want at a business meeting is not to be able to show your presentation due to a Wi-Fi failure.
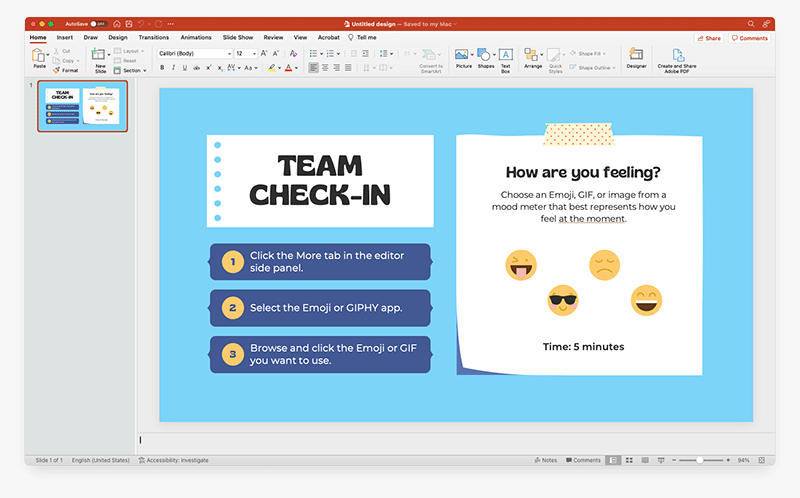
And Canva does a very good job of exporting to PowerPoint format: when testing the feature, I was pleased to see that the exported version looked exactly how it did in Canva (see screenshot below).
If you like, you can import PowerPoint files to Canva for editing too. My experience of this was less positive — when I imported PowerPoint files into Canva, a lot of them ended up rather garbled.
Some of this was down to my font selection (not all the typefaces installed locally will be available in Canva), but other design elements didn’t import exactly as I’d hoped for either.
You can learn more about creating presentations in Canva here.
Creating documents with Canva
Canva has been traditionally associated with the creation of visual assets — but thanks to the addition of its ‘Canva Docs’ feature, it now facilitates more text-based content creation.
As its name suggests, Canva Docs lets you create documents and it can, if desired, be used as a simple alternative to desktop publishing apps like Microsoft Word.
Canva Docs lets you use all of Canva’s design tools, templates, brand kits and stock visuals when creating a document, giving you a quick way to create attractive, on-brand content that ‘pops’ off the page or screen.
At the time of writing (January 2026), there are over 1,900 Canva templates available that are specifically for creating documents with — these include project proposal, press release, style guide and student journal templates.
Note: The content you create with Canva Docs can be exported to Word or PDF format; however, if you choose to export to Word, you’ll need to be careful with font selection — any fonts you use in a Canva doc will need to be installed locally on your machine for your document to display correctly.
Although you could technically create similar documents using tools like Microsoft Word or Google Docs, the process for doing so would arguably take a lot longer, and you’d need to source all the imagery for your documents outside of the applications themselves.
That said, Canva Docs is not yet a substitute for a professional desktop publishing app — try inserting a table of contents, advanced markup or page numbers into a Canva document and you’ll find out why!
One thing I really liked about Canva Docs was its neat integration of the ‘Magic Write’ tool into proceedings. This lets you ask Canva to create the copy for your document (and, in fact, request that it use your ‘brand voice’ to use while doing so — i.e., a writing style that is consistent with your corporate style).
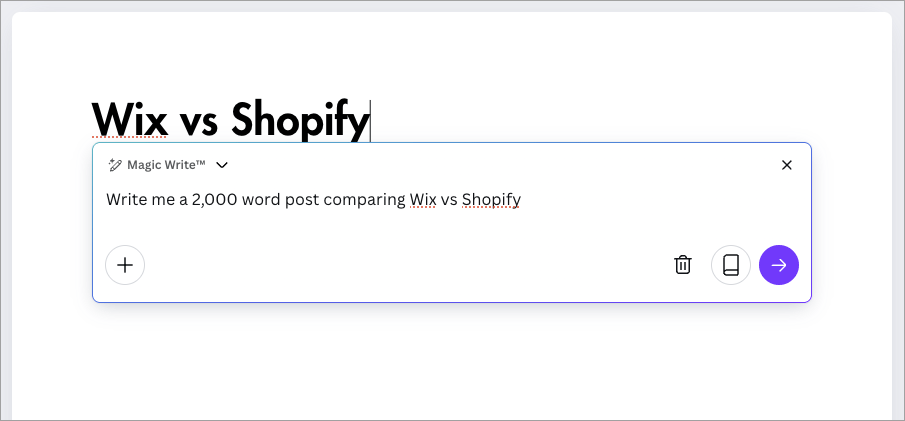
In my tests, I found that the copy that Magic Write provided was reasonably good — but there were definitely problems with factual accuracy.
For example, when I asked Magic Write to create a comparison of Wix and Shopify, it provided me with completely incorrect information about Shopify’s support offering, and the number of pricing plans available for the platform.
I found Magic Write to be of most use for getting ideas for document structures. As a test, I asked it to give me an outline for a blog post comparing two web design platforms we write about a lot, Shopify and WordPress — and I was pretty impressed with the content headings it suggested (see screenshot below for the test results). The headings provided definitely reflected the type of sections we typically use in our ecommerce and web design builder comparisons.
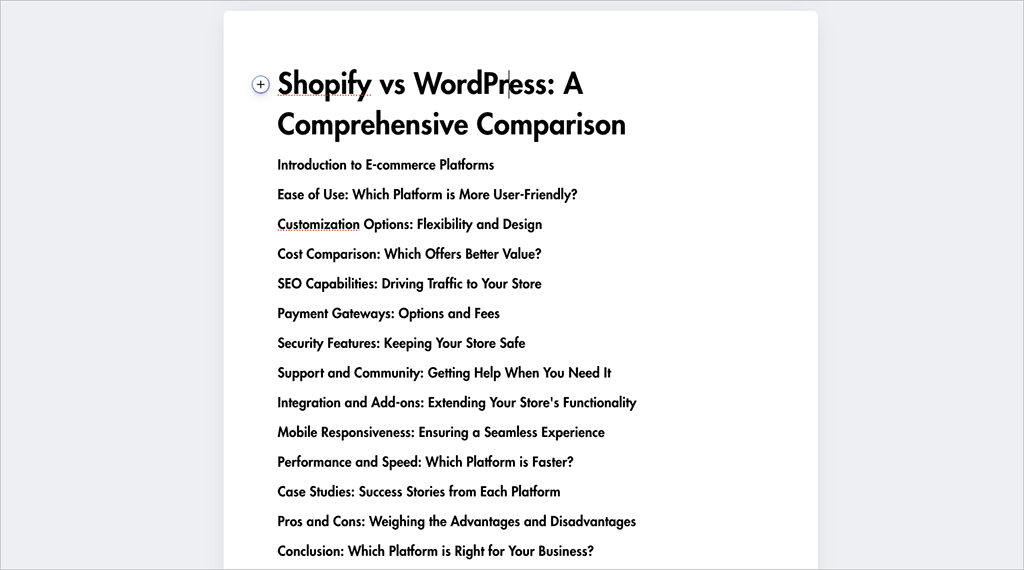
Ultimately the Magic Write feature has a bit of a way to go before it can create copy that doesn’t require editing before publication. But it is unquestionably good at generating ideas that can inform how you go about creating text-based content.
Creating charts and data visualizations in Canva
Although Canva is often thought of primarily as a tool for creating social media graphics and marketing material, it also gives you some really useful (and often overlooked) features for creating charts and graphs.
You can create around 30 different types of chart using Canva, including bar charts, line graphs, pie charts, histograms and more.
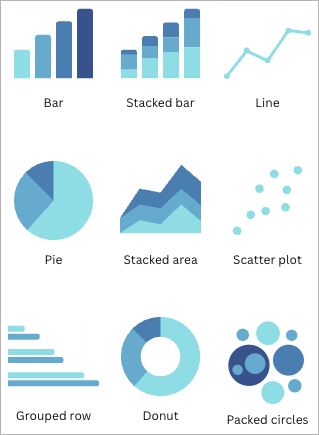
The feature is extraordinarily easy to use — you simply enter your data into a table on the left-hand side of the Canva interface, which Canva then automatically turns into a chart or graph (see screenshot below).
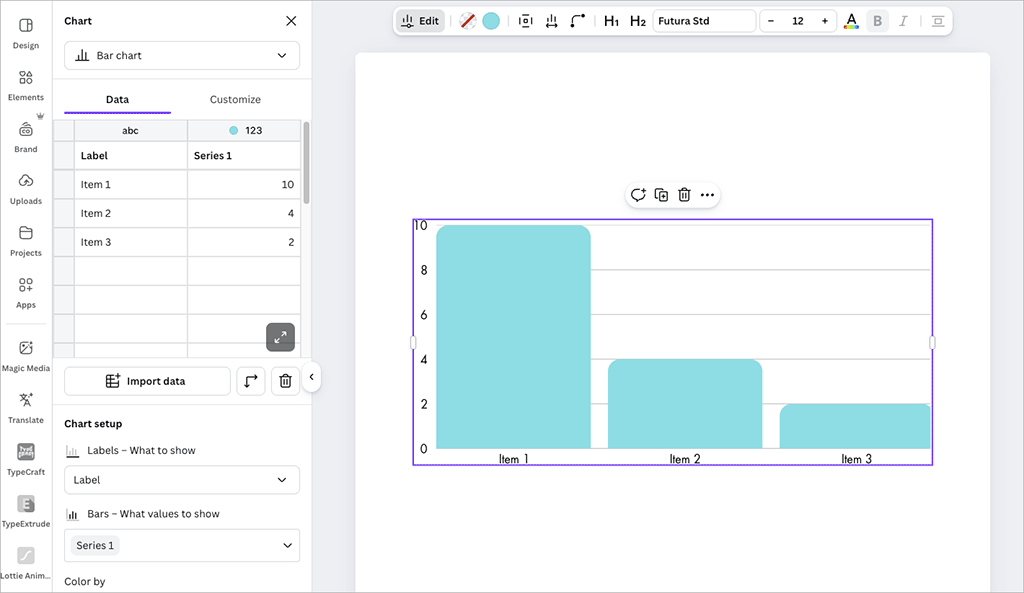
(You can also generate these charts by importing an external spreadsheet.)
Your charts can be exported to a variety of file formats, or embedded on websites via a code snippet, with the latter method of presentation giving you a way to update your data in Canva and show the most up to date graphs on your site automatically.
Canva has also recently introduced a ‘Magic Charts’ feature, an AI-powered feature that automatically suggests the best chart for your spreadsheet data and generates it for you. The chart stays synced as you update your figures, making it an especially handy option for quick, polished data visuals.
And if that’s not enough for you, Canva now also offers a new data visualization option through its integration with the Flourish platform — a tool used by thousands of organizations worldwide to create interactive charts and graphics. This feature is available on Canva’s ‘Business’ plan and higher, giving users access to Flourish’s powerful visualization templates directly within their designs.
We’ve used Flourish in the past and found it capable of producing truly stunning, interactive results, so its inclusion in Canva represents a particularly exciting addition for data-focused users.
For me, Canva’s charting capabilities and the Flourish integration represent standout features of the tool that give you really simple ways to present statistics and data in an extremely attractive, on-brand way.
You can learn more about creating charts with Canva here.
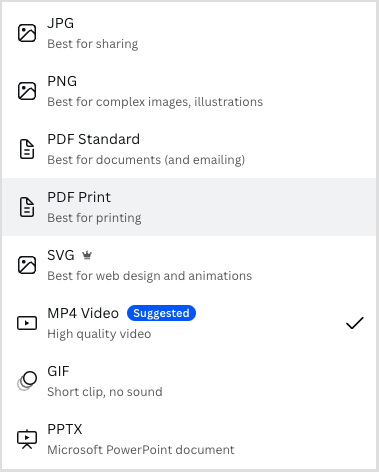
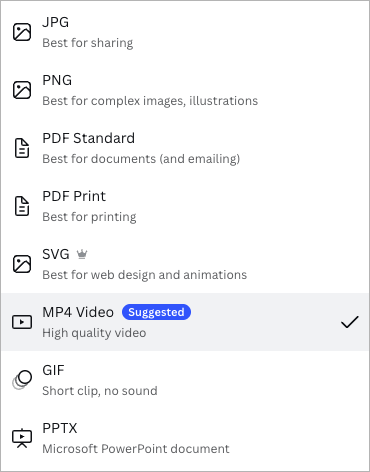
Exporting your projects
Once you’ve created a design in Canva, you can export it to a variety of formats, namely:
- PNG
- JPG
- PDF (low-res and print quality)
- DOCX
- SVG
- MP4
- GIF
- PPTX
To be honest, by comparison to professional design tools (or even similar ‘prosumer’ tools like Adobe Express), this is quite a small range of output formats, and represents one of the key disadvantages of using Canva.
If you use a professional graphics or video editing package, you’ll be able to export your content into just about any format going — but Canva really limits your options here.
Significantly, you can’t export Canva projects to Adobe Photoshop’s PSD format, meaning that if you want to start a design off in Canva and then send it to a professional graphic designer for enhancement, you’re out of luck.
(Workarounds for addressing this situation exist — involving converting files to PDF and using third-party tools to separate layers out — but they’re clunky).
And, as discussed earlier only one video export format is provided: MP4 (with no options provided to adjust compression or output quality).
Now, to be fair, Canva does cover the basics with its output formats, and a lot of its users won’t really need additional ones; the key aim of the product is to let people create quickly, and export simply. For most applications, the range of export formats provided will be fine (especially if you’re using Canva to create content that’s destined to be consumed online).
But some users, particularly those with more pro-level requirements, will miss the flexibility to output their work to a format of their own choosing.
Embedding Canva projects elsewhere
It’s important to note that you don’t always have to export your Canva project to a file format to share it with others. If displaying a design digitally, you can also embed it.
To do this, you simply grab a snippet of code from Canva and add it to your website. Doing so will display your project — but crucially, reflect any changes that you make to it in Canva automatically.
Canva’s Magic Resize tool
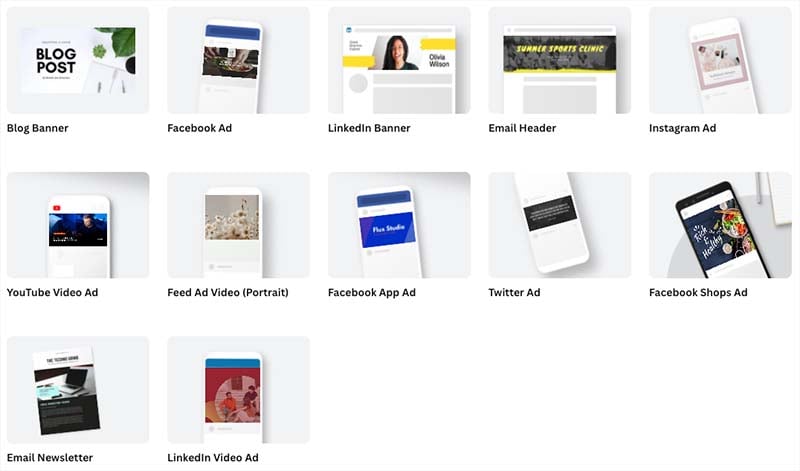
A particularly useful feature of Canva is its ‘Magic Resize’ tool, which lets you repurpose existing designs for different platforms really easily.
This tool lets you automatically reformat an existing design to suit different applications or social platforms.
For example, you can use the Resize option to turn a blog post banner into a Facebook post image or a YouTube video thumbnail, just by clicking the appropriate option.
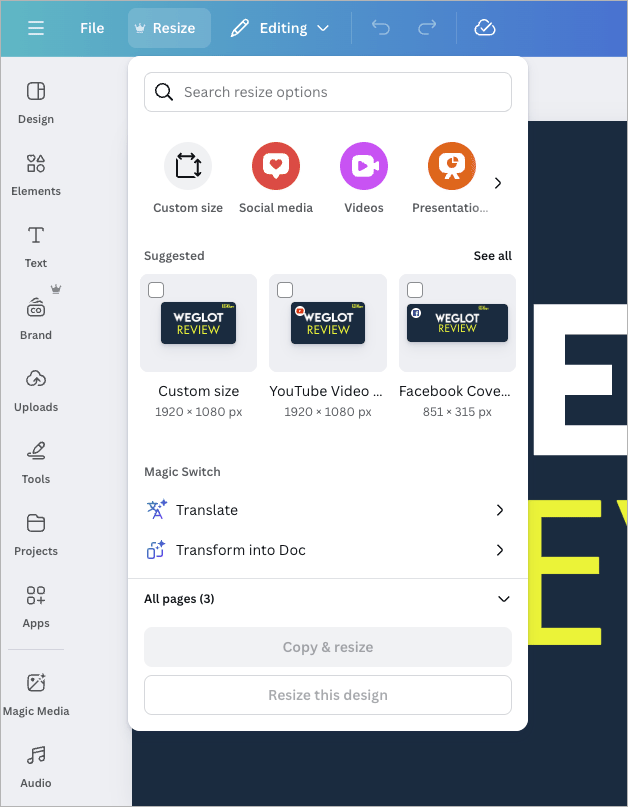
Not only this, but Magic Resize lets you completely change the format of your design — you can use it to turn a static image into a video or presentation, for example.
(How well this works will depend heavily on the source material, however — and expect to do some editing on the output!)
Ensuring brand consistency with Canva
As we’ve seen above, Canva provides users with a lot of tools and content to create marketing materials with — templates, graphics, stock photos, videos etc. In theory, you could use all these to design your assets, without needing to resort to anything else.
You could even use Canva to create an entire brand identity — i.e., create a logo in Canva; define a color palette; and choose fonts for your brand from the extensive range provided within the platform.
But in practice, most businesses will need to configure Canva so that they can create designs that reflect an existing brand identity.
To this end, Canva provides you with the option to create a ‘brand kit.’
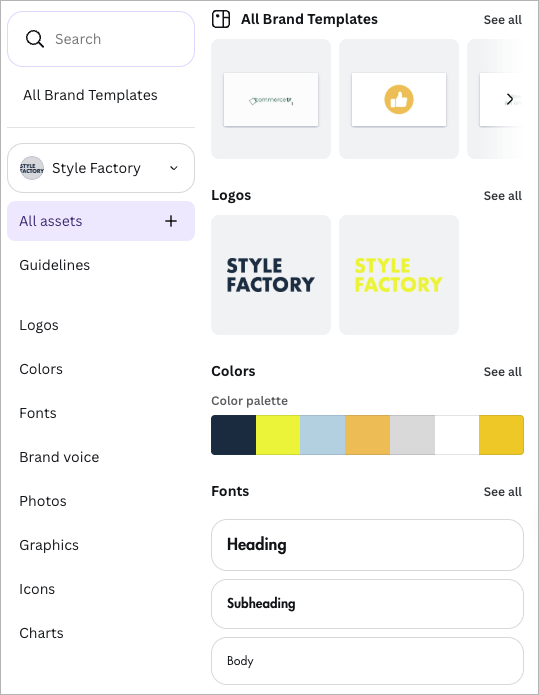
This lets you:
- add a brand logo
- define a color palette
- upload your own font
- upload your own images
- add regularly-used graphics
- upload your own icons
- create branded charts
- define your brand voice.
On paid-for plans, you can create multiple brand kits (five on the ‘Canva Pro’ plan, 100 on ‘Canva Business’, and 1,000 Canva’s ‘Enterprise’ plan).
Once your brand kit is in place, whenever you’re creating in Canva, you can apply or add any of these brand assets to your design.
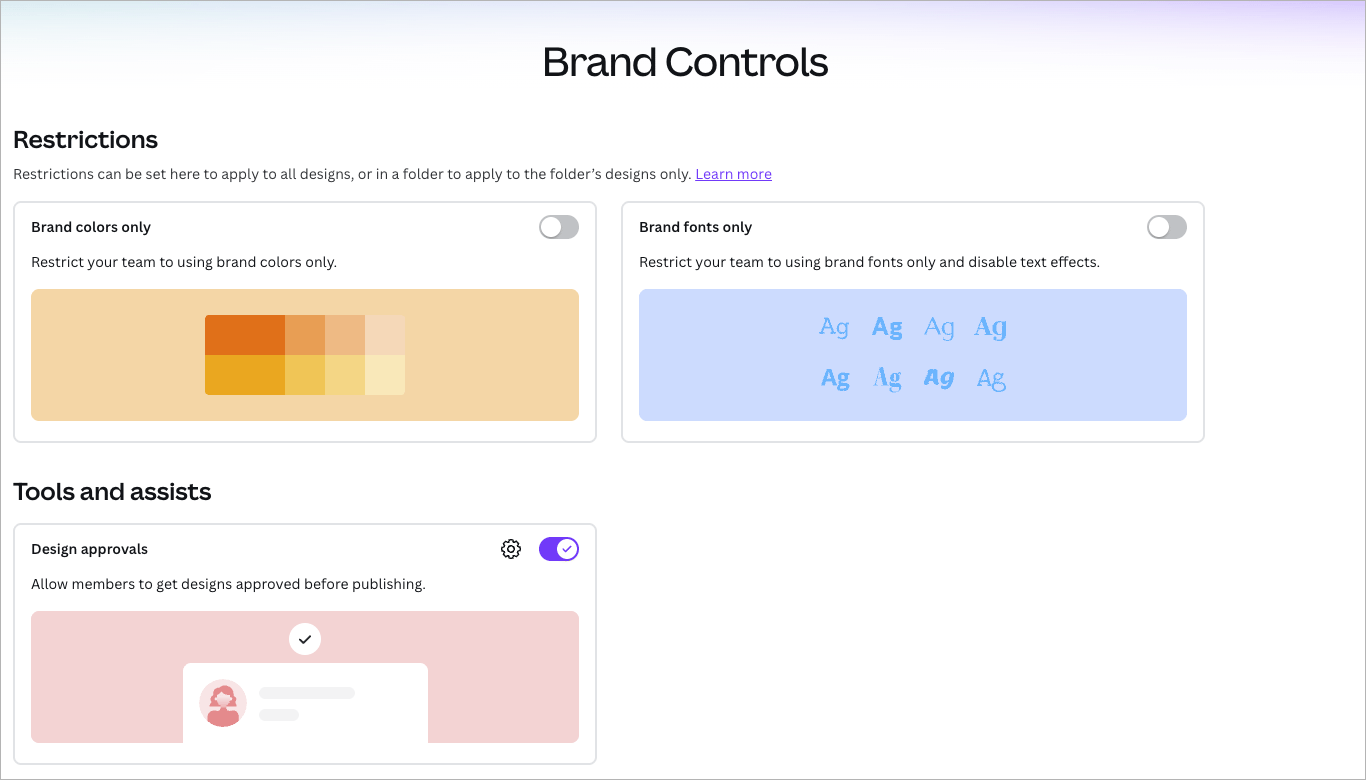
On paid Canva plans, you also get a few other features to help you maintain brand consistency across your designs:
- the option to create reusable brand templates
- a ‘brand controls‘ section (pictured below), where you can restrict your team members’ ability to use colors or fonts that are not part of your official brand guidelines
- an ‘element locking‘ feature, which lets you lock design elements so they can’t be edited
- an ‘approvals‘ feature, which lets brand managers notify team members when a design has been signed off
- the option to bulk replace logos and images across multiple designs.
In general, the brand controls in Canva are good. There is one annoying aspect to them though: for some reason, all the brand templates you create end up in a ‘general’ brand templates section, rather than stored in individual brand kits with all the other brand assets — colors, logos, typefaces etc.
Organizing work and collaborating in Canva
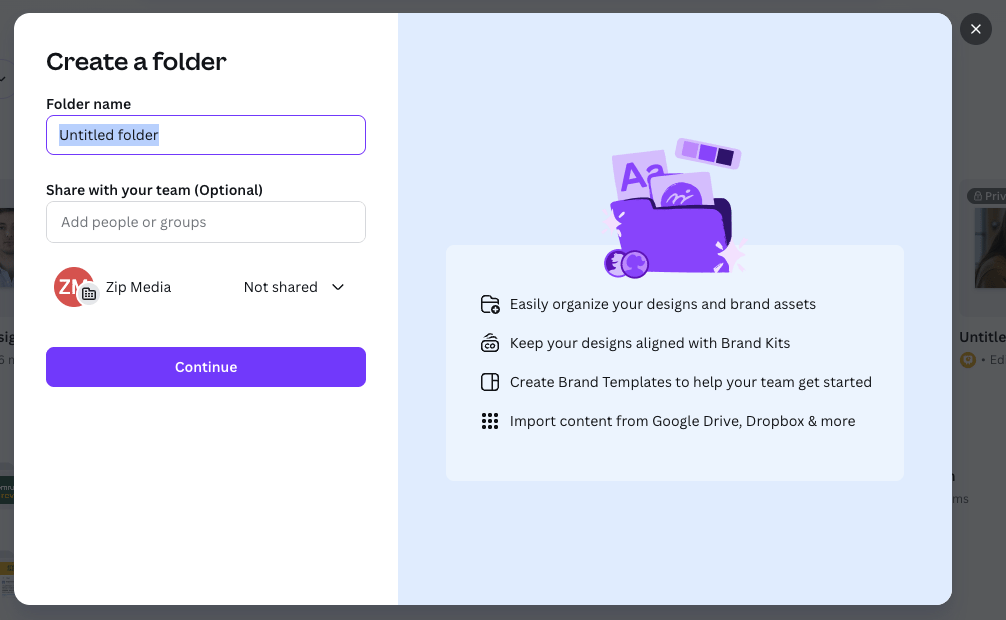
Organizing your work in Canva is pretty straightforward. A simple folder structure lets you create folders that house your designs.
If you’re on a ‘Canva Business’ plan, these folders can be shared with other team members, who can then edit any designs that they contain. This works in a similar way to Dropbox and other file sharing services — you simply share a folder with a team member by entering their email address into the folder’s settings.
(More details on ‘Canva Business’ and Canva pricing in a moment!).
Can you back up a Canva project?
Although Canva uses a traditional files and folder based approach to organizing your design, it’s important to note that the platform doesn’t really give a way to back up your projects.
You can recover deleted files for a set period — after deleting a design, it’s kept in a trash folder for 30 days before being permanently deleted (if you delete a team, that team and its content can be recovered for up to 14 days).
While these grace periods are welcome, they’re no substitute for being able to back up your projects to a device and reimport them in the event of accidental deletion of a project (or loss of access to a Canva account).
Yes, you can export your files to PNGs, JPGs etc. — but these will flatten all the layers in your design, meaning that when you re-import them to Canva, they’re no longer editable.
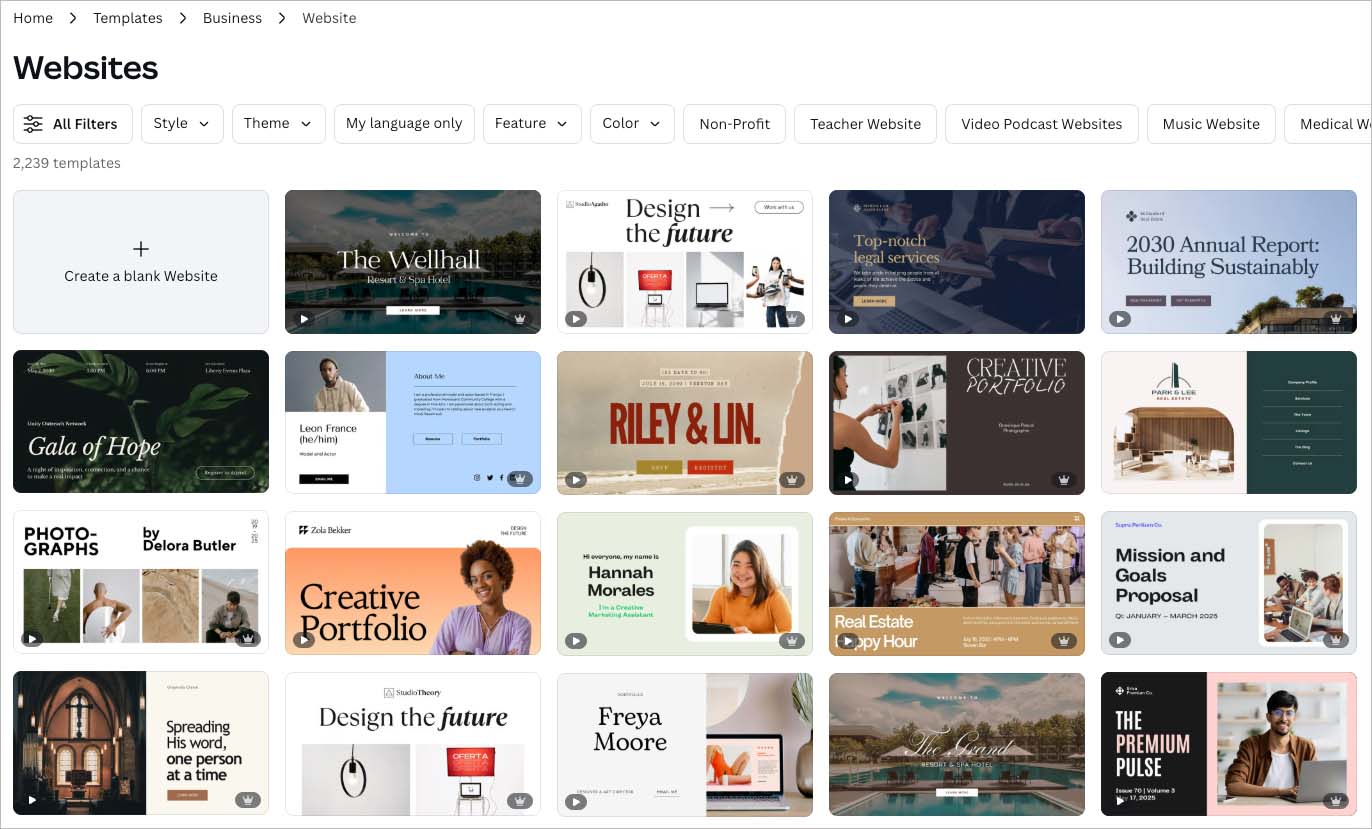
Building a website with Canva
In addition to being able to create visual assets with Canva, you can technically use it to build websites too.
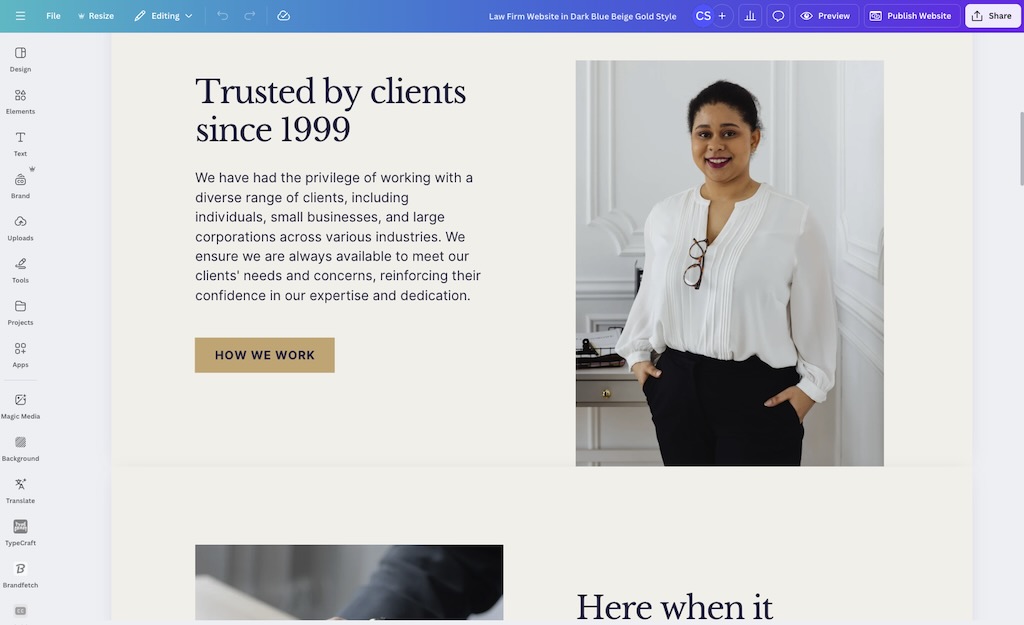
It has to be said however that only very simple websites can be created with the platform — you can build a one-page site ‘brochure’ site with Canva, but that’s about it. The sites that you can make with Canva look very professional and on-brand, but you can forget about incorporating things like a complex navigation structure or ecommerce into them.
Simply put, although you can create a simple online presence with Canva (and a lot of people have: over 329,000, according to Builtwith.com), it doesn’t give you the sort of professional website building features that dedicated site builders like Shopify and Squarespace do.
The site designer might be appropriate for some users’ needs, however — if all you need is a basic resume site with some copy and a few pictures, it’ll do the job fine. Over 2,230 web design templates are currently available from Canva, all of which can be populated with content very easily.
When you’ve created your site, you can publish it in three ways:
- via a free Canva site address (yoursitename.my.canva.site)
- by purchasing a new domain for it through Canva (using the desktop version only)
- by mapping it to a domain you already own.
Making products with Canva
Another interesting aspect of Canva is the fact that you can actually manufacture physical products using the platform.
To do this, you go to its ‘Print products’ section, where a wide range of items can be designed (60 different products in total) and purchased. These include:
- hoodies
- t-shirts
- tote bags
- greeting cards
- stationery (notebooks, brochures, diaries etc.)
- photo gifts (books, mugs, prints etc.)
- marketing printables including table tents and retractable banners.

In a nice ‘ethical’ touch, Canva runs an ecological scheme to offset the environmental impact of manufacturing a product through the platform: for every order made, Canva plants one tree.
Ultimately though, I’d view Canva’s product manufacturing option as a ‘nice to have’ feature rather than a core one.
First, all the products available are quite expensive, meaning that you can’t really make something, mark up on it, and sell it to somebody else. The cost price of a t-shirt is around $25, for example — though Business plan users receive a 10% discount on print orders.
Second, the number you can order at once is capped — when testing the feature, any item I tried to manufacture was limited to 50 copies. This makes the option unsuitable for anyone wishing to mass produce items — such users would be better off using a dedicated print on demand solution like Printful or Printify instead.
Finally, it’s worth noting that printed products created with this feature can’t be shipped to all countries yet (this is a particular problem where African nations are concerned).
Additionally, you need to be careful regarding using stock imagery on items that you print from Canva — various licensing restrictions apply. The below video explains some of the issues involved.
Email design in Canva
Canva has recently introduced a new email newsletter design tool, which lets you create branded emails using the same drag-and-drop interface as the rest of the platform.
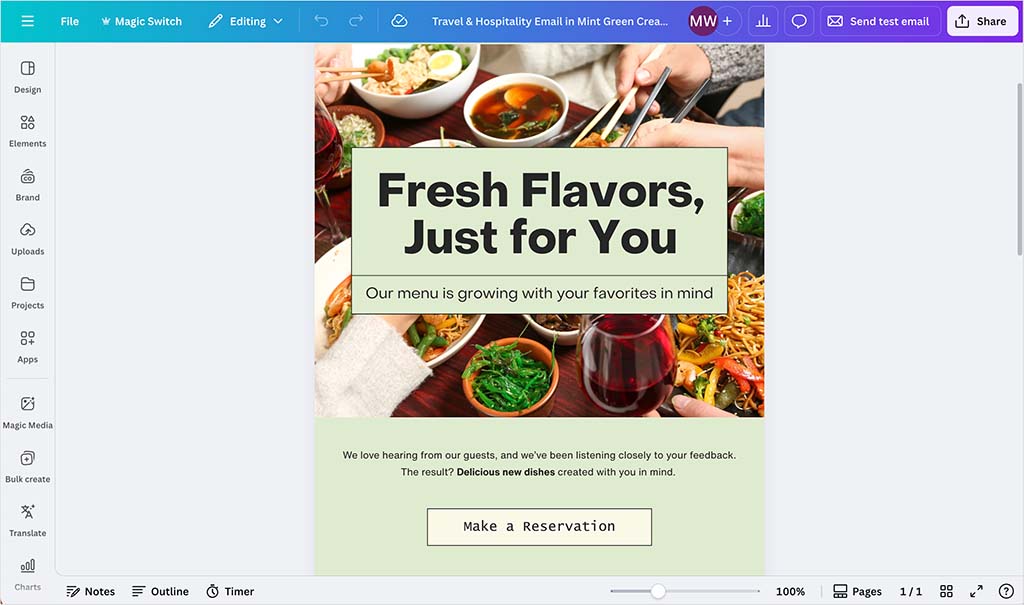
Once designed, your emails can either be downloaded as HTML files or sent directly via integrations with Gmail or Mailchimp.
In my tests, the emails displayed very well on both desktop and mobile devices — layouts stayed consistent, and images rendered crisply across different screen sizes.

However, there are some limitations to be aware of. The HTML that Canva produces when you export an email is quite simple under the hood — it relies on fixed-width tables and lots of inline styling.
This makes the design display consistently across most inboxes, but it also means the code isn’t very flexible. If you import it into a more advanced email marketing platform, you might find it tricky to edit or customize your design without breaking the layout.
Canva’s email tool is also focused purely on design rather than marketing, so you won’t find features like personalization tags, automation workflows or in-depth analytics. And while Canva’s templates look great, its image-heavy designs can load a bit slowly in certain email clients.
That said, it’s still a very welcome addition — especially for individuals or small teams who want to create good-looking newsletters quickly and send them through Gmail, Mailchimp, or similar tools without needing to master HTML or specialist email software.
Apps and integrations
As with a lot of other SaaS (software as a service) products, you can integrate Canva with other platforms, or add extra functionality to it, through the use of apps and integrations.
At time of writing (January 2026), I found 300 available in Canva’s ‘Apps Marketplace’ (pictured below).
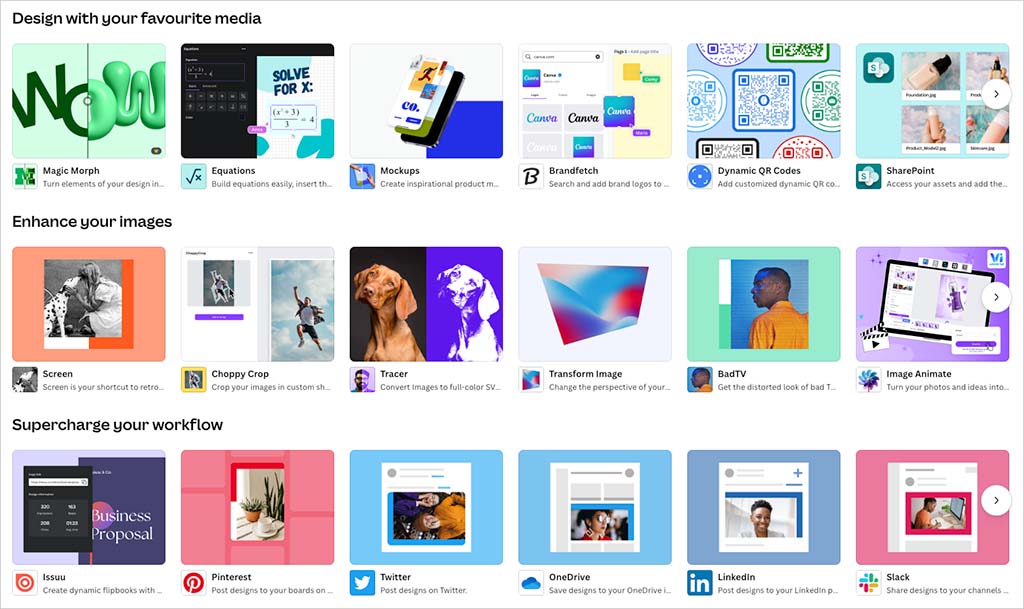
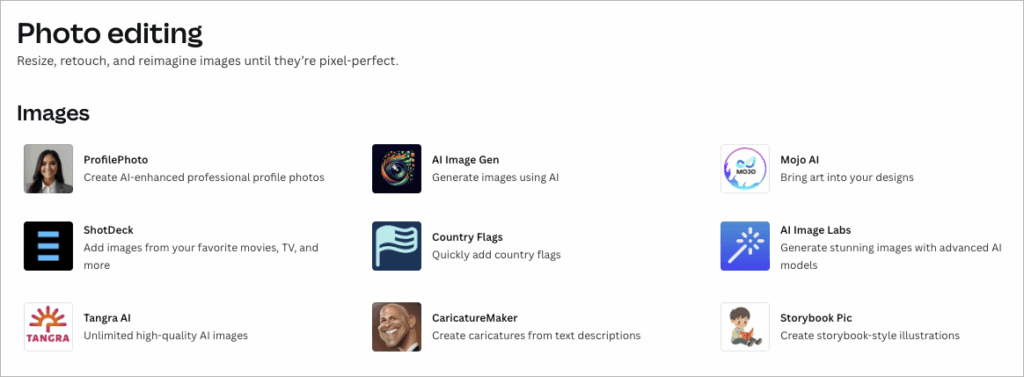
The apps on offer are generally to do with adding special effects to your images, or retouching them — but an increasing number of AI image, video and audio generation apps are now on offer too.
The integrations available typically help you import images or videos from other apps into Canva. For example, you can connect your Canva account to services like Google Photos, Google Maps, YouTube and Facebook and bring content in from them (which you can then incorporate into your designs).
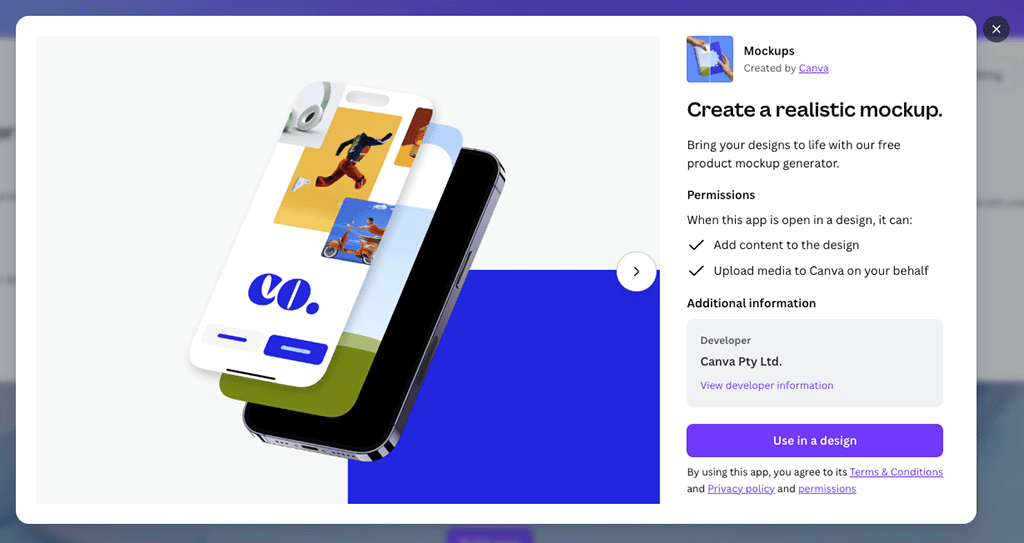
For me, one of the most useful of these is the ‘Mockups‘ one (previously ‘Smartmockups’). This lets you see how your design will look in context in the ‘real world’ — for example on a book cover, in a picture frame, in a smartphone etc.; it can serve as a built-in alternative to the similar ‘PlaceIt’ mockup generator.
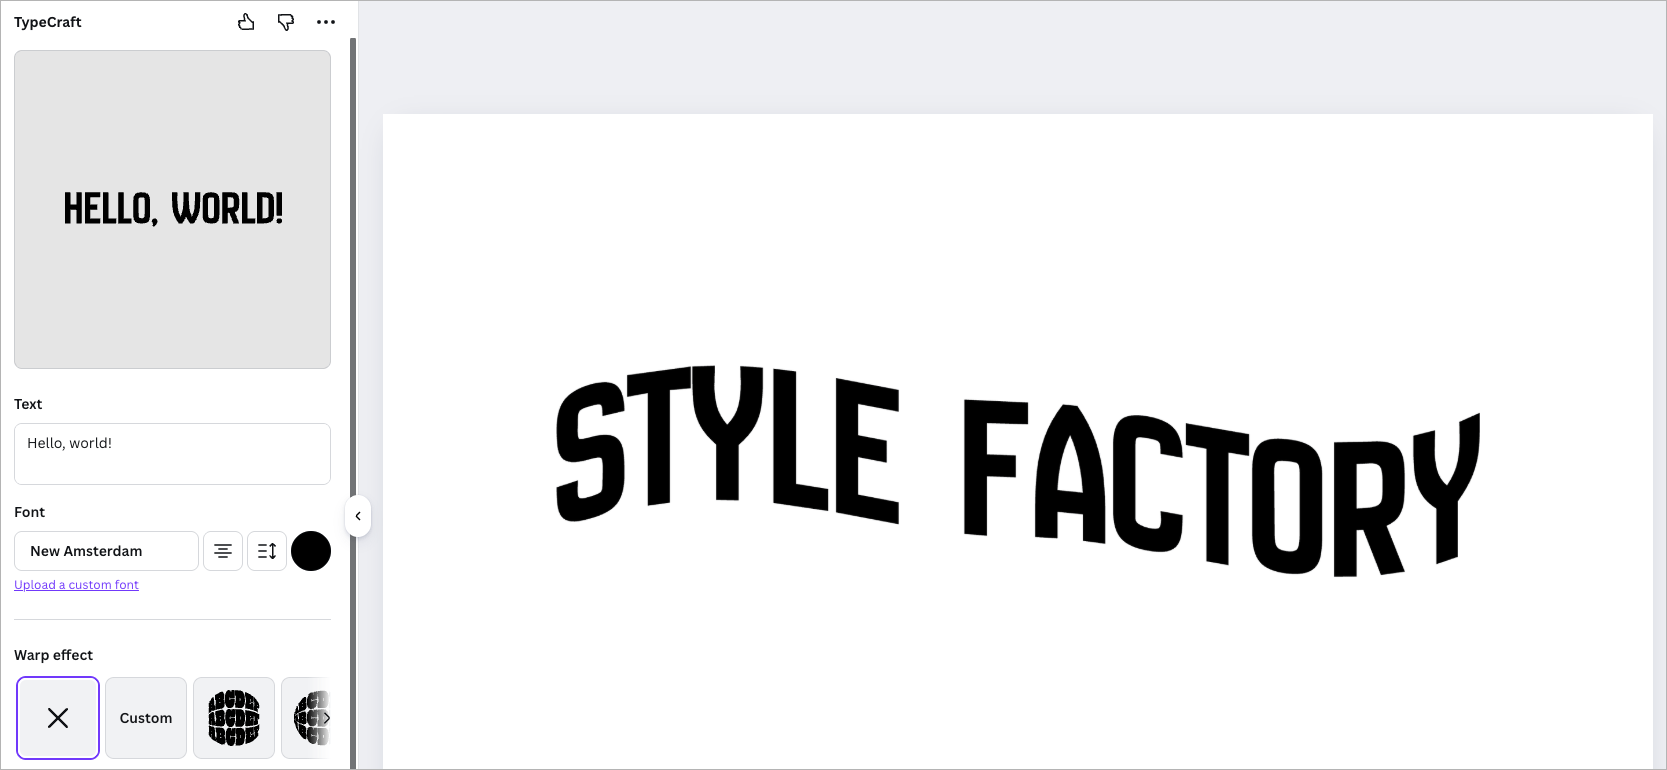
Another app I found particularly useful while testing Canva was ‘Typecraft,’ which lets you bend, warp and twist text in lots of interesting ways using mirror points.
Oddly however, I couldn’t find any Canva apps for popular website builders, like WordPress, Wix and Squarespace. These are all services that could definitely benefit from an integration with Canva, because it is so good for producing web graphics, product mockups and blog banners.
A new Canva app has been made available for the popular Shopify ecommerce platform, however — ‘Shopify Connect.’ This lets you add images from Shopify to your Canva designs.
Email marketing services and CRM tools are fairly well catered for — integrations are available for popular tools like Mailchimp, Hubspot, iContact and MailerLite.
But if the apps on offer aren’t enough for you, you could always consider building your own — a developer’s platform for Canva provides access to the platform’s API and lets you create your own ‘content extensions’ that let you integrate Canva with other tools in various ways.
(Obviously you’ll need development skills to do this.)
Using Canva on mobile phones
As you’ll have noticed from the screenshots on this post, I’ve largely based this Canva review on the browser-based version of the app (for the record, the desktop versions for macOS and Windows are very similar to this).
You can however also use Canva on a mobile device, thanks to iOS and Android apps that are available for the platform.
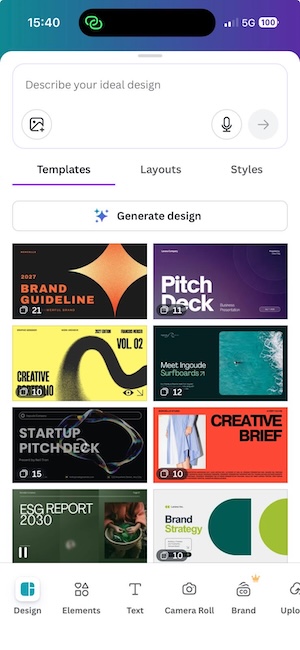
Canva’s mobile app performs exceptionally well in user reviews — it holds a 4.9-star rating in the iOS app store and a 4.8-star rating in the Google Play store.
In my own test of the mobile app, I found that it was very easy to use, providing an interface that was very similar in nature to the desktop version (albeit squashed down a bit!). And we are not talking about a cut-down version of the platform here; you can do fairly serious work with Canva on a smartphone.
That said, I’d still be inclined to use the browser or desktop-based version of Canva wherever possible: editing photos and videos on a phone is rather fiddly and I don’t enjoy doing that much!
But for users who need to create slick-looking content for social media platforms on the move, Canva’s mobile version is great.
Customer support
There are a few ways to avail of customer support from Canva.
First, there’s the Canva help center. This provides AI-powered instant answers to queries (which, based on my experience of them, are usually pretty good); it also contains a searchable archive of help articles and how-to guides.
There’s also email support. As with a lot of other SaaS products, accessing the form for this requires searching for a solution to your problem first, which can be a bit annoying.
As for live chat support, this is listed on Canva’s pricing page as a feature. A footnote states that this is available for ‘select issues’ only, however — and when testing the product, I couldn’t find a way to access it for any issue (select or not!).
Significantly, when I asked Canva’s AI assistant to help me access live chat, I got a message saying that Canva doesn’t offer a live chat feature for support. All I can conclude here is that Canva’s approach to the provision of live chat support is at best confusing, and at worst misleading.
As for phone support, there’s none available (on regular plans anyway — Enterprise customers may be able to avail of it, depending on what they negotiate). But given the low price point of Canva, it’s fairly understandable that its customer service is largely email-based.
And speaking of pricing…
Pricing and value for money
So far, we’ve looked at all the key features of Canva, but not its pricing. Let’s dive into that now.
Canva pricing plans
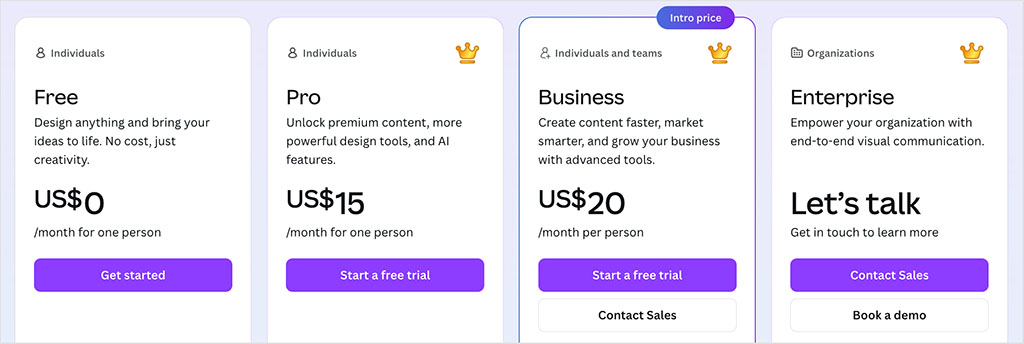
There are four main versions of Canva to consider:
- Canva Free — $0 per month
- Canva Pro — $15 per month (for one user)
- Canva Business — $20 per month per user
- Canva Enterprise — negotiable pricing
If you pay for your Canva plan on an annual basis, a discount of up to 16% is applied.
Subject to a vetting process, free or discounted plans are provided to educational organizations (via the company’s ‘Canva for Education‘ and ‘Canva for Districts’ plans). Similarly, and again subject to eligibility checks, non-profits can use Canva for free too (via the ‘Canva for Nonprofits’ plan).
In terms of the differences between the three main plans aimed at small businesses (‘Free’, ‘Pro’ and ‘Business’), the key things to watch out for are as follows:
- Seats — the number of users varies by plan, with the free plan and Canva Pro both providing just one user account, and the ‘Canva Business’ plan letting you purchase multiple seats.
- AI features — the premium plans give you full access to all of Canva’s AI design tools (Magic Switch, Magic Eraser, Magic Morph etc.) and more generous allowances to use on the AI tools that are available on both the paid-for and free plans. Paid-for Canva plans also unlock the pro AI features provided by Canva’s sister ‘Affinity’ platform (these include generative fill, background removal, and image generation).
- Templates — the paid-for plans give you considerably more templates than the free one.
- Images and videos — the paid-for plans give you access to over 141 million stock photos, videos and graphics; the free one gives access to 4.7m+ of these assets.
- Brand kits – you get one of these on the free plan; five on ‘Pro’ and 100 on ‘Business.’
- Storage space — the free plan gives you 5GB of cloud storage; the ‘Pro’ plan provides 100GB; and on the ‘Canva Business’ plan, you get 500GB per user.
- Export options — output formats are more limited on the free plan, and you won’t be able to use it to export print-ready / CMYK designs.
- User controls – only the ‘Canva Business’ plan provides controls over what can be uploaded to or edited in Canva.
(Note: our Canva Pro vs Free comparison spells some of these feature differences out in more detail.)
As for the ‘Enterprise’ version of Canva, this includes the main features of the ‘Canva Business’ plan, plus additional ones aimed at larger businesses, key ones being:
- The option to manage multiple teams
- IP indemnity content control
- SSO
- Automate license provisioning with SCIM
- Priority support
- A dedicated customer success manager (if you buy 100+ seats)
- The ability to create up to 1,000 brand kits
- 1TB of storage.
Value for money
There’s no doubt about it: Canva offers you a lot of bang for your buck. For a relatively small monthly fee, you can enjoy access to a wide range of design tools and visual assets that let you create very professional results, extremely quickly.
And, when you consider that Canva’s per-user monthly fee can be less than what you’d pay for just a single stock photo from Getty or iStock, but gives you access to millions of stock images and videos, this sense of value for money becomes even more pronounced.
It’s worth pointing out Canva is not quite as good value as it used to be, however. Not that long ago, you could purchase a $29-per-month ‘Teams’ plan for Canva that included 5 seats.
Even with this increase in pricing, you need to remember that many business apps requiring a monthly subscription typically cost a lot more than Canva — the SEO apps we review, for example, typically range from $139 to $400 per month in price, and come with extremely small seat counts. So despite the hike in price, I’m still struggling to think of any product that we’ve reviewed to date that offers quite so much functionality for such a low price.
Canva Free vs Pro video comparison
Canva user reviews
So far, I’ve shared my own thoughts on Canva, but it’s also useful to consider what other users are saying.
The table below summarizes feedback from Canva users on major software review platforms (accurate as of January 2026):
| Review site | User ratings |
| Capterra | 4.7 out of 5 (13,123 reviews) |
| G2 | 4.7 out of 5 (6,597 reviews) |
| Trustpilot | 2.9 out of 5 (3,068 reviews) |
| TrustRadius | 4.5 out of 5 (2,006 reviews)* |
| Average user rating | 4.2 out of 5 |
* Recalculated from an out-of-ten score
As you can see, the average user rating for Canva was 4.2 out of 5. While Trustpilot reviews were notably lower — mainly due to concerns about billing and customer support — ratings on other platforms remained consistently high, reflecting strong satisfaction with the product overall.
Canva review conclusion
Overall, Canva is a very solid, easy-to-use app that is absolutely packed with features that make designing visual assets simple. While not always a substitute for a professional graphic design tool or video editing package, it is considerably easier to use than such tools, and in many contexts will do the job just as well as them (and much more cheaply, too).
The main downsides of Canva are the fact that its output formats are limited (particularly where video is concerned); there’s no way to back up projects; and support is email-only. I also feel that the AI-generated images and videos need improvement — until Canva provides high-resolution versions of them to users, they’re not really much use in any professional context.
As always, the best way to get a sense of whether or not the platform is right for you is to try it out yourself — and you can access a fully-functional, 30-day trial of it here.
I’ll leave you with a summary of the key pros and cons of Canva, and you’ll also find some information on some alternative tools below. Do leave a comment if you have any queries about this review or the Canva platform in general.
Key pros and cons of Canva
Reasons I’d use Canva
- It’s extremely good value — for a small monthly fee you can get access to a host of design tools and millions of bundled graphics, photos and videos.
- The Canva features are extremely easy to use, even if you don’t have any graphic design skills.
- The free plan is very usable, and even comes with support.
- Its brand kit option and the way it lets you upload your own photos and typefaces make it easy to ensure brand consistency across designs produced in Canva.
- It provides a fantastic way not just to create promotional material, but, thanks to its graphic features, statistics too.
- If you’re on a ‘Canva Business’ plan, you’ll find that Canva makes it extremely easy to collaborate on designs.
- Its ‘Magic Resize’ tool makes it extremely easy to create lots of visual assets at once.
- Canva’s mobile app is extremely functional and is particularly good for creating ‘on-the-go’ visuals for social media marketing.
- It provides an easy way to produce one-off printed items.
Reasons I’d avoid Canva
- The formats you can output your visuals to are quite limited, with the lack of an ‘export to PSD’ option being a particular concern.
- Canva is an online graphic design tool — so if you don’t have Internet access, you won’t be able to work on any of your designs.
- There’s no obvious way to back up your projects.
- The licensing system for using Canva’s audio files on YouTube is very clunky.
- By default, AI-generated images and videos are output in low resolution (there is a workaround for making AI images hi-res, but it interrupts workflow).
- There’s no phone support, and the situation with regard to the availability of live chat support is confusing.
Alternatives to Canva
There are quite a few alternatives to Canva available.
Browser-based alternatives
In terms of browser-based apps, key alternatives include Visme, Kittl, Adobe Creative Cloud Express (formerly Adobe Spark), Picsart, and VistaCreate (formerly Crello). These are similarly affordable graphic design tools that let non-professional designers create visual material easily.
If you’re interested in learning more about these tools, we have Visme vs Canva, Adobe Express vs Canva, Kittl vs Canva and Canva vs VistaCreate comparisons available, along with a Picsart review.
Figma is also worth investigating if you need a graphic design tool to create prototypes of websites and apps with (it also gives you whiteboarding and presentation making tools). Our Canva vs Figma comparison explores how it stacks up against Canva.
For browser-based video editing, dedicated tools like Descript or Riverside provide more advanced functionality.
Adobe apps
It’s tempting to think of desktop Adobe applications like Photoshop, Illustrator and Premiere (and other tools you get in an Adobe Creative Cloud subscription) as direct alternatives to Canva. But they are actually quite different beasts.
While Canva comes with a built-in library of graphics, stock photos and videos, when using the Adobe apps, you often have to source assets ‘outside’ of them. But they are nonetheless great tools for putting visual assets together with, and at the end of the day, considerably more functional than Canva.
(You can learn more about the differences between Adobe Photoshop and Canva in our in-depth comparison of Canva and Photoshop.)
Web design tools
Although Canva can technically be used as a web design tool, the truth is that there significantly better platforms available for building websites — just a few examples include WordPress, Squarespace, Webflow, Wix and Shopify.
Print-on-demand tools
If a key aim of using Canva is to create printed materials or physical items with it, you might also want to investigate dedicated print-on-demand apps like Printful or Printify. These tend to come with larger and cheaper product ranges, and facilitate the production of greater number of items in one go.
Related resources:
Canva review FAQ
What are the advantages of Canva?
The main advantages of Canva are that it’s easy to use, cheap, and packed full of features — not only can you design visual content with it, you can also use the tool to create videos, presentations, digital art, and even websites.
What are the disadvantages of Canva?
The main disadvantage of Canva is that its range of output formats is quite limited, meaning that the projects you export from the platform can’t be easily edited by professional graphic designers in other tools. Other disadvantages include the fact that no phone support is available for the tool, its AI-generated images and videos are only provided in low resolutions, and its options for backing up your work are limited.
Is Canva good for beginners?
Canva is extremely easy to use. You won’t need any graphic design skills to create projects with the tool (although an eye for design will of course help).
Can I use Canva for free?
Yes. A cut-down free version is available, or alternatively you can make use of a 30-day free trial of the ‘Canva Pro’ version.
Update details
This article was updated on January 2, 2026. The following updates were made:
- Product screenshots were updated.
- The section about Canva’s AI features was updated.
- Information about the available number of stock assets and graphics was updated.
- The number of apps available for Canva was updated.
- The Canva user reviews section was updated.
- Information about support availability was updated.
Comments (8)