We have a strict honest review policy, but please note that when you buy through our links, we may receive a commission. This is at no extra cost to you.
In this Canva vs PowerPoint shootout, I compare an established presentation app (PowerPoint) with a cloud-based app that promises to make graphic design in general easy for everyone (Canva). Which solution comes out on top? And which one is best for your business?
Well read on, because I’m going to do a deep dive into both tools, and help you answer these important questions. I’ll start with a quick verdict, and then move on to my full comparison.
Quick verdict
The key argument for using Canva over PowerPoint is that unlike its rival, it’s not just a presentation maker. It doubles as a video editor, poster creator, whiteboard, and even a website builder, making it a highly versatile design tool for individuals, educators, and small businesses alike. On top of that it’s considerably easier to use than PowerPoint, and gives you access to a far bigger library of stock images, videos, and design assets to use in your presentations.
The main argument for using PowerPoint boils down to the way it works so well within the Microsoft 365 ecosystem. It integrates tightly with Word, Excel, and Outlook, which makes it perfect for data-driven reports, financial presentations, and corporate workflows. It’s also a better choice than Canva for those producing presentations involving mathematics, thanks to its inclusion of a built-in equation editor.
Getting started with Canva or PowerPoint
Now let’s discuss the fundamental difference between Canva and PowerPoint.
What’s the main difference between Canva and Microsoft PowerPoint?
Although Canva and PowerPoint can both be used to create attractive presentations, the two tools are quite different in nature.
While PowerPoint is a tool that has been specifically designed to let users create presentations, Canva is a multi-purpose tool that lets you design a huge range of visual assets — in addition to presentations, it lets you create social media graphics, simple videos, slides, posters and even websites.
Another key difference to note between the two tools is that unlike PowerPoint, Canva works best if you’re online. This is because all your designs are saved in the cloud, as are all the templates, images and other visual elements the platform uses.
(That said, recently Canva introduced a ‘Present offline’ mode for presentations, meaning that you can now use the tool to present slideshows even if not connected to the Internet. You will still need to be online to create these slideshows, however.)
Now, given that this is a Canva vs PowerPoint comparison, I’m going to largely focus on how good both tools are for creating presentations.
So, let’s move on and do that, starting with a look at the templates available for both Canva and PowerPoint.
Templates
Templates are the starting points for presentations — you pick one, tweak some colors, add your content and then present the results.
So what’s the template offering from Canva and PowerPoint like?

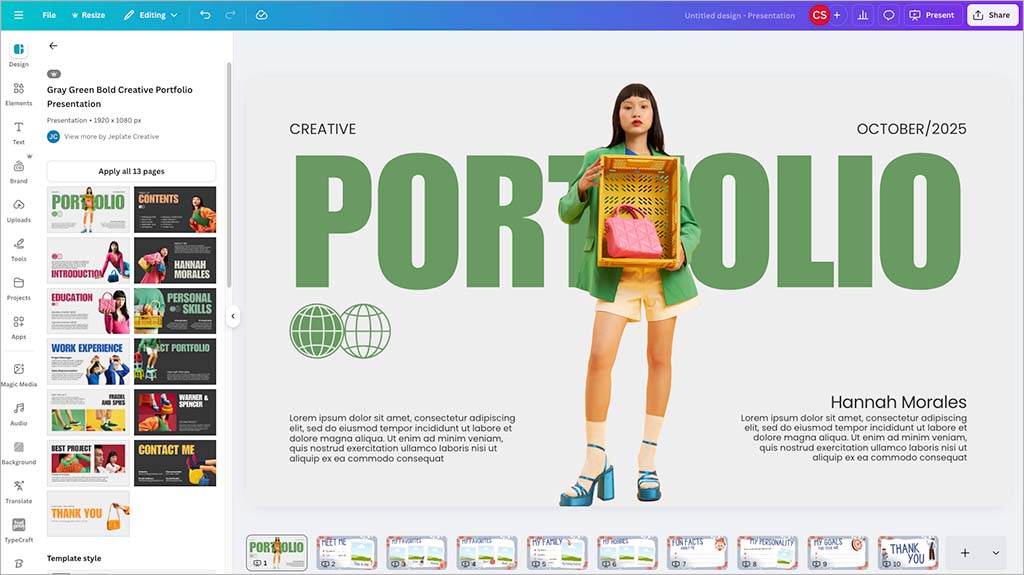
Well, in terms of quantity, it’s a clear win for Canva. Out of the box, the desktop version of Microsoft PowerPoint gives you just 25 or so templates to design with; and although you can download more from the Microsoft site, this total pales by comparison to Canva’s offering of 20,000+ ready-made presentation templates.
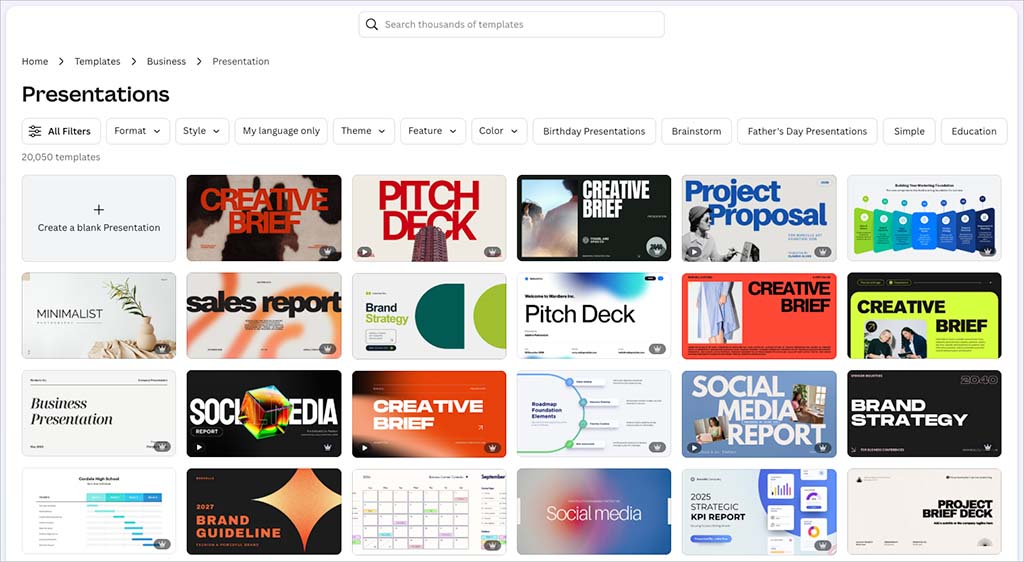
The quality of templates in Canva is better too; the templates are more varied in nature and are often bundled with more individual slide types.
In terms of aesthetics, I feel that Canva’s templates definitely have the edge. Many of the PowerPoint templates look quite dated (having in my view quite a 1990s look to them), employ very corporate fonts and scream ‘Microsoft’ at you.
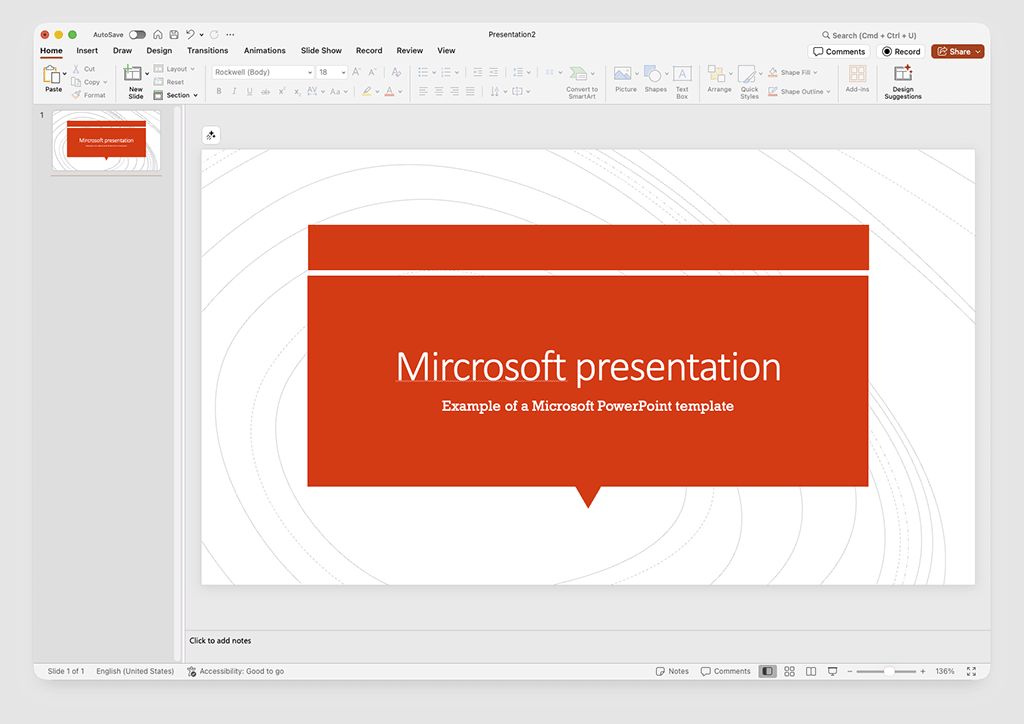
By contrast, the Canva templates look really contemporary, make use of a wide range of interesting typefaces and are simply more ‘fun.’
Both Canva and Microsoft PowerPoint also let you create presentation templates using simple AI prompts. You can describe what you want — for example, “a modern investor pitch deck for a SaaS startup, using a blue color palette and clean typography” — and the AI will automatically generate a multi-slide presentation with coordinated layouts, fonts, colors, and imagery.

In Canva, this functionality is enabled by default, but full access to it in PowerPoint is dependent on having an active subscription to Microsoft’s Co-Pilot add-on (this typically involves an $18 per month commitment).
Templates are just the starting point for a design of course — they can be brought to life and made much more appealing when customized.
So how easy is it to customize designs in Canva and PowerPoint?
Customizing presentations
Once you’ve picked a template (or generated one via an AI prompt) in either PowerPoint or Canva, the next step is to customize it and make it your own.
Canva and PowerPoint let you do this by adding a variety of elements to a template and then positioning and resizing them. Let’s look at both processes — and how they differ — in turn.
Adding elements to a template
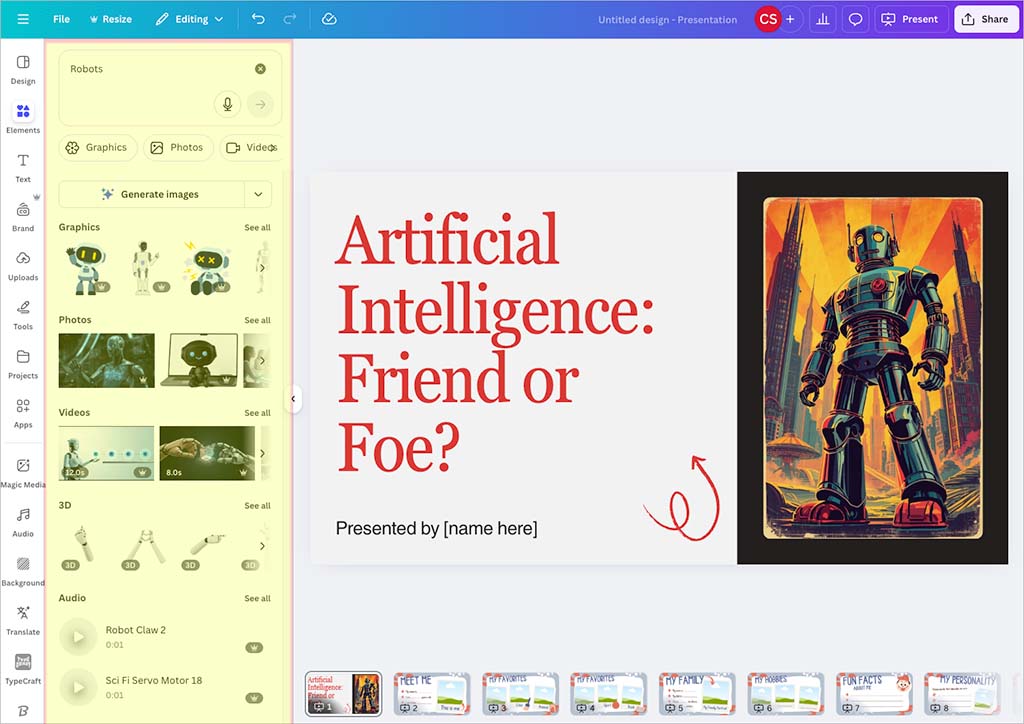
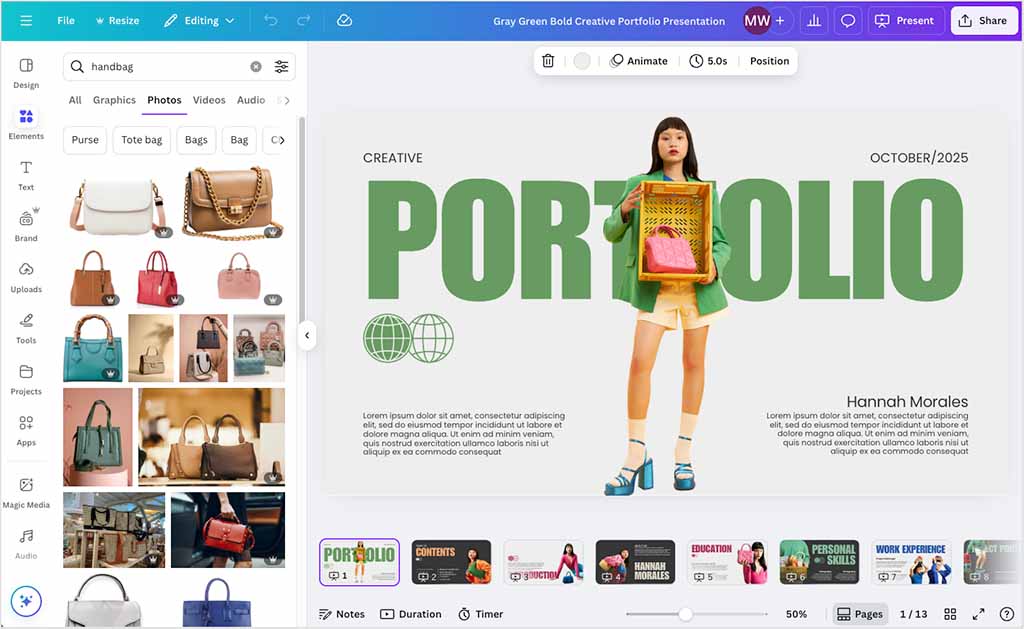
In Canva, you add elements to a template using a search box and vertical menu on the left-hand side of the screen.
This lets you add the following to your template:
- graphic elements (icons, clip art, shapes, etc.)
- photos
- videos
- audio
- content you’ve uploaded to Canva
- text
- backgrounds
- logos.
The best thing about the process of adding elements to a presentation in Canva is the simplicity: you simply pick the item you’d like to add and drag it onto your design. This makes for a really quick and smooth workflow.
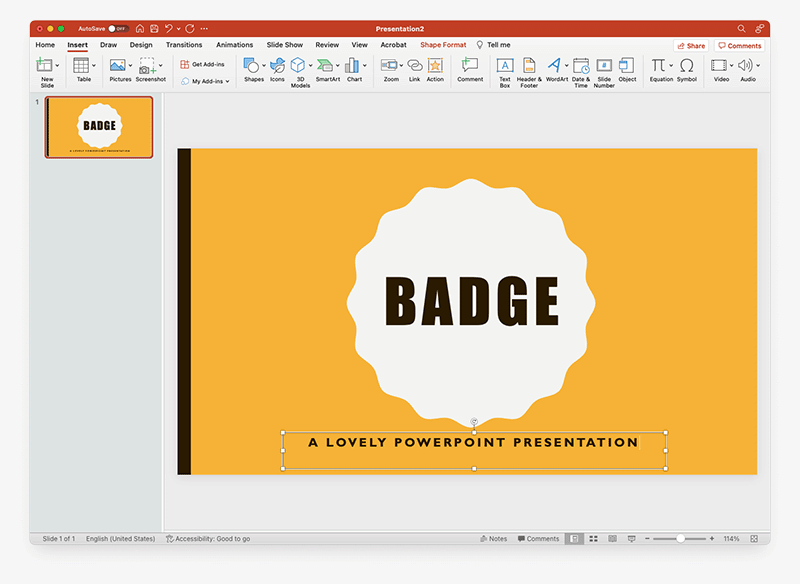
Adding elements in PowerPoint involves a clunkier process. First, you need to click the ‘Insert’ option in the main menu.
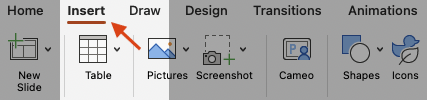
You’ll then see a ‘ribbon’ menu that gives you the option to add items into your template (some of these are shown in the screenshot below).

Unlike in Canva though, there’s no drag-and-drop facility — you’ll need to click on the item type, browse the available elements, and then click an ‘insert’ button to add it to your presentation. And doing so will place it in the middle of your presentation, rather than the position you might have envisaged for it (this is not the end of the world, however, as you can reposition it easily — more on doing this in a moment).
The assets you can add in PowerPoint are similar to those available in Canva, but there are two extra elements available from PowerPoint that are worth dwelling on for a moment.
- 3D models
- equations.
3D models, as their name suggests, are 3D images that you can rotate to meet your requirements. Quite a lot of them are available, and they can help bring a presentation to life, or illustrate a point (see screenshot below for an example of a PowerPoint 3D model being manipulated).
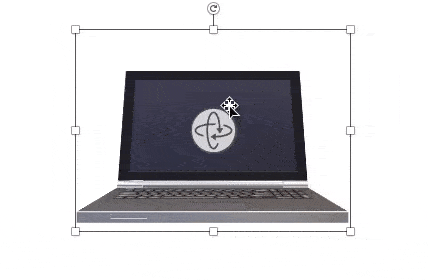
Although there are a variety of 3D graphics available in Canva, you can’t rotate and customize them to meet your needs the same way as you can in PowerPoint.
(It’s also harder to find them, because there’s no dedicated option for displaying them — you’ll just have to browse Canva’s image library and try to spot them).
As for equations, PowerPoint gives you the option to insert them easily into presentations, thanks to its aptly named ‘Equation Editor’ feature.
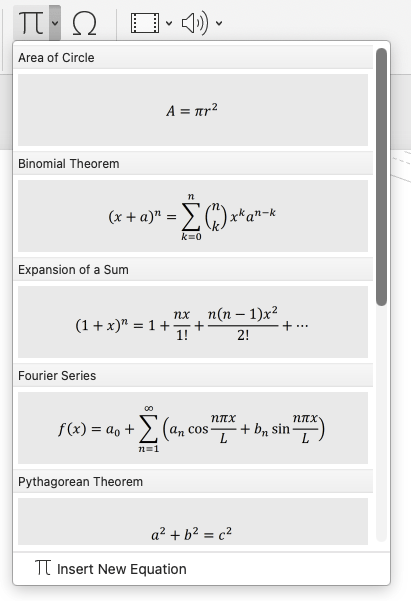
While at first glance this might strike you as a bit of a ‘niche’ feature, it’s actually quite an important one — there are a lot of math and science teachers out there who will find it extremely useful.
(Note: although Canva doesn’t have any built-in equation editing functionality, there are some third-party apps you can add to the platform that provide this. More on apps shortly.)
Positioning and resizing elements
Once you’ve added an element to a Canva or PowerPoint presentation, you’ll usually need to move or resize it.
The process of moving elements around a presentation in Canva and PowerPoint is very similar — a drag-and-drop process, where you simply click on the item and move it where you want it to go, applies in both tools (see screenshot below).
Similarly, both tools let you specify which element should go in front or behind others via ‘bring forward’ and ‘send to back’ tools.

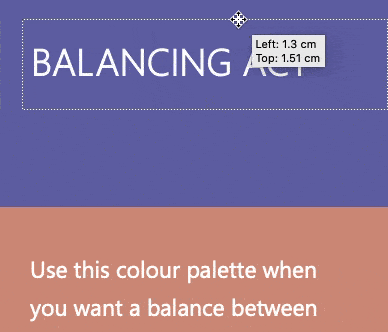
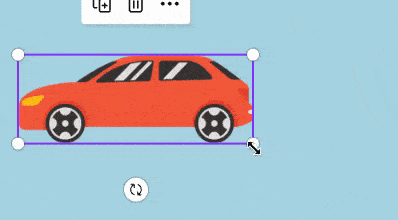
Resizing things involves a fairly similar process in both tools too — you click on an element, a container box appears around it, and you extend or reduce the edges of that container to resize the item (see screenshot below for a demonstration of this).
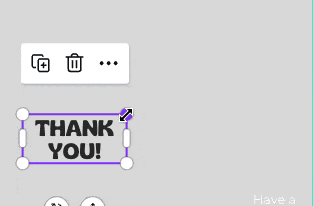
However, when it comes to resizing text, Canva takes a different approach to PowerPoint. Resizing text in Canva works exactly the same way as resizing an image — you extend or shrink the text’s container box to adjust its size, as demonstrated below.
But with PowerPoint, this automatic resizing of text doesn’t always happen; it depends on how much text you’ve got in a container.
If you’ve got a large block of text (i.e., several bullet points or paragraphs), PowerPoint will resize it as you adjust the container edges.
But for small blocks — single words, short sentences etc. — you’ll nearly always have to use a font dropdown menu to manually specify the font size (much as you’d do when formatting text in Microsoft Word). This makes for a more inconsistent and clunkier workflow.
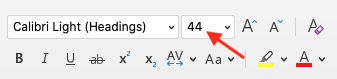
It’s worth pointing out that Canva gives you fine-grained control over font size too, if you want it — you can adjust font size manually in a similar way via a dropdown menu. This gives you the best of both worlds when it comes to formatting text.
Overall, the processes involved in adding, positioning and resizing elements in Canva and PowerPoint are fairly similar, but I find Canva’s approach a bit slicker and one that leads to a more efficient workflow.
Background removal
Both PowerPoint and Canva give you easy-to-use background removal tools: you just hit a suitably named ‘remove background’ (PowerPoint) or ‘Background remover’ (Canva) button to extract the image of a person from a busy background.
This is useful for creating headshots for your presentation, as the example below demonstrates, or placing different background colors behind a photograph of a person.

However, in my tests I found that the Canva background tool was the better one, especially when dealing with images where it was hard to distinguish the background from the person in the photograph. While Canva consistently managed to remove backgrounds from photographs in a way that left the person in the image ‘intact,’ PowerPoint consistently struggled to do this.
Here’s an example of the same image being used to test both tools’ background removal tools. In the case of Canva, I encountered no problems at all when separating the person from the background.

But look at what happened when I use the same image to test the background removal feature in PowerPoint:

As you can see, the subject’s hat and feet were removed by PowerPoint!
Now, PowerPoint does give you some tools to improve the results — you can use a ‘mark area’ tool to highlight bits of the image that you don’t want removed. But this is a bit fiddly to use; and ultimately, while Canva’s background removal tool just works out of the box, you’ll usually end up doing more manual tidying up with the PowerPoint one.
Ensuring brand consistency in Canva and PowerPoint
A key part of designing presentations for use in a corporate context involves branding — you usually need to stick to strict brand guidelines.
You can do this easily enough in Canva and PowerPoint, but the process differs for both products.
In Canva, you work with ‘brand kits’ that let you specify your brand colors, define your brand font, upload a brand logo and add other brand assets such as photos, graphics and icons. These can then be applied to anything you design using the platform.

In PowerPoint, you don’t get a similar brand kit tool — it’s a case of creating a template that adheres to your brand guidelines and re-using it.
You can also take the latter approach in Canva if you like, creating a branded template that serves as the starting point for your design.
So overall on the branding front, it’s a win for Canva, simply because it gives you two ways to create on-brand presentations, while PowerPoint only offers you one.
Royalty-free images, videos and audio
Earlier I looked at how you can add elements to PowerPoint or Canva — but didn’t discuss what you can add.
On this front, both tools give you access to libraries of royalty-free images and video; Canva goes one better and gives you free audio clips as well.
In terms of the quantity of multimedia files available, Canva is more generous: while Microsoft states that ‘thousands’ of royalty free images and videos are available for PowerPoint (so long as you are a Microsoft 365 subscriber), Canva gives you millions.
You might not think that this disparity would necessarily have a huge impact on presentation design or content — surely access to thousands of images is enough? — but it does, as a little test I ran showed quite quickly.
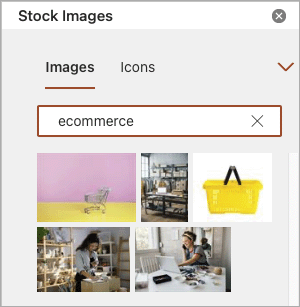
As part of our work in ecommerce, we create a lot of content about ecommerce companies such as eBay; occasionally we need to create presentations about these platforms too.
Now, if I enter the phrase ‘ecommerce’ into PowerPoint’s image search, here’s what I get:
PowerPoint returns a very small selection of just five stock assets related to my phrase.
But look at the results offered by Canva for the same query:
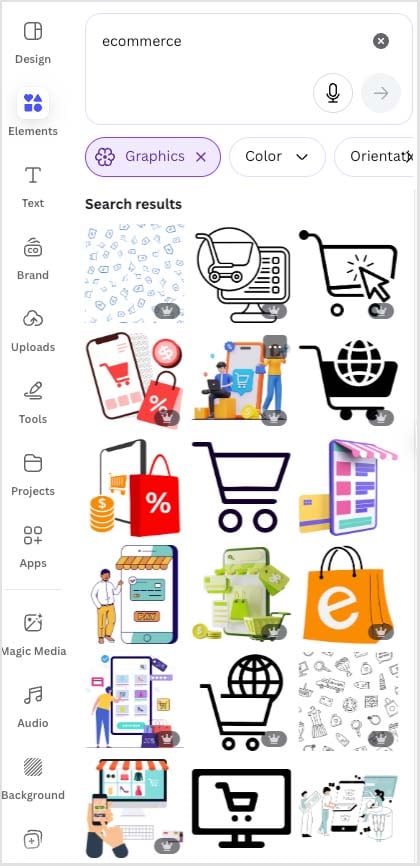
As you can see, Canva gives me immediate access to a huge range of graphics and images I might need for my ecommerce presentation, while PowerPoint’s tiny selection forces me to look elsewhere.
To be fair, it’s easy to grab images from royalty-free media sites (for example Unsplash or Pexels) or a Google image search. But this involves using other tools or add-ons, saving files locally, and then inserting them manually into your presentation — all of which can end up being a time-consuming process.
PowerPoint does try to make things a bit easier on this front, by giving you a facility to search for images online. However, you won’t necessarily have the rights to use the images you identify with it.
By contrast — and this is a key selling point of Canva in general — you are licensed to use all the images it gives you access to.
It’s a similar situation with videos in Canva and PowerPoint: although some stock videos are provided by PowerPoint, the range on offer is nowhere near as wide as Canva’s.
So, all in all, when it comes to providing access to royalty free videos, images and audio, it’s a clear win for Canva.
Apps and integrations
So far in this comparison, I’ve looked at what PowerPoint and Canva can do ‘out of the box.’ But what about integrating them with other tools, or adding functionality?
Well, both Canva and PowerPoint give you access to a library of apps that let you do this.
Canva gives you over 1,000 apps and integrations to play with in its ‘app directory’; this can be accessed on the left-hand side of the Canva dashboard by clicking the ‘More’ option, and then selecting ‘Apps.’
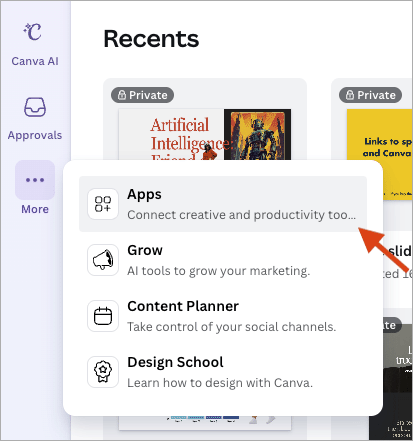
The apps on offer include integrations with well-known social media platforms (Facebook, Instagram, Pinterest etc.) and marketing tools (like Mailchimp, LinkedIn and Hubspot); you’ll also find apps in the directory that add bits of functionality to Canva — for example image enhancement tools; frame tools; mockup tools and more.
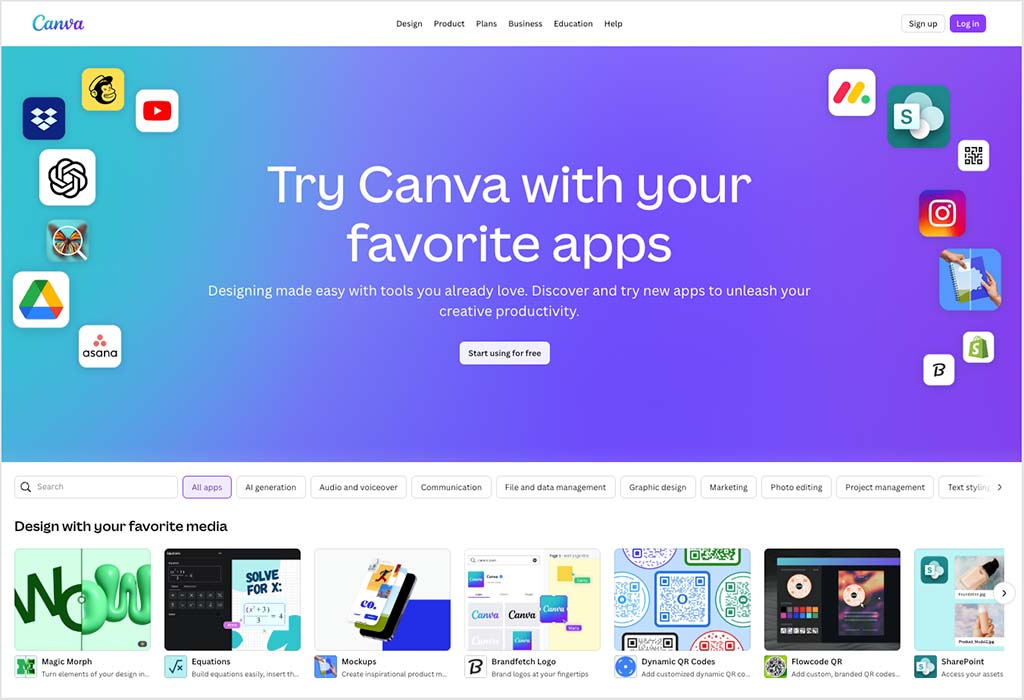
As for PowerPoint, a slightly smaller range of add-ons is available — around 500 of them. An ‘Add-ins’ button in the PowerPoint ribbon menu lets you browse these.

However, while the Canva apps are quite broad in terms of their features and purposes, the ‘add-ins’ available for PowerPoint are essentially to do with presentation-related functionality.
(This is fair enough really, given that PowerPoint is a tool that has been designed for creating presentations and Canva is a multi-purpose graphic design app.)

You’ll find lots of PowerPoint add-ins to help you embed content from other services into your presentation; there’s also quite a few apps for sourcing stock images and icons for them. But you won’t find any official integrations between PowerPoint and social media apps, and there’s no add-ins for integrating PowerPoint with popular marketing tools either.
Accessing free trials of Canva and PowerPoint
If you’re interested in trying out all the features of Canva and PowerPoint, free trials are available for both. A 30-day Canva trial is accessible by clicking the button below.
As for PowerPoint, you can use it for free for 30 days as part of the Microsoft 365 free trial.
Creating charts
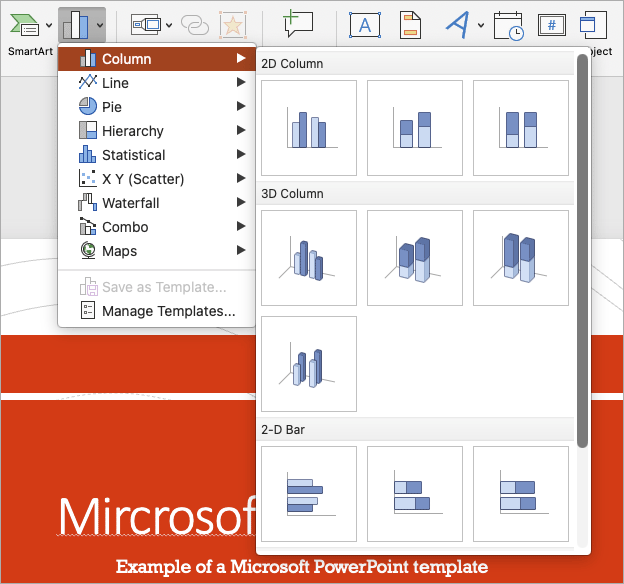
Both Canva and PowerPoint give you access to tools that let you create graphs and charts and add them to your presentations.
PowerPoint is the more generous tool in terms of the range of chart types that you can add to your presentations, letting you choose from around 60 chart designs — each of which comes in a number of variants — to Canva’s 30 or so.
The process for creating these graphs is much easier in Canva, however — while PowerPoint forces you to link an Excel spreadsheet to your graph, Canva just lets you enter the relevant data for the graph directly within the tool. This makes for a much easier workflow.
(And if you do want to use Excel as a source of data, this is possible too, via CSV file upload; you can also use Google Sheets as a source of data for your charts).
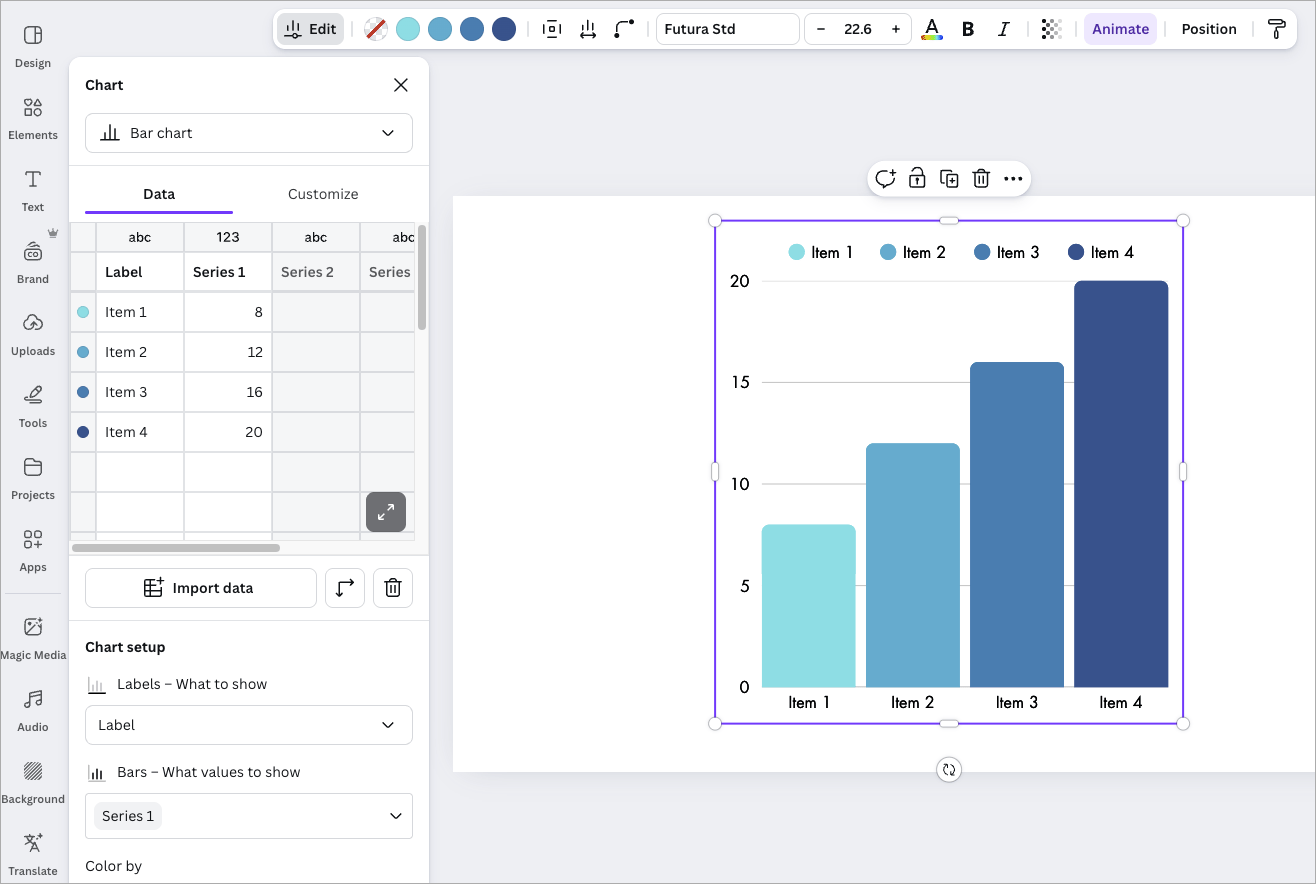
But overall, PowerPoint is the more powerful tool when it comes to charts — while the customization options in Canva are fairly limited, you can edit just about any aspect of a chart created in PowerPoint.
Working with video
Both Canva and PowerPoint let you add video content to your presentations easily.
However — and in keeping with the fact that Canva is a ‘multi-purpose’ tool and PowerPoint is a ‘presentation-only’ one, the options for manipulating your video content in Canva are much more extensive.
This is because Canva includes a video editor in its feature set. While it’s not going to compete with the likes of Adobe Premiere or Final Cut Pro any time soon, it’s nonetheless very usable and very handy for creating simple videos that you can drop into your presentations. You can split, trim and create transitions between clips with ease; you can also remove backgrounds from them really easily too.
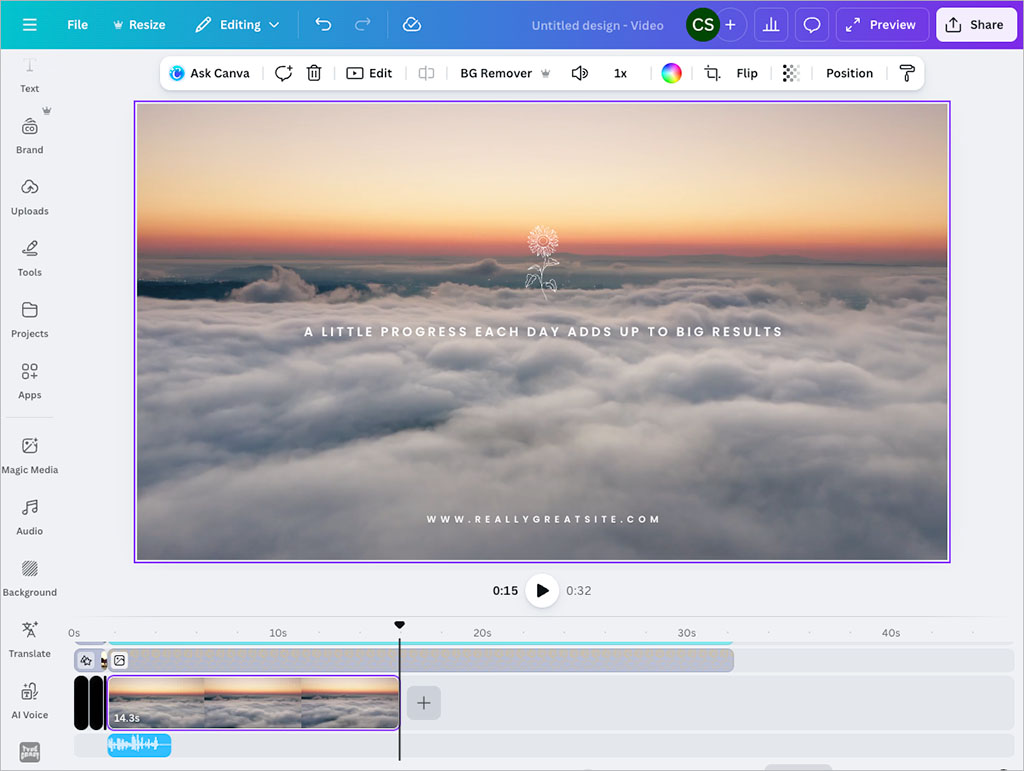
In fact, you can actually convert your presentation into a video in Canva really easily using its ‘Magic Resize’ option — and then add an AI voiceover to it. This can be a massive timesaver for explainer-type content.
As for PowerPoint’s video capabilities, it lets you record your slideshows to video, with its ‘Cameo’ feature letting you make a personal appearance in your presentation (via a ‘Picture in Picture’ effect). But its general video editing options are very limited — you’re more or less restricted to trimming the length of your video, or adjusting attributes like brightness, contrast and color.
But if you need to do any detailed editing work involving a timeline, you’ll need to use a separate video editing application.
So, a win for Canva here.
Presenting tools
Creating a presentation is one thing — giving it is another! So how do Canva and PowerPoint shape up when it comes to the ‘presenting’ part of the equation?
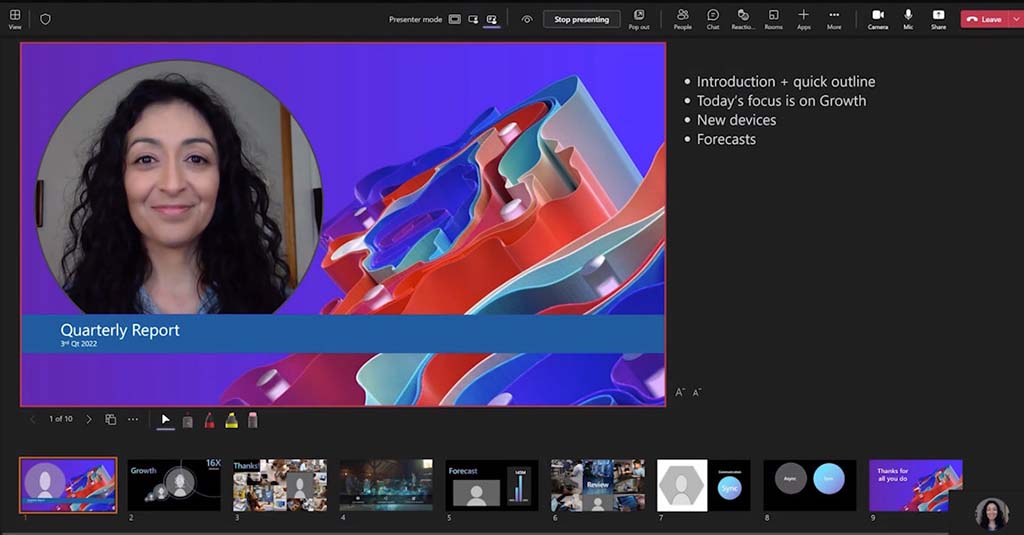
Well, it’s fair to say that PowerPoint wins here, by giving you a host of tools for presenting your content exactly the way you want to.

Not only does PowerPoint give you lots of ways to present your slides, it gives you different ways to rehearse your presentation too. These even include an option to rehearse with a virtual ‘coach’ that assesses your performance — after you’ve given your presentation, your coach will give you a report containing information about your pace, length of presentation and suggestions on how to improve your performance.
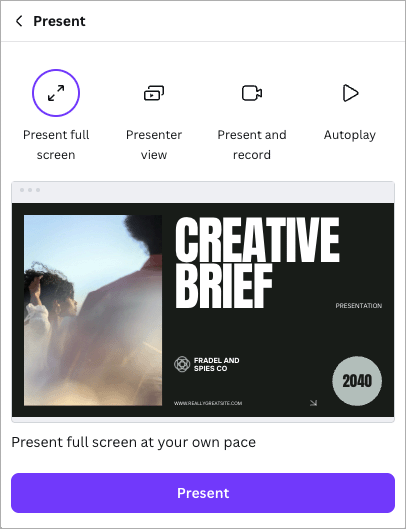
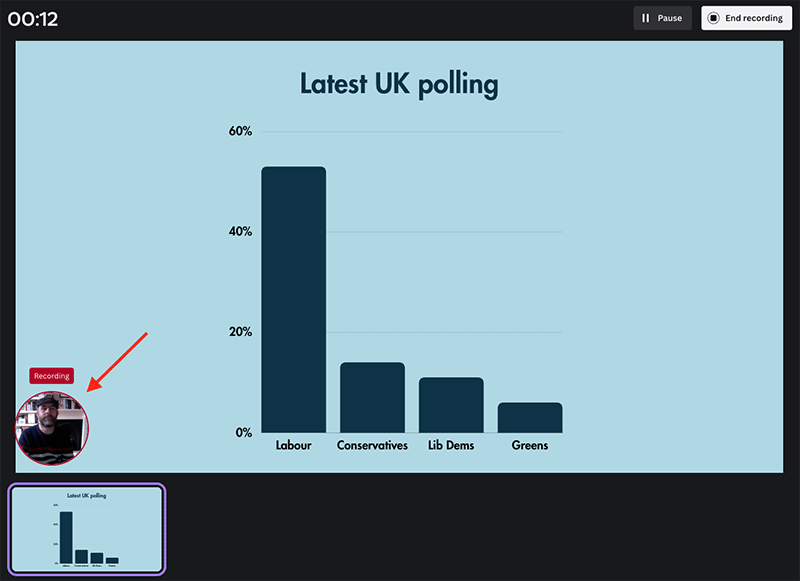
The presentation options in Canva, by contrast, are pretty basic: you can present via a ‘standard’ presentation, use a ‘presenter view’ option (i.e., with notes), record as you present, or ‘autoplay’ your presentation (this is useful for looping displays without a presenter).
On the subject of recording presentations, this works in a similar way in both tools: you can record your presentation with audio and video (i.e., your webcam). When finished, this can be exported as a video file.
Exporting and sharing your presentation
Once you’ve finished creating your presentation, you’ll want to share it with others. So what exporting and sharing options do Canva and PowerPoint offer?
Exporting presentations to different file types
When it comes to outputting presentations into different file formats, both tools let you export your content into a wide range of file types, although the options available differ.
Canva lets you export your presentation (either the whole thing, or individual slides) into the following file types:
- JPG
- PNG
- SVG (vector graphics file)
- MP4 Video
- GIF
- PPTX (PowerPoint)
To export your Canva presentation into these formats, you simply click the share button above it, followed by the ‘download’ option.
As for PowerPoint, it lets you export your work into the following file formats:
- MP4
- MOV
- JPG
- TIFF
- PNG
- GIF
- BMP
- RTF
- PPT
So if you need your presentation in super high quality photographic or video format, then PowerPoint takes the win (thanks to the option to let you export your files in TIFF and MOV format).
However, if you want to export your presentation as scalable vector graphic files — SVG — then Canva has the edge. (An SVG file is an image made from shapes and lines instead of pixels, so it can be resized to any size without becoming blurry.)
Sharing your presentations
When it comes to sharing your presentations with others, both Canva and PowerPoint let you save your work locally and then distribute it however you like.
However, both tools also let you share your presentations in more sophisticated ways.
Canva is particularly flexible here, giving you a multitude of ways to share your presentation. For example, you can share it as a URL; embed it on a website; or create a QR code to share it to mobile phones.
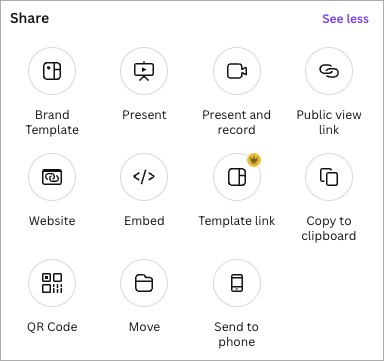
There’s also the option of sharing presentations with colleagues for collaboration purposes. You’ll need to be on a Canva Business plan to do this; this allows you to create and share folders and files that can be accessed by multiple users.
(More on Canva pricing plans shortly).
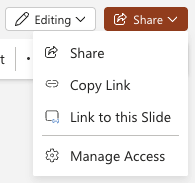
As for PowerPoint, the sharing options aren’t quite as extensive — you can share a link to a presentation, or enable multi-user access on the file. These options are probably fine for most applications, however.
(It’s important to note that if you are an existing Microsoft 365 user, PowerPoint slots much more neatly into that environment. You can pull in data from other 365 document types; make use of Microsoft 365 team collaboration features; and share your presentations on OneDrive easily.)
What about importing PowerPoint files into Canva?
Canva has an import feature that lets you import PowerPoint files into Canva. However, depending on the fonts and layouts used in the original presentation, imported presentations may not always be faithful to the PowerPoint original.
Plans, pricing and value for money
It’s a bit tricky to compare the fees for Canva and PowerPoint, as two different pricing models are involved. But let’s do our best!
Let’s start with Canva.
Canva pricing
There are three main versions of Canva available:
- Canva Free
- Canva Pro
- Canva Business
As its name suggests, Canva Free is an entirely free plan. It doesn’t come with all the bells and whistles of the paid-for version of Canva — key omissions include the option to create more than one brand kit, use its background removal tool and access to premium content (i.e., the full library of stock photos, audio and images).
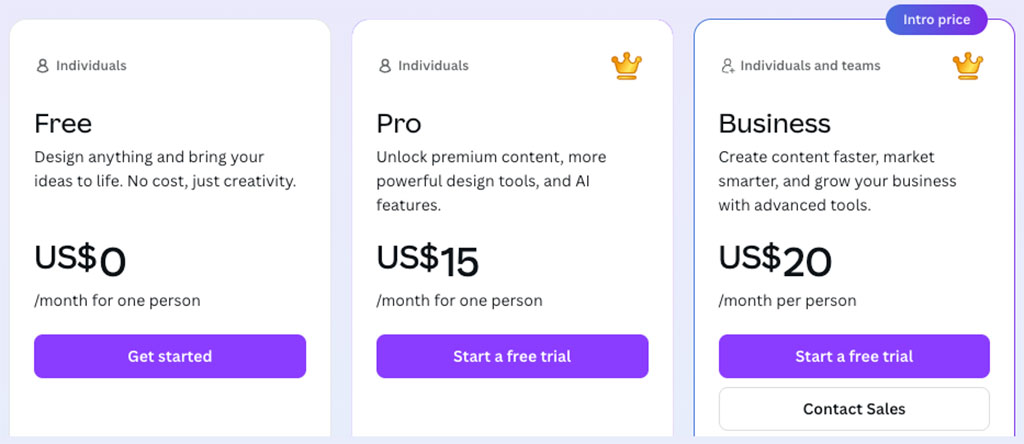
Despite this, it is still a highly functional tool that lets you create attractive designs and presentations easily.
Moving onto the premium plans, Canva Pro costs $15 per month and gives you access to the full range of Canva features and image/video libraries. It can only be used by one user, however.
Canva Business (formerly ‘Canva Teams’) costs $20 per user per month (or $200 per user per year if paying annually). For this, team members get access to all the Canva features and libraries, plus a very wide range of collaboration features (including the ability to set user permissions and lock custom templates).
As for PowerPoint pricing, as mentioned above, the app comes as part of a wider package of Microsoft tools. There are a multitude of pricing options available, which range from $4.40 per user per month to $57 per user per month, depending on whether you need a basic business package or an enterprise one (and whether you want access to Microsoft Teams). A 30-day trial of Microsoft 365 is also available.
(For full details of the main pricing options for Microsoft 365, please read our Microsoft 365 versus Google Workspace comparison).
In all cases, the key thing to remember about buying PowerPoint is this: you won’t just get PowerPoint, you’ll have access to a host of other Microsoft apps too — like Word, Excel and Outlook.
In a sense however, this is also the case with Canva: when you subscribe to it, you’re not just getting a presentation-making tool but a video editor, image editor, stock photography library, social media scheduler, basic website builder and more besides.
So in truth, both tools give you a lot of bang for your buck — and it will boil down to how much you value getting your hands on a range of Microsoft products as part of a subscription, or the simple ‘all-in-one’ approach taken by Canva.
User reviews
User reviews can also provide a useful perspective on how Canva and PowerPoint stack up in practice. Accordingly, and to give you a sense of what ‘real-world’ users think of the two tools, I’ve collated some user rating data from leading software review platforms — see my table below:
| Review site | Canva | PowerPoint |
| Capterra | 4.7 out of 5 (13,123 reviews) | 4.7/5 (20,779 reviews) |
| G2 | 4.7 out of 5 (6,597 reviews) | 4.6/5 (4,273 reviews) |
| TrustRadius | 4.5 out of 5 (2,006 reviews)* | 4/5 (957 reviews) |
| Average user score (out of 5) | 4.6 | 4.4 |
*Recalculated from an out-of-ten score.
Takeaway: while the ratings for both tools are very good, Canva has a slight edge in terms of user satisfaction ratings.
Canva vs PowerPoint conclusion
So which is better for your project, Canva or PowerPoint?
For me, there are two main arguments for using Canva over PowerPoint. First, and most importantly, its ease of use — Canva is an absolute breeze to use, and considerably better than PowerPoint in the user-friendliness stakes. Second, the range of assets you get from Canva — for the price of a single iStock or Getty picture, you get access to millions of multimedia items per month with Canva. Although PowerPoint does give you access to some stock photography and videos, the choice available on both fronts is much more limited.
PowerPoint is a better choice for some users, however — particularly those who have invested heavily in the Microsoft 365 ecosystem, or need to work with other businesses who routinely use Microsoft products. And investing in PowerPoint means you end up getting a host of other useful industry-standard apps, like Word, Excel, Outlook and Publisher (similarly, however, buying a Canva subscription doesn’t just get you a presentation maker but a host of other design and productivity tools — a video editor, a whiteboard, document creator etc.)
Below you’ll find a summary of the relative pros and cons of Canva and PowerPoint. Do leave any questions on Canva or PowerPoint in the comments section below — we read all comments and do our best to answer all visitor queries.
Reasons to use Canva instead of PowerPoint
- It’s a much easier-to-use product.
- It gives you access to a much bigger range of images, graphics and videos than PowerPoint.
- The bundled range of templates is much larger than PowerPoint’s.
- Its background removal tool is significantly better than PowerPoint’s.
- Working with video is significantly easier in Canva.
- Canva is not just a presentation-creating tool: it’s a photo editor, an image enhancer, a screen recorder, a website builder and much else besides.
- There are more ways to share Canva creations than PowerPoint ones, particularly where social media is concerned.
- There is a much larger selection of apps and integrations available for Canva.
Reasons to use PowerPoint instead of Canva
- When you buy PowerPoint, you’re actually subscribing to Microsoft 365 — and getting access to a host of really useful Microsoft products in the process.
- PowerPoint integrates much better with other Microsoft apps and services than Canva does.
- There are dedicated tools for working with 3D models and equations in PowerPoint — this is not the case with Canva.
- PowerPoint lets you output your presentations to a wider range of formats than Canva, including higher-res image and video formats.
- You can create more sophisticated graph types with PowerPoint.
- PowerPoint gives you more ways to rehearse your presentation.
Key alternatives to Canva and PowerPoint
Canva and PowerPoint are by no means the only tools for creating presentations.
When it comes to ‘all-in-one’ design apps like Canva, Visme, VistaCreate (formerly Crello), Kittl and Adobe Express are probably the main competitors. You can learn more about these products in our Canva vs Visme comparison, our VistaCreate (Crello) vs Canva comparison, our Kittl review and our Adobe Express vs Canva shootout.
Figma is another browser-based app that competes in various ways with Canva and comes with a presentation maker; you can learn more about it in our Canva vs Figma shootout.
As for direct alternatives to PowerPoint, Google and Apple provide the main competition, in the form of Google Slides (part of the Google Workspace suite) and Keynote (an iWork product) respectively. We have yet to review Keynote or iWork, but we do have a Microsoft 365 vs Workspace comparison available.
In certain contexts, Adobe Photoshop can be used as an alternative to Canva, but it’s not really a direct competitor to PowerPoint. Check out our Canva vs Photoshop comparison for more details on the key differences between this app and Canva.
Canva vs PowerPoint — FAQ
Can I use Canva and PowerPoint for free?
In the case of Canva, a free version is available, or alternatively, you can make use of a 30-day trial of Canva Pro. PowerPoint can be tried for free for 30 days as part of a Microsoft 365 trial.
Is Canva better than PowerPoint?
It’s better in some ways — it’s easier to use, gives you more stock photography to play with, and gives you built-in video editing tools that are not present in PowerPoint. However, PowerPoint beats Canva when it comes to integrating with Microsoft 365 apps, giving you ‘niche’ tools for working with 3D models and equations, and being more flexible when it comes to creating graphs.
Can you create professional presentations in Canva?
Yes — you can create extremely professional presentations in Canva that make sophisticated use of audio, images and video; you can also export them to a wide range of formats.
Can I import PowerPoint presentations into Canva?
Yes. Canva recently released an import feature that lets you import PowerPoint files into Canva. However, depending on the fonts and presentation layouts involved, imported files may not always be faithful to the PowerPoint original.
Update details
This article was updated on January 5, 2026. The following updates were made:
- Product screenshots were refreshed.
- The section about video editing features was significantly changed.
- The user reviews section was updated.
- The information about the quantity of apps available for both platforms was updated.
- Pricing information for Microsoft 365 was updated.
Comments (10)