We have a strict honest review policy, but please note that when you buy through our links, we may receive a commission. This is at no extra cost to you.
Visme vs Canva — which is better? In this detailed comparison, I take a look at two tools that aim to make graphic design easy for non-designers, and help you pick the best one for your business.
Quick verdict
Visme and Canva are both great choices for creating professional visuals without hiring a designer. They offer intuitive design tools, large libraries of stock images and videos, and templates for everything from social posts to presentations.
However, Canva ultimately comes out ahead here. It offers a broader range of features, including a better video editor, a web design builder, and more AI tools. Add in its much bigger asset libraries and its more functional free plan, and it’s hard not to see Canva as the more flexible, creative option.
Visme does have a few advantages over Canva, like HTML5 exports, an interesting form builder, and more comprehensive support — but ultimately they’re not enough to outshine its rival.
I’ll begin my full comparison with a key question: what are Visme and Canva?
What are Visme and Canva?
Canva and Visme are web-based design tools that let you create impressive visual assets without needing a lot of graphic design experience.
Both solutions can be used to create social media graphics, infographics, charts, simple videos, presentations, slides, posters, YouTube thumbnails and other marketing material — and a wide range of templates and royalty-free images is provided to help make this process easy.
How do they work?
Both Canva and Visme differ from traditional graphic design software like Adobe Photoshop in that they are primarily designed to be used online in a web browser rather than as desktop applications.
That said, both solutions can be installed locally too. Canva exists as an app for both desktop and mobile devices (Mac, PC, Chromebook, iOS and Android apps are available for it); Visme is available in desktop versions for Mac and PC.
Canva and Visme give you three key things to help you create your design:
- templates — pre-designed layouts that you can use for a variety of applications
- ‘elements‘ — royalty-free photos, graphics, videos and audio that you can add to your projects and create designs with
- a drag and drop editor that lets you move your visuals around a template.
Regardless of whether you use Visme and Canva in a browser or in an app, the key thing to remember is that you’ll need an Internet connection to use them — all the design elements that can be used in your design are hosted on the web.
User base size
Both platforms were founded in 2013, but since then Canva has become the more popular product of the two under discussion: it has over 260 million users worldwide, to Visme’s still impressive 34 million.
This discrepancy in user base size shouldn’t trouble you too much however, as both tools are well-established in their market, and are extremely popular options for working on graphic design projects.
But which one is right for you?
Let’s find out, starting with a look at pricing.
Pricing
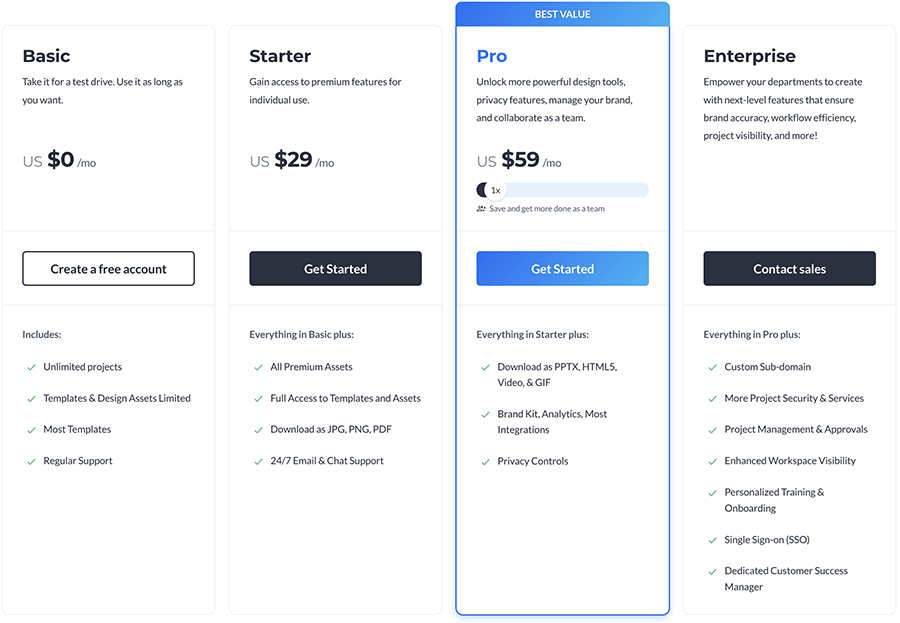
There are four main Visme plans available:
- Basic — $0 per month
- Starter — $29 per month
- Pro — $59 per month
- Enterprise — negotiable pricing
These prices are sharply reduced if you pay upfront for a year — if you subscribe on an annual basis, the relative costs for the ‘Starter’ and ‘Pro’ plans become $12.25 and $24.75 per month.
If you want a Visme account for your team, you can opt for the ‘Team of 3’ or ‘Team of 5’ versions of its ‘Pro’ plan. These cost $119 per month and $159 per month respectively (or $72 per month and $120 per month each if paying annually). If you require more than 5 seats on your team, you’ll need to contact Visme to negotiate a price for your requirements.
As for Canva, there are also four pricing plans available:
If you pay on an annual basis for a ‘Canva Pro‘ or ‘Canva Business‘ plan, you can avail of a 16% discount.
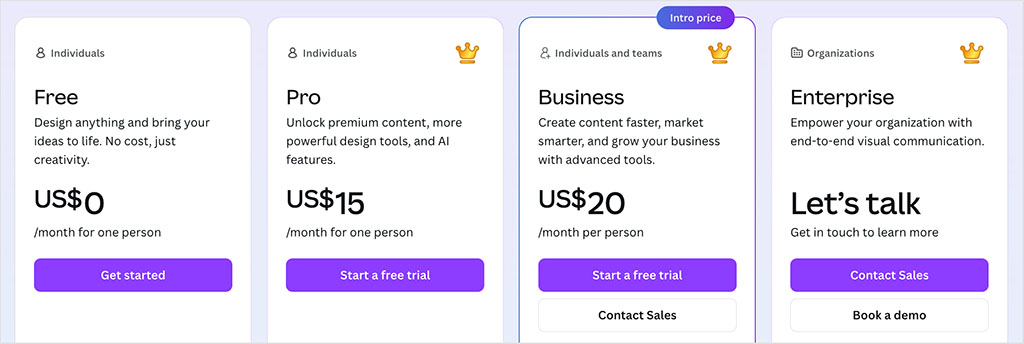
In terms of the main differences in features between these plans, the key things to watch out for are:
- User accounts — with Canva, only the ‘Canva Business’ and ‘Canva Enterprise’ plans lets you add more than one user to your account.
- The ability to download your projects — Visme’s free plan doesn’t let you download your work at all; Canva’s free plan gives you fewer options on this front, but crucially does let you export your designs.
- Storage space for your own assets — the more you pay, the more you get.
- The option to apply your own brand fonts, colors and logo to designs — this is only available on the two most expensive Visme plans.
- Team collaboration features.
I’ll have more to say on all the above as I progress through the review. But if you’re looking for a snap judgment on pricing, it’s obvious that Canva is considerably cheaper, and its free plan is more functional too. For small businesses or ‘solopreneurs’ on a low budget, the Canva pricing plans will inevitably prove the more attractive.
Now, let’s take a look at Visme and Canva’s interfaces.
Interface / ease-of-use
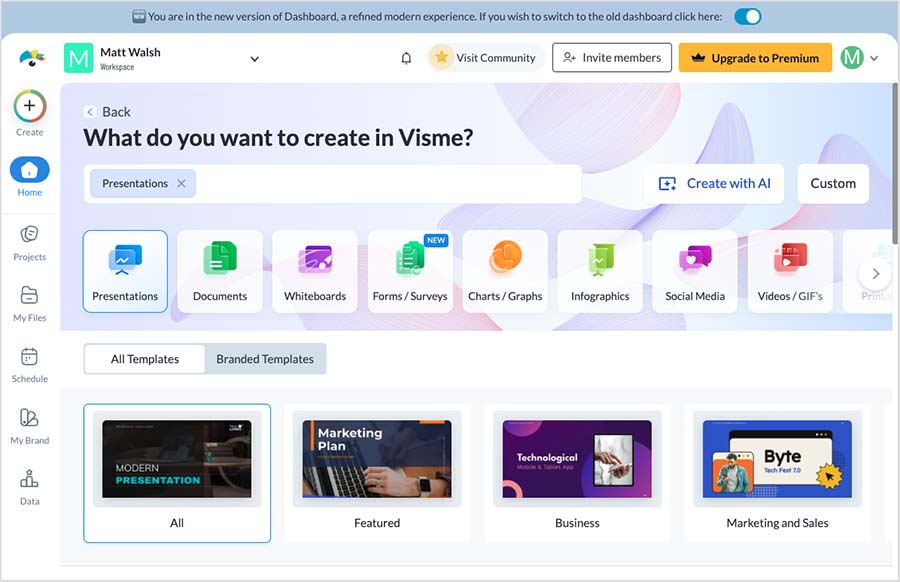
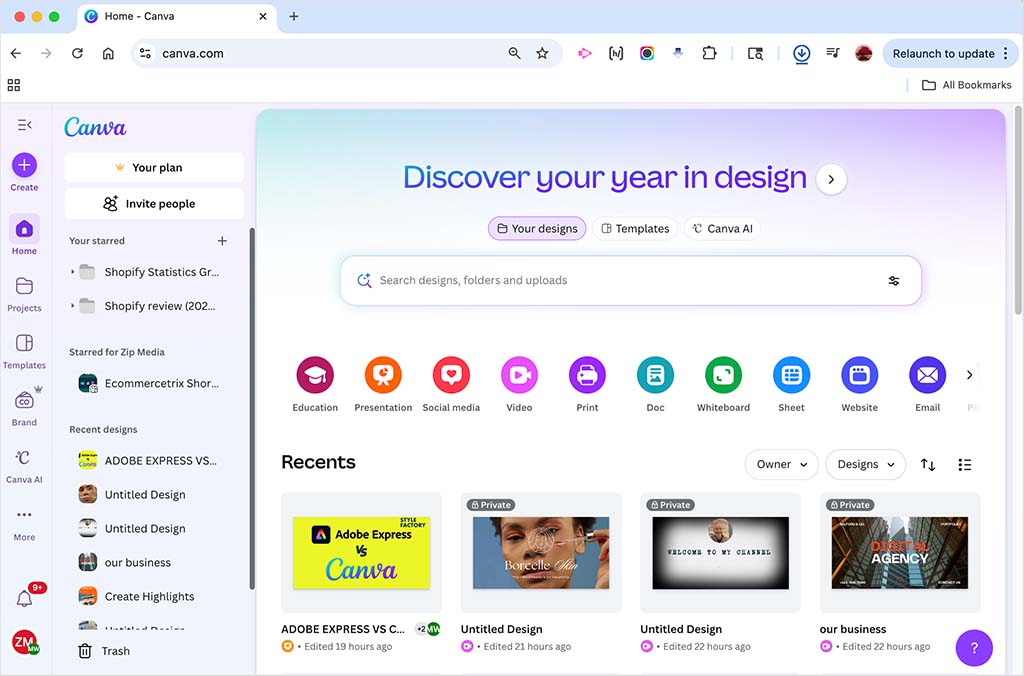
When you log into either Visme or Canva you are presented with two main choices: the option to create a new design, or to open an existing one.
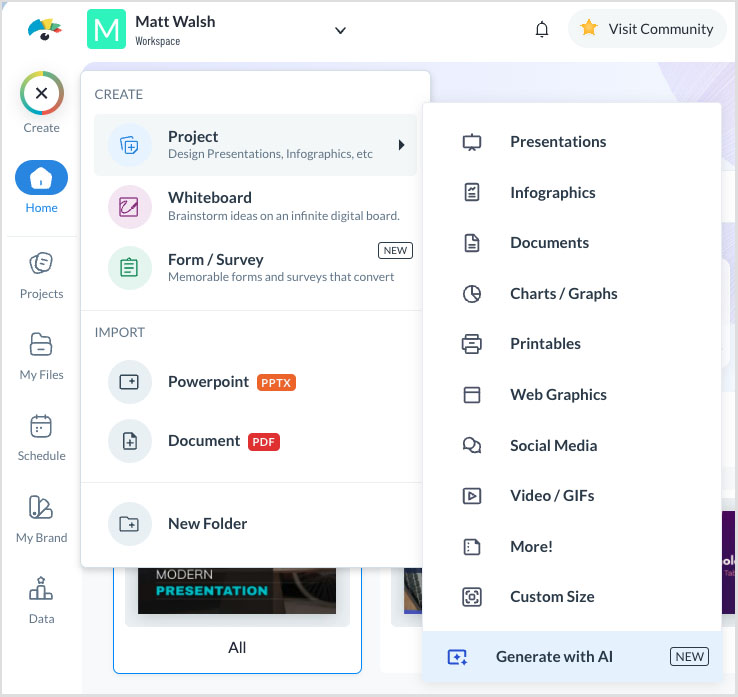
Once you’ve started working on a design, you’ll find that Visme and Canva have fairly similar interfaces: there’s a main menu on the left that gives you access to each tool’s key features, and your design work is carried out on the right-hand side of the screen using a drag and drop editor.
The main menus in both platforms provide you with a similar range of options. You can use them to apply a new template to your design, and add the following to it:
- graphic elements (shapes, icons, outlines etc.)
- photos
- videos
- text
- animations
- assets you’ve uploaded
- brand colors.
There is however, a slightly different approach in both tools regarding how you go about adding elements to your design.
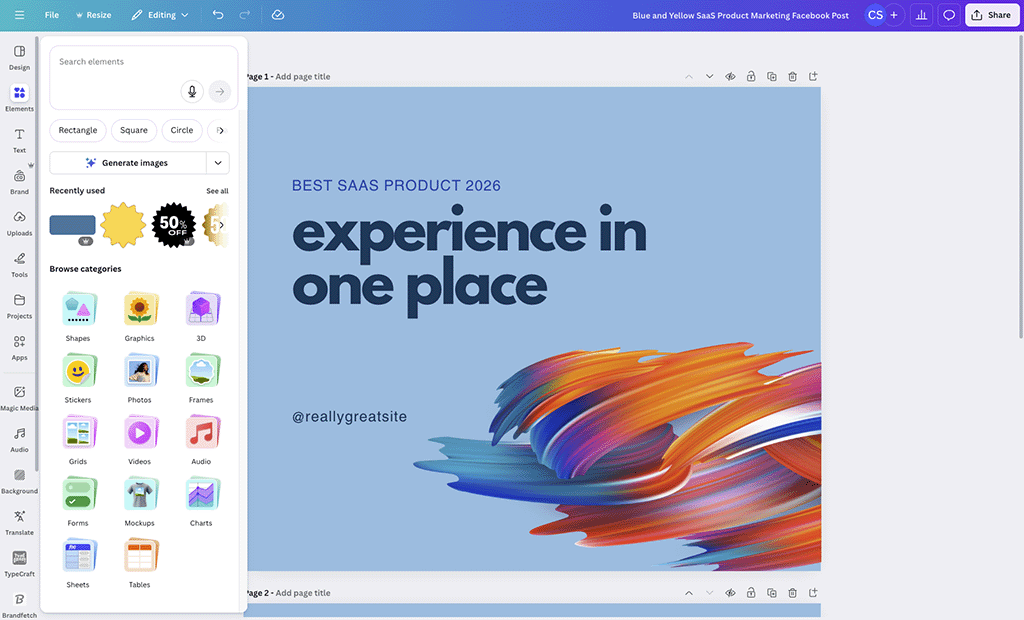
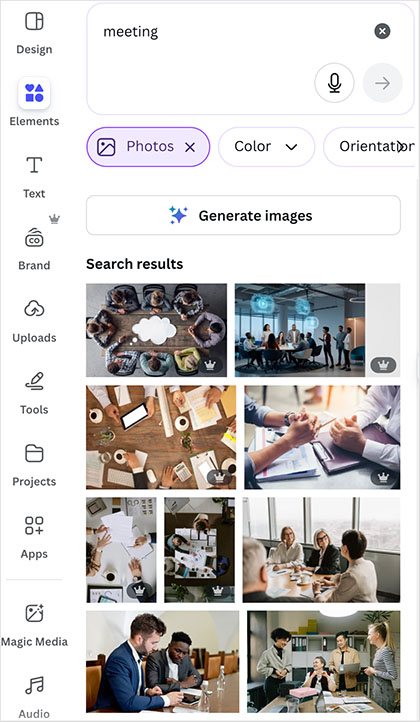
Canva places all its assets in one section — ‘Elements’. You click on that tab, and then search the section for the sort of assets you’d like to add.
These can include any type of media — graphics, photos, videos etc.
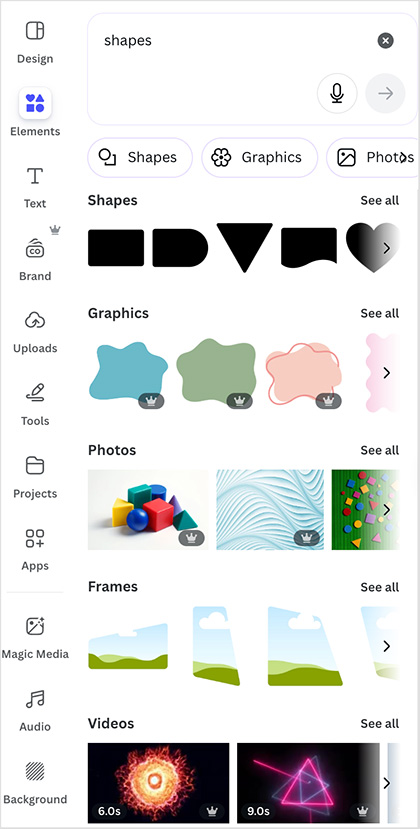
By contrast, Visme places a much greater emphasis on categorization in its main menu. As you can see from the screenshot below, graphics, photos and multimedia (video and audio) are split out into three separate sections, and you’ll need to go to the relevant one to locate assets for your design.
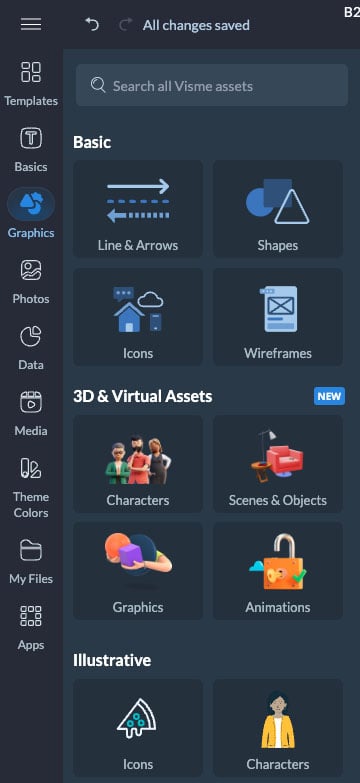
To be honest, both approaches work reasonably well and neither result in a steep learning curve — so which interface is ‘best’ is probably a matter of personal preference. If you’re somebody who likes categories, then Visme’s user interface may appeal more; if you like less-cluttered menus and using search bars to locate content, then you might prefer Canva’s.
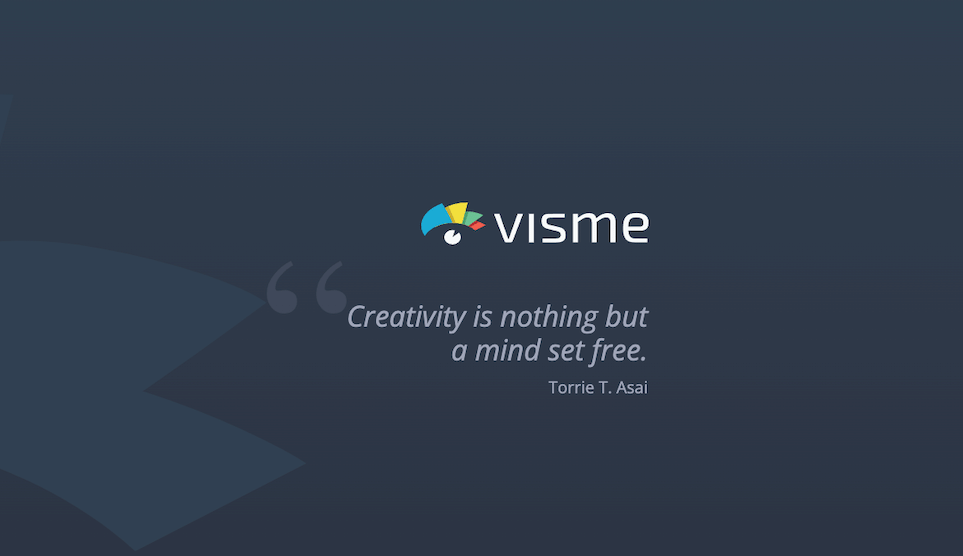
One thing I personally don’t like about the Visme interface is that every time you start working on a design, it shows you an inspirational quote. This makes things feel a little bit sluggish. (I’m a bit cynical when it comes to inspirational quotes, too!).
And speaking of working on designs, let’s explore how both tools let you get started on doing that — with a look at their design templates.
Templates
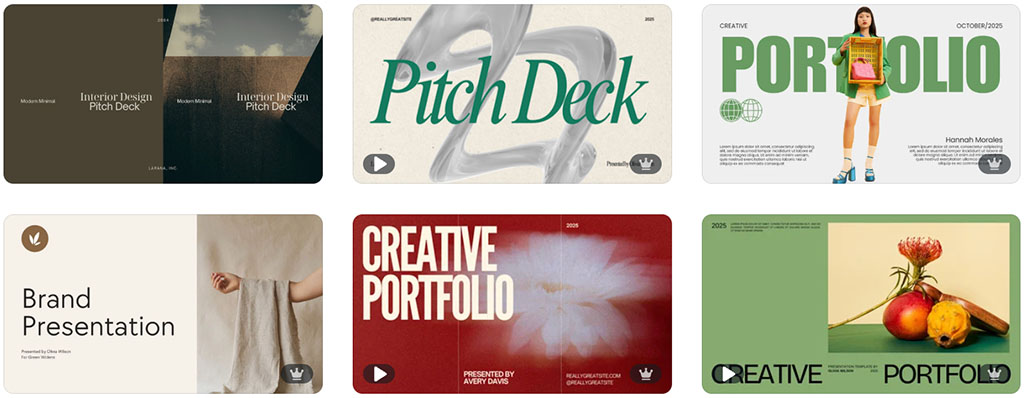
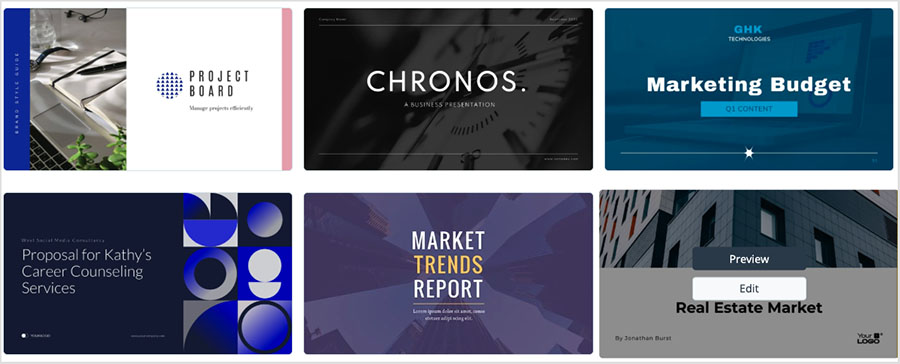
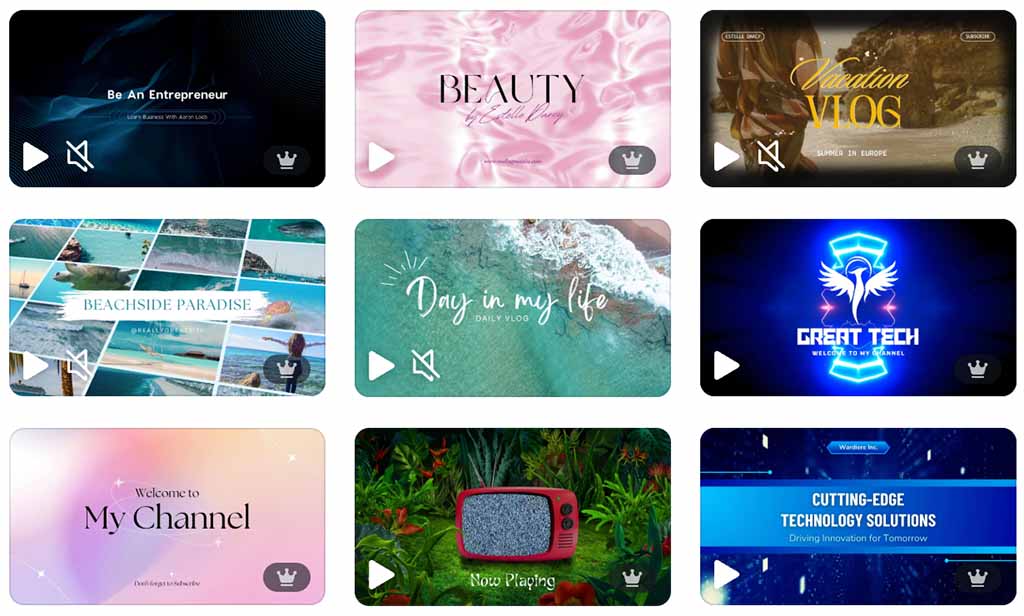
Templates are the starting point for any design in Visme and Canva, and both tools offer a wide range of them to choose from.
However, with Canva, you get access to a lot more of them: 1.6+ million on its free plan, and 3.6+ million on its paid-for plans. These are produced by Canva’s design team as well as external designers belonging to Canva’s ‘Template Creators’ program.
Visme gives you just over 14,000 — all of which are created by Visme’s in-house design team.
Whether or not you need millions of templates is, of course, debatable — sometimes so much choice can be a bit paralyzing. But some users will appreciate the bigger quantity of templates that Canva brings to the table.
In terms of quality, it’s hard to fault either Canva or Visme in this department — both platforms’ offerings are extremely varied and strong, and you should be able to use either platform’s templates as a really professional starting point for a project.
One thing I’d say is that based on browsing both tools’ selections, the Visme templates struck me as being a little bit more ‘corporate’ in tone than the Canva ones — I felt that the Canva design aesthetic was at times a little more playful.
But with such a large number of templates on offer from both platforms, it’s hard to make a definitive statement on that, and you can definitely find both business-like and quirky templates in both platforms.
Stock photography
One of the main reasons to use a tool like Visme or Canva is to get access to a large library of royalty-free photos. In a lot of cases, the cost of one stock image from Getty or a similar stock photo company can exceed the monthly fee charged by either tool.
Both platforms give you a lot of choice on the photography front. On the Canva free plan, you get access to over 4.7+ million royalty-free multimedia assets (images, graphics, videos and audio); this increases to a massive 141+ million on a paid-for plan.
(It’s not clear how many of these assets are photos as opposed to videos, however).
Visme’s free plan provides limited access to its photo library, which includes over 5 million images, as well as limited access to its video and audio library with more than 2 million assets. On its paid plans, you gain full access to the complete photo library and video/audio library, and other stock assets (animations, icons and so on).
You shouldn’t struggle to find premium images with either tool, but overall, Visme seems to offer more choice when it comes to photos.
And speaking of photos…
Photo editing
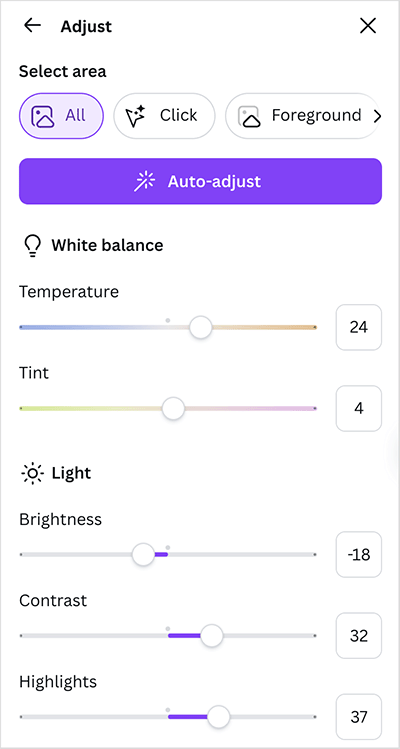
Once you’ve added a photo to Canva or Visme — either from their stock photo libraries, or by uploading one of your own — you can access a range of simple editing tools that let you customize your images.
Both Visme and Canva’s photo editors let you do the basics easily: adjust brightness, contrast, crop, flip, rotate etc. And they also give you access to a range of Instagram-style filters that you can apply to your images.
Once you’ve applied a style to an image, both tools make it easy to copy that and apply it to another picture, thanks to appropriately-named ‘copy style’ tools.

Image background removal is possible too, but only if you are on a premium plan.

There are a couple of image editing tasks that Visme arguably lets you perform more easily, however: color overlays, frame adding and replacing photos.
Let’s look at these.
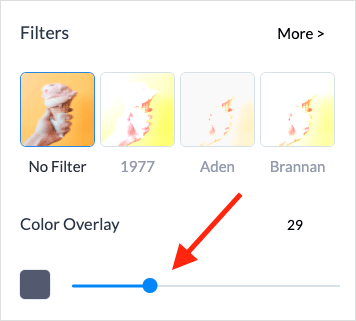
Color overlays
Visme makes it easier than Canva to overlay colors on images — a simple ‘overlay’ tool lets you apply an overlay with an opacity of your choosing. But to do the same in Canva, you’ll need to add a shape on top of your photograph and adjust the its color and opacity settings.
Frame adding
Another imaging editing feature that Visme provides slightly easier access to a frame-adding tool, which you can use to crop your images into a variety of shapes quickly and easily.
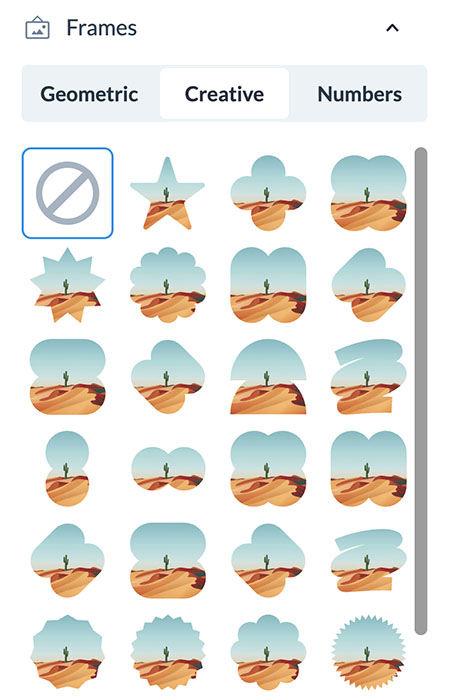
That’s not to say however, that you can’t do the same thing in Canva — it just involves a different process. You need to pick a frame separately from its elements section, then locate a picture, and then drag it into your frame. (And the number of frame designs on offer from Canva, it should be said, is a lot bigger).
Neither method is strictly ‘right or wrong,’ but as with applying a color overlay to an image, some people may appreciate the more ‘immediate’ approach offered by Visme here.
Replacing photos
If you want to change a photo you’re using in your design, Visme has a nifty feature that you won’t find in Canva: an AI-powered image suggestion tool.
You access this by selecting the photo you want to change, and clicking the ‘Replace’ command at the top of the Visme interface.
Visme’s ‘Suggested by AI’ tool then provides you with a range of alternative stock images to choose from based on the photo you are replacing and the context of that image on your design canvas.
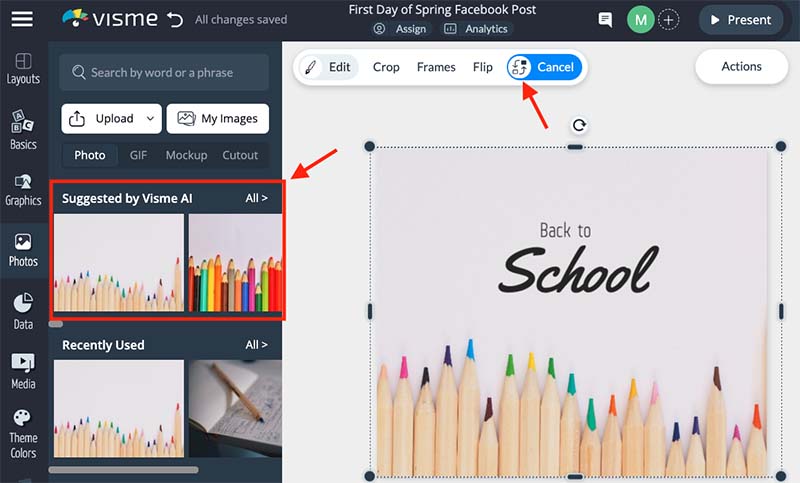
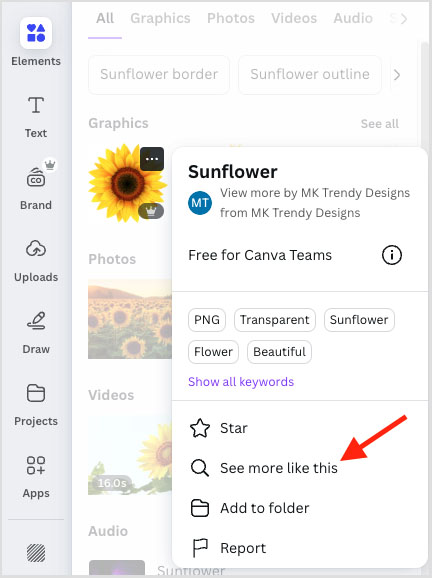
While Canva does let you explore similar photos via a ‘See more like this’ option on most of its stock photos, not every photo in Canva’s library gives you this option, and it’s not as easy to access as Visme’s ‘Suggested by AI’ tool.
Can you use Visme and Canva for free?
Both Visme and Canva provide users with free plans that can be used indefinitely. However, while the Visme free plan just represents a way to try the platform out, the Canva equivalent is a genuinely free and highly-functional version of the app that can be used to generate professional results for as long as you like.
With Visme’s free plan, you get access to its design editor along with a limited set of ready-made templates. This plan lets you share your designs online, but unfortunately, it doesn’t let you download any of your design files (and any designs you make on this plan feature an intrusive ‘Made with Visme’ label too).
By contrast, Canva’s free plan is a much more usable option — it gives you full export functionality, all designs are free of Canva branding, and it provides you with quite a few of Canva’s AI-powered ‘Magic Studio’ tools too.
Additionally, Canva provides free plans to non-profits and educational groups; Visme just provides them with discounts.
You can find out more about the difference between Canva Pro and Canva Free here, try the Visme free plan here, or learn more about the Canva free trial here.
Limited time offer: a 30-day free trial of Canva Pro
For a limited time only, Canva has made a 30-day free trial of Canva Pro available. This gives you extensive and extended access to all its stock images, videos, graphics and templates as well as its entire range of design tools.
Storage space
In addition to giving you access to online images and videos, Visme and Canva both let you upload your own assets to their platforms.
However, Canva is considerably more generous when it comes to cloud storage. Even its free plan gives you 5GB of space for your photos, videos and audio files. This rises to 100GB on the Pro plan, 500GB on the Business plan, and a very substantial 1TB per user on the Enterprise plan.
The Visme storage limits aren’t great by comparison: you get just 500MB on its free plan, 1GB on its ‘Starter’ plan and 5GB on its ‘Pro plan.’ And on its ‘Enterprise’ plan, the limit is just 25GB, which pales in comparison to the equivalent 1TB per user limit from Canva.
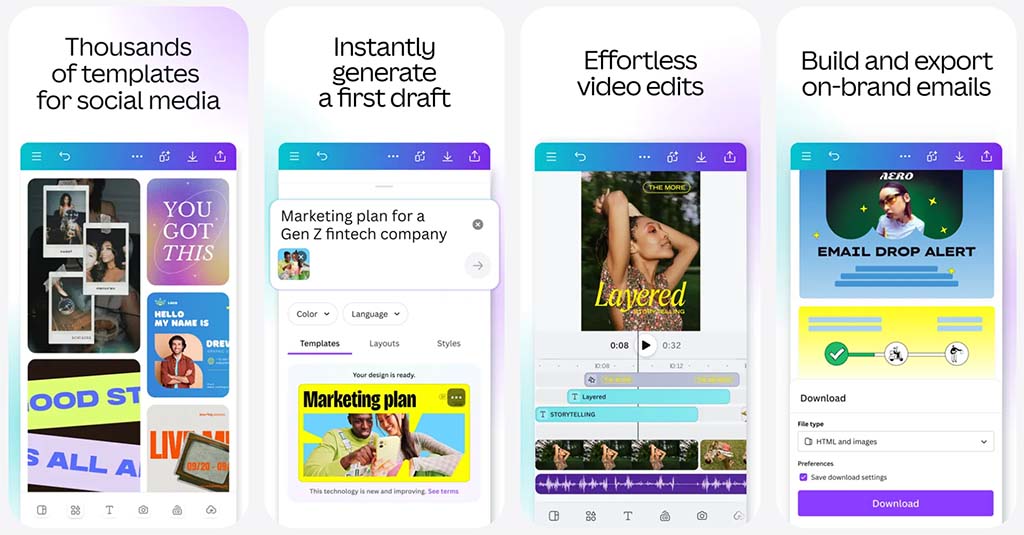
Creating videos with Canva and Visme
In addition to letting you create ‘static’ designs, both Canva and Visme let you create and edit videos too. The process works in a similar way to designing ‘static’ content — you pick a template, tweak it, and add clips to your video as necessary.
Both tools make it easy to populate your video template and move clips around a timeline, and in recent updates the gap between them has narrowed.
Canva uses a fully horizontal timeline that will feel instantly familiar to anyone who has worked with conventional video-editing software such as iMovie, Final Cut Pro, or Adobe Premiere. Clips, audio, and effects are all arranged visually across a single timeline, making it very easy to see how your video fits together and to fine-tune timing.
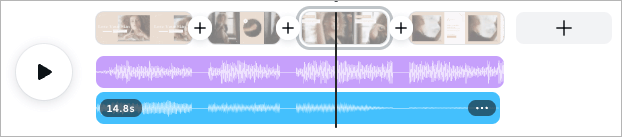
Visme’s video editor used to rely heavily on a slide-style, vertical sequencing system, which I previously found quite clunky for video work. However, this has now been significantly improved: Visme offers a proper horizontal timeline and allows full playback of your video sequence directly in the editor, bringing it much closer to Canva’s approach and making it far more usable for video projects.
That said, despite these improvements, Canva’s video editor still feels more polished and responsive overall. In my experience, it’s slightly faster to work in, more intuitive, and better suited to users who want to produce videos quickly without friction.
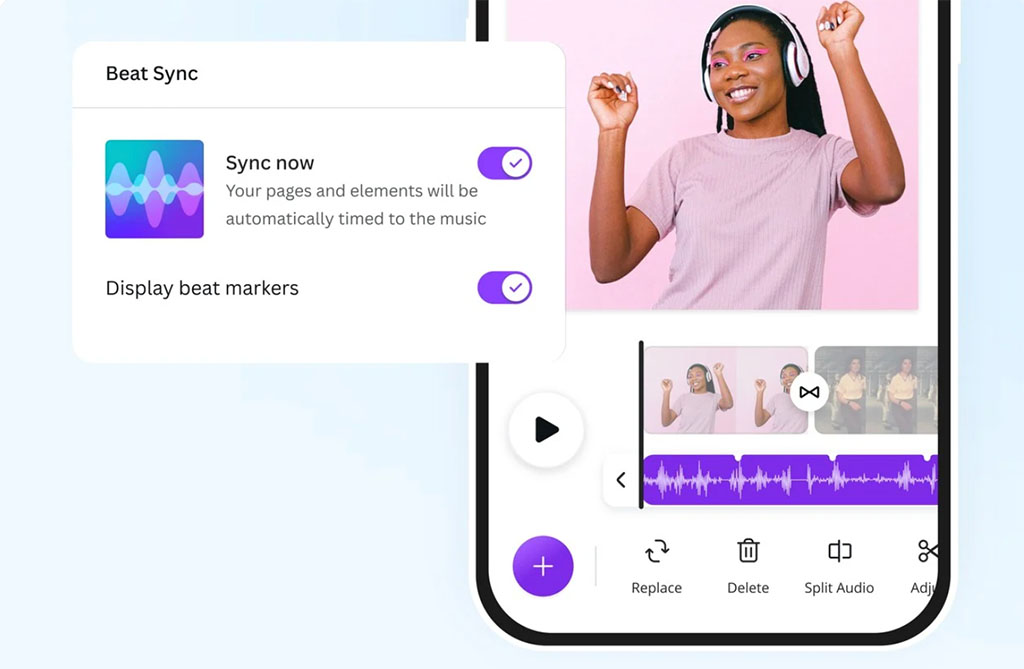
Canva also offers a few standout video features that Visme currently lacks or handles less elegantly — such as Beat Sync, which automatically cuts visuals to match the rhythm of your music, and Highlights, which helps you quickly identify and emphasize key moments in a video. Canva has also recently expanded its video toolset with background removal for video clips, allowing you to strip out backgrounds without leaving the editor.
So while Visme has clearly made meaningful progress with its video timeline and playback experience, Canva still edges ahead when it comes to ease of use, responsiveness, and overall video-editing features — making the overall winner for video creation Canva.
Web design
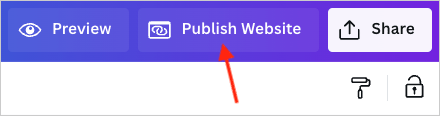
On the surface, Canva seems to have an edge over Visme in that it provides a dedicated web building tool and Visme doesn’t.
You should note however that only very basic websites can be created with this — you can build a one-page site ‘brochure’ site, but that’s about it. And, although the websites that you can make with Canva look very professional, you can forget about incorporating things like a complex navigation structure, ecommerce or a slick technical SEO setup into them.
Simply put, the sort of professional features that dedicated site builders like Wix or Shopify give you are currently missing from the tool.
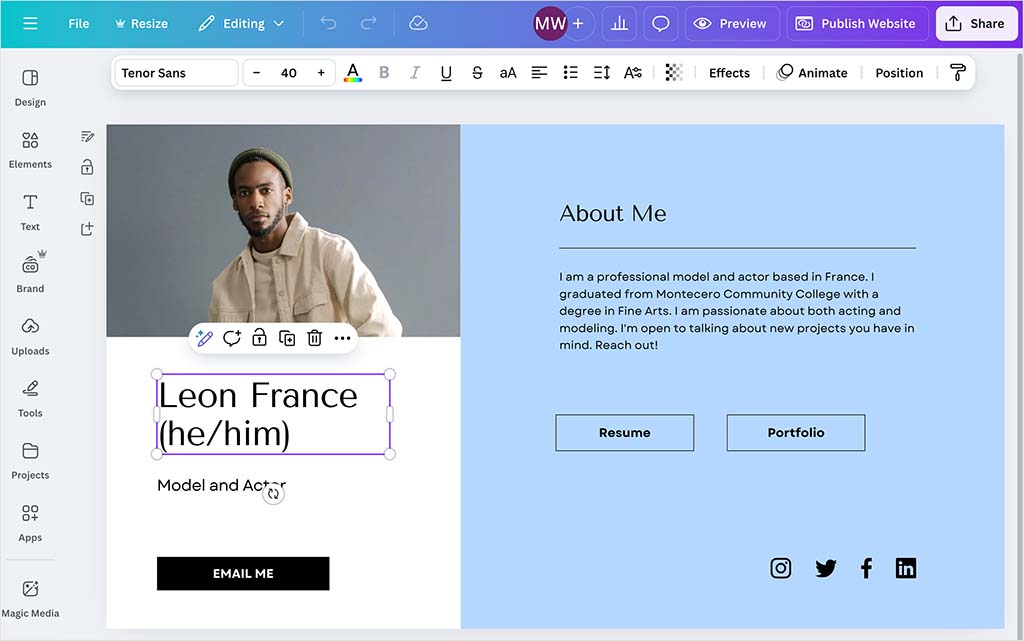
But that said, Canva’s site designer might be appropriate for some needs — if all you want is a basic resume site with some copy and a few pictures, it will do the job fine. And you can choose from over 3,300 Canva website templates to use as a starting point for your website design.
Once you’ve created your site in Canva, you can:
- publish it to a free Canva site address (yoursitename.my.canva.site)
- buy a new domain for it through Canva
- map it to a domain you already own (account administrators / owners only)
Now, as mentioned above, there isn’t an equivalent feature in Visme.
But, you can actually create web content with Visme too — by outputting your designs in HTML5 format. Essentially, this turns a design into a website, and gives you the files you need to upload it to a server.
This requires an awareness of how FTP (file transfer protocol) works and also some server space somewhere, but it nonetheless empowers you to use Visme as a web design tool too (and arguably in more sophisticated ways).
But for web design newbies, the built-in web design tool that Canva provides is the better bet.
AI tools in Canva and Visme
In recent months, both Canva and Visme have expanded their AI feature sets, adding tools that let users generate text, images, layouts, and other creative assets directly inside their editors. These updates have made both platforms much stronger all-in-one content creation tools, particularly for speeding up design workflows.
Both platforms’ AI writing tools are powered by OpenAI’s ChatGPT model, so the quality of generated text is broadly similar. The real differences lie in how the AI features are integrated and how much you’re allowed to use them.
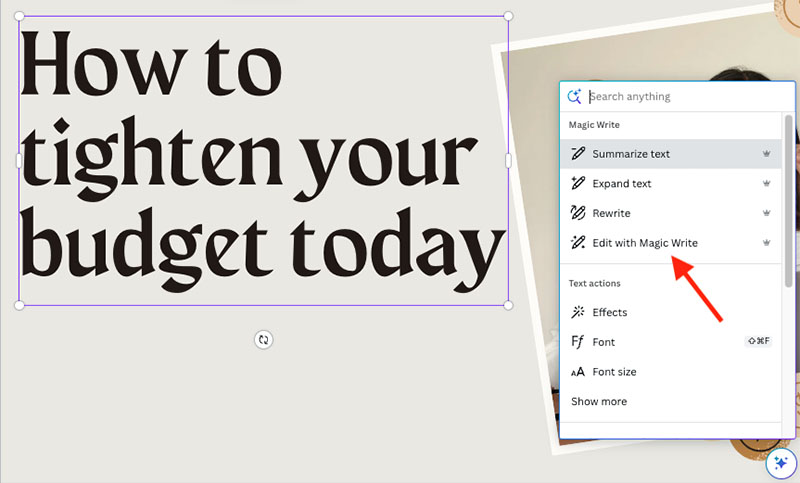
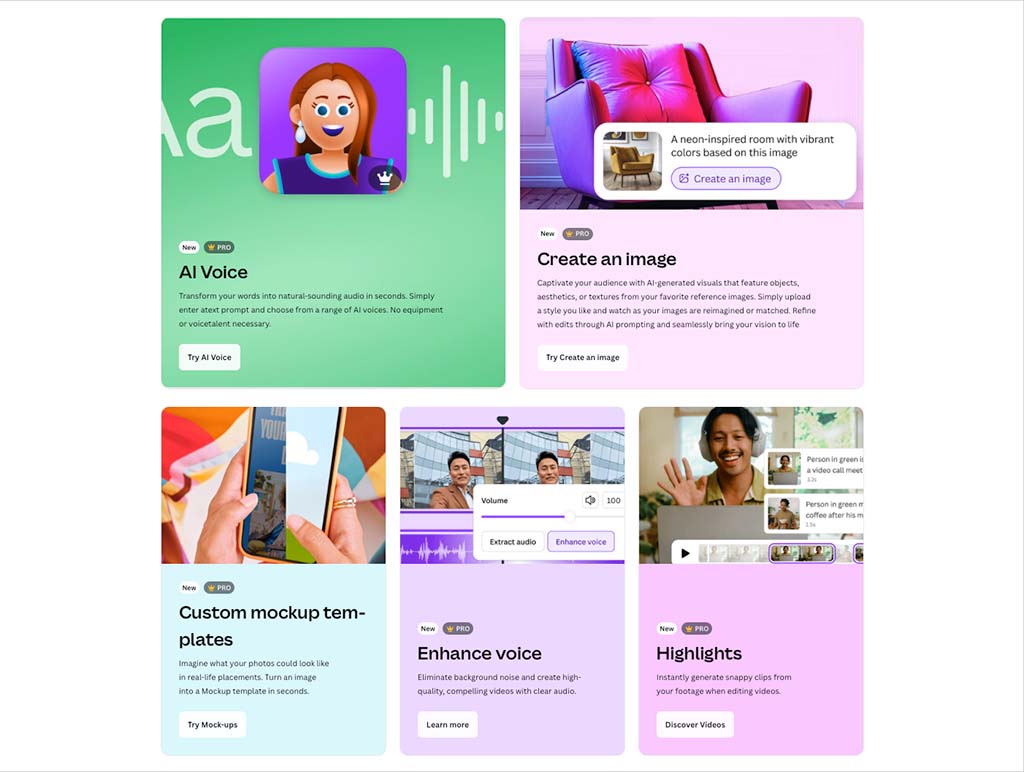
Canva groups its AI tools under its ‘Magic Studio’ branding and integrates them tightly into the editor. Text and image generation, background removal, layout creation, and even video enhancements are surfaced naturally as you work. Canva has also pushed further into AI-assisted video creation, with features such as Beat Sync, Highlights, and video background removal.
Visme’s AI tools are more clearly geared toward business outputs like presentations, reports, and infographics. They’re effective for structuring content quickly, but the experience feels more segmented and slightly less fluid than Canva’s.
Usage limits also favor Canva. All paid Canva plans include 500 monthly uses of Magic Write, while Visme’s $29 Starter plan includes 200 AI credits, with 500 credits only available on its $59 Pro plan.
Overall, while both platforms now offer capable AI tools built on similar technology, Canva has the edge thanks to better integration, stronger video AI features, and more generous allowances on lower-priced plans.
Data capture forms — still a Visme USP?
Both Canva and Visme now include online form makers, but Visme’s remains the more fully featured option, offering greater control over form fields, data management, and integrations.
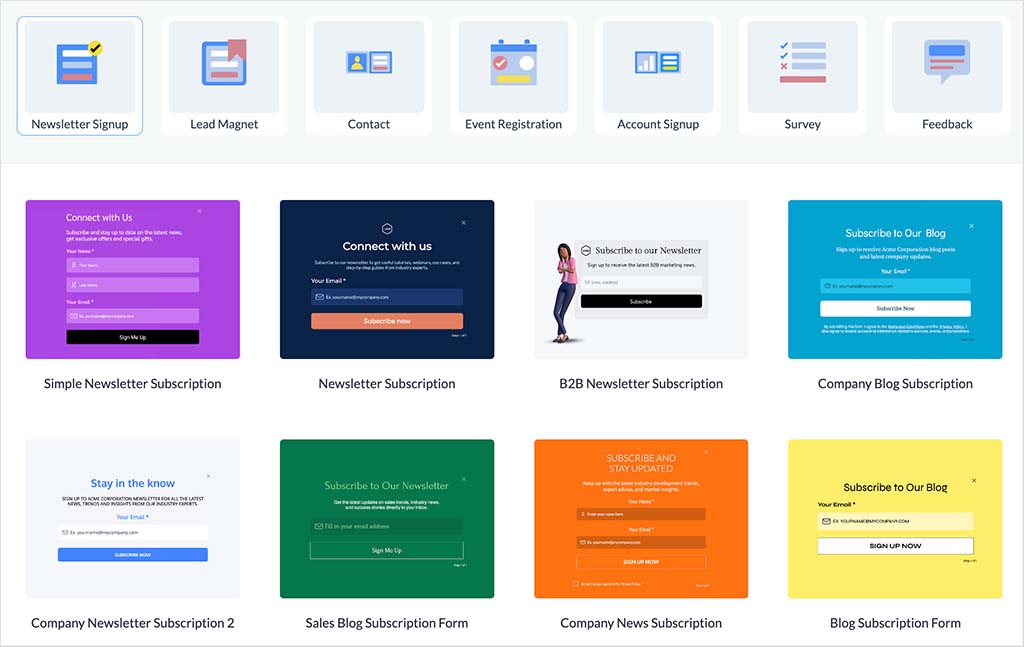
The Visme form builder facilitates the creation of a wide range of form types, including newsletter signup forms, lead magnets, contact forms, event registration forms and more.
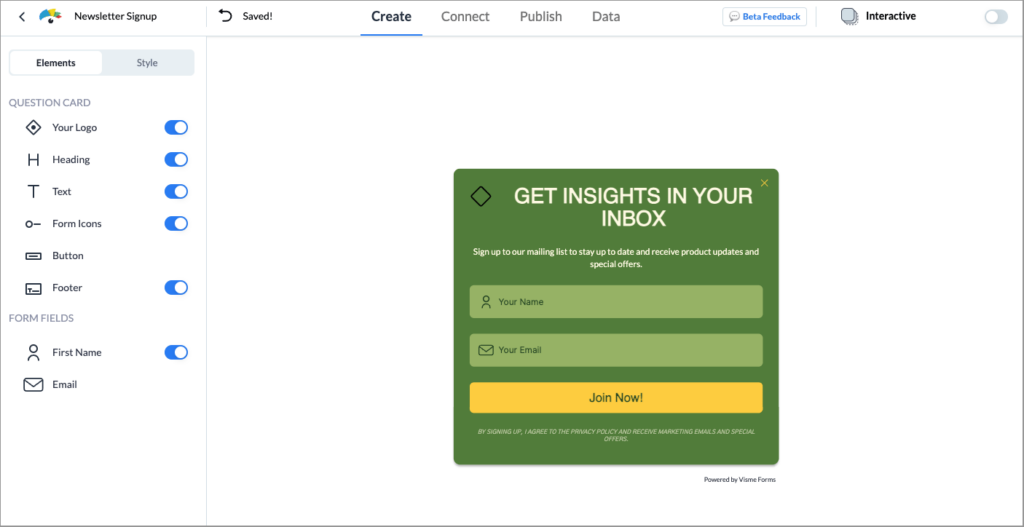
Using this feature is very straightforward — a simple ‘elements’ editor lets you add logos, headings, texts and fields easily, and style controls are provided that enable you to change colors, typefaces etc.
Forms you create can be embedded on your website in pop-up, sidebar or in-body format; alternatively, they can be shared via a link. The data captured can be stored within Visme, or sent to a variety of popular email marketing and productivity tools, including Mailchimp, ActiveCampaign, HubSpot and Google Sheets.
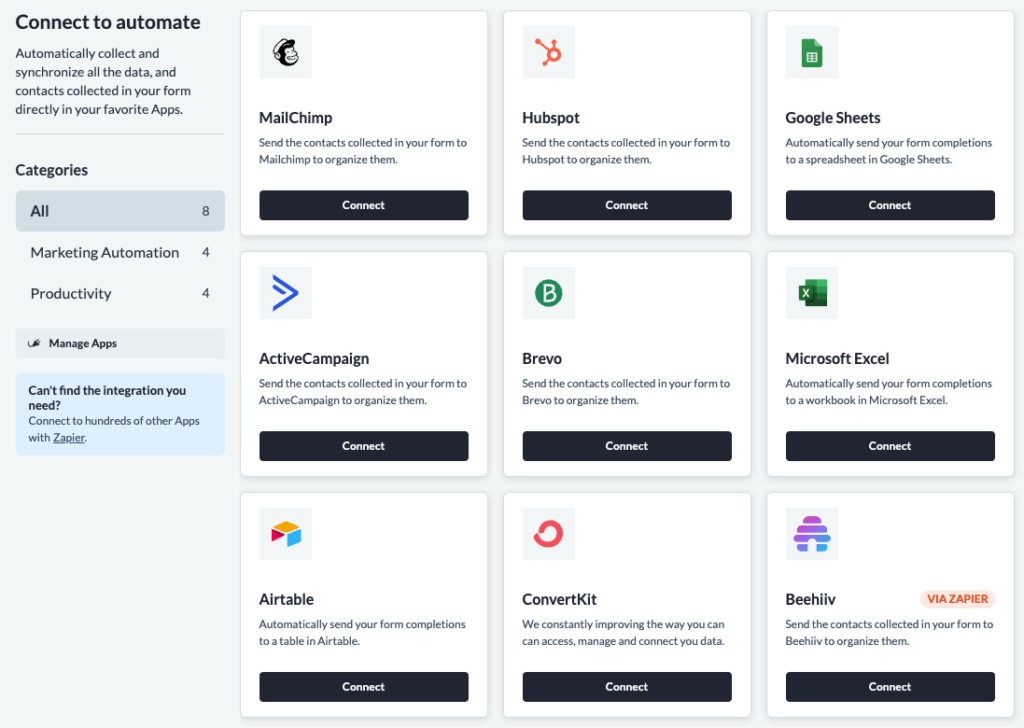
(If your preferred data capture system is not catered for, there’s the option of using Zapier to connect it to Visme.)
Now, you’ve probably come across a lot of similar form-building tools previously — and in fact, if you use an email marketing app, you’ve probably already got access to this sort of functionality. So what makes Visme forms different?
The answer lies in the animations you can add to them. Visme has done a lot of research into conversion rates, to see what sort of form layout generates the most signups — and their studies reveal that interactive forms involving animated characters are likely to perform best. According to their data, using these types of animated forms can lead to an increase in conversion rates of up to 40% and a reduction in cost per acquisition (CPA) of up to 28%.
Accordingly, Visme has placed customizable, animated characters at the heart of their new form building feature — you can design your own characters and make them perform in various ways beside your sign up form (everything from moonwalking to weightlifting is catered for).
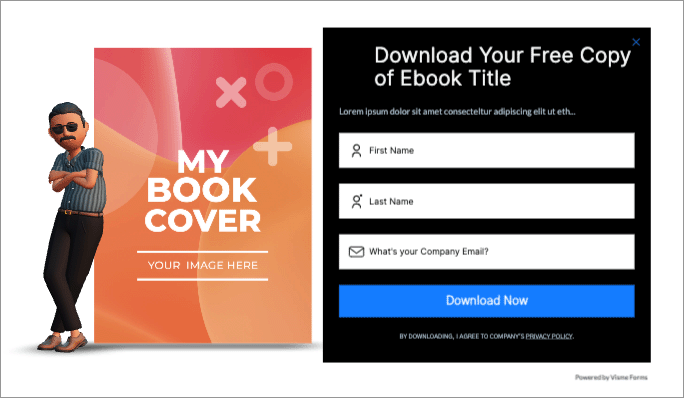
When creating a character, you can choose its sex, color, clothes, actions and even facial hair.
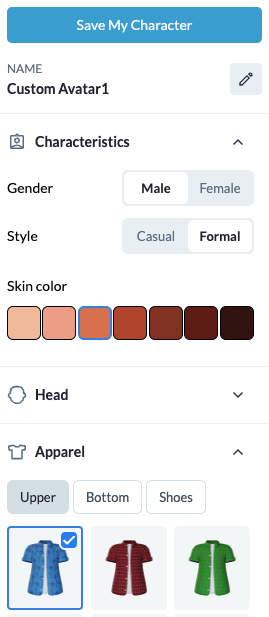
Now, it has to be said that these dancing, weightlifting and yawning characters won’t be for every brand. But helpfully, Visme users who don’t want to feature these sort of animations in their data capture process can simply switch the characters off (and create regular sign-up forms instead).
Either way, Visme’s new form-building feature is a really useful addition to its toolkit.
But I did have one key concern about it, and that was how the forms created with the tool would be treated by Google. The company is on the record as saying that aggresive use of ‘interstitial popups’ on a website can damage its search rankings.
I spoke to Visme’s team about this and they highlighted the fact that the forms have an ‘SEO-friendly mode,’ where they are only triggered after 50% of a page has been viewed, or when a user tries to leave it (by hovering over the back button or browser address bar).
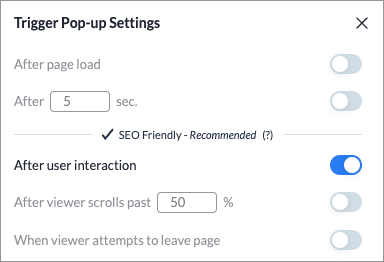
According to Visme’s research, this prevents Core Web Vital scores (Google’s metrics for site speed and stability) being negatively affected. This is very welcome news, as a lot of popup forms can wreak havoc on CWV.
But whether or not this SEO mode will meet Google’s requirements that popup forms remain unobtrusive is moot — at the end of the day, whilst noticeable, fun and elegant, Visme forms are ultimately intrusive (which is kind of the point!).
Overall though, the feature is great and looks set to get better; if you’re comfortable with pop-ups, you’ll find this a really useful addition to your design toolkit that may boost your lead generation rates.
In terms of what Canva offers on this front, it has now introduced its own built-in form maker, letting you create basic sign-up, feedback or contact forms directly within the platform. The feature integrates neatly with Canva’s editor, so you can design forms using your usual fonts, colors and logos — and keep everything on-brand without leaving the workspace.
At present, Canva Forms focuses on straightforward data capture rather than advanced form logic or automation. It lacks the deeper customization options, animated elements and conversion-focused features that make Visme’s tool stand out. However, it does support connections to apps like Google Sheets, Mailchimp and HubSpot via Canva’s app directory, which will cover most simple marketing needs.
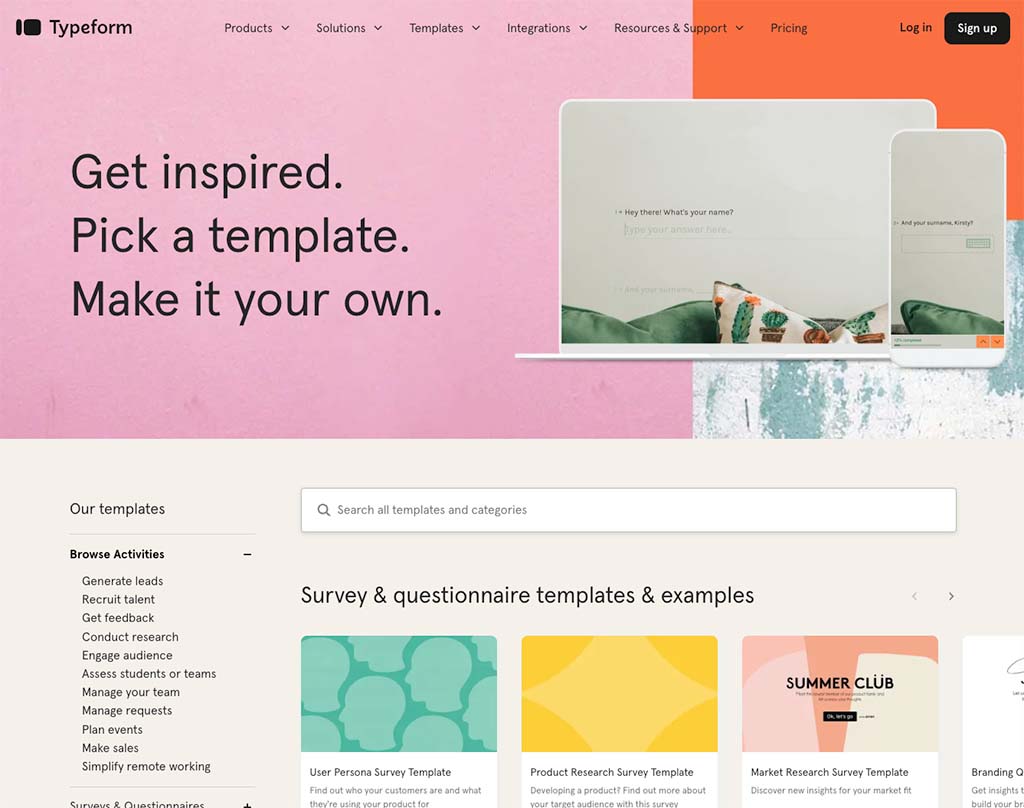
You can also integrate the TypeForm package with Canva in various ways. This brings with it an additional set of costs though — costs that are likely to end up exceeding those of your Canva subscription. And, unlike Visme Forms, the templates that TypeForm provides are not character animation based (meaning, that if Visme’s calculations are correct, you’ll lose out on the superior conversion rates).
So ultimately, when it comes to form building and data capture, I’d give the win to Visme.
Update: Visme’s animated characters can now be used across the full range of Visme design formats.
Ensuring brand consistency
So far, we’ve looked at a lot of the things that you can create with Visme and Canva.
However, whatever the type of creation involved, there’s one key thing that it usually needs to adhere to: brand guidelines.
This is especially important when tools like Visme and Canva, which are in many ways aimed at non-professional designers, are being used — and thankfully, both give you access to features that help ensure brand consistency.
In the case of Canva, brand issues are handled via its ‘brand kit’ tool, and in Visme, by its ‘My Brand’ equivalent.
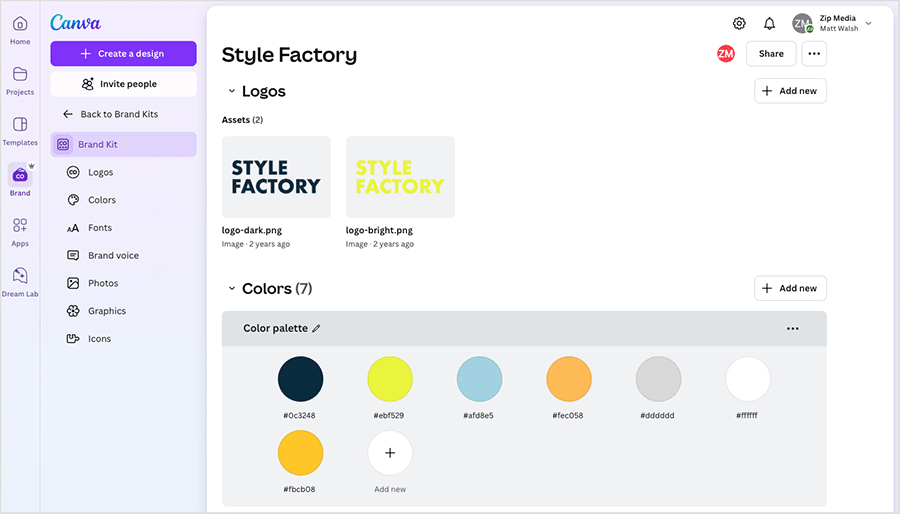
Both let you add/define:
- your own logo
- your own fonts
- your own color palette
Once these are in either system, you can then apply them as necessary to your designs.
(In Canva, you can also add some extra assets to your brandkit, namely brand photos, brand graphics and brand icons).
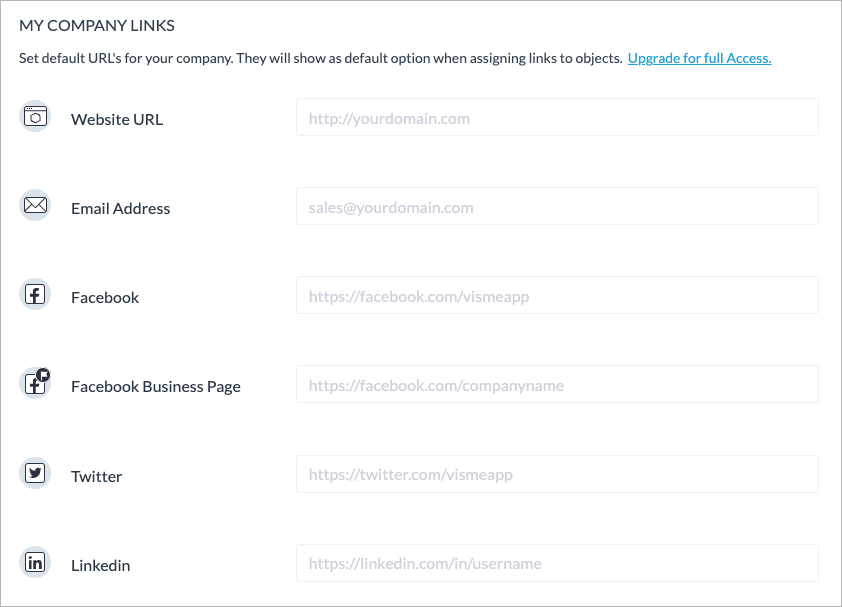
Visme has a slight edge in the brandkit department, however, because it also lets you add a bunch of ‘brand links’ to proceedings — website addresses, Facebook URLs, phone numbers etc. These can be applied automatically to any materials you create.
It should be noted however that in both platforms, the brand kit tools aren’t available on the free plans.
In fact, with Visme, you need to be on the $59 per month ‘Pro’ plan to access the brand kit feature.
Canva, by contrast, lets you create 1 brand kit on its free plan, 5 on Pro, 100 on Business and up to 1,000 on Enterprise — making it far more generous than Visme in this regard.
Organizing work and collaboration
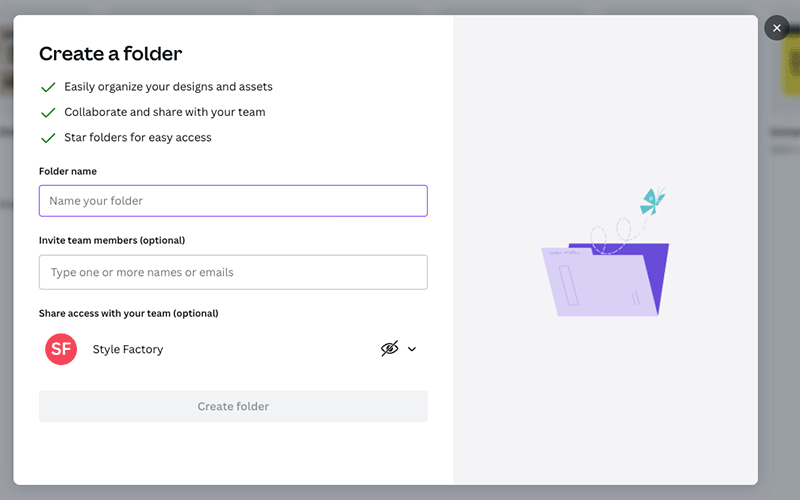
Organizing your work in Canva is straightforward. A simple folder structure, which you’ll find in Canva’s ‘Your projects’ section, lets you create folders that house your designs.
If you’re on a ‘Canva Business’ plan, these folders can be shared with team members, who can work on any designs that the folders contain (different permissions apply — users can view, edit or comment on designs depending on their access rights).
This all works in a similar way to Dropbox and other file sharing services — you simply share a folder with somebody by entering their email address into the folder’s settings.
The ‘Canva Business’ plan also gives you ‘workspaces’ where you can drop designs, folders and templates, as well as add members to your team (and create sub-groups within your team).
As previously mentioned, pricing for Canva Business costs $20 per team member per month.
Visme’s file sharing setup works in a similar way — you can create shared folders and use workflow management tools. But you should note that folders can only be used on the ‘Pro’ plan, which costs a hefty $59 per month (if paid for monthly; $24.75 annually), and workflow / edit rights management tools are only available on the ‘Enterprise’ plan (pricing for which is negotiable).
So all in all, the much better value option here is Canva.
Printed products
Canva and Visme are both undeniably great for creating visual assets for use in a digital context: they let you come up with pretty stunning designs, and quickly too.
But what about designing stuff that gets printed?
Well, on premium versions of both tools, you can download any design in PDF format (among others which I discuss shortly) — and printers can definitely work with those.
But both tools also give you a range of templates that are specifically geared towards printed material (brochures, menus, flyers etc.).
In Visme, you can see all these in its ‘Printables’ section.
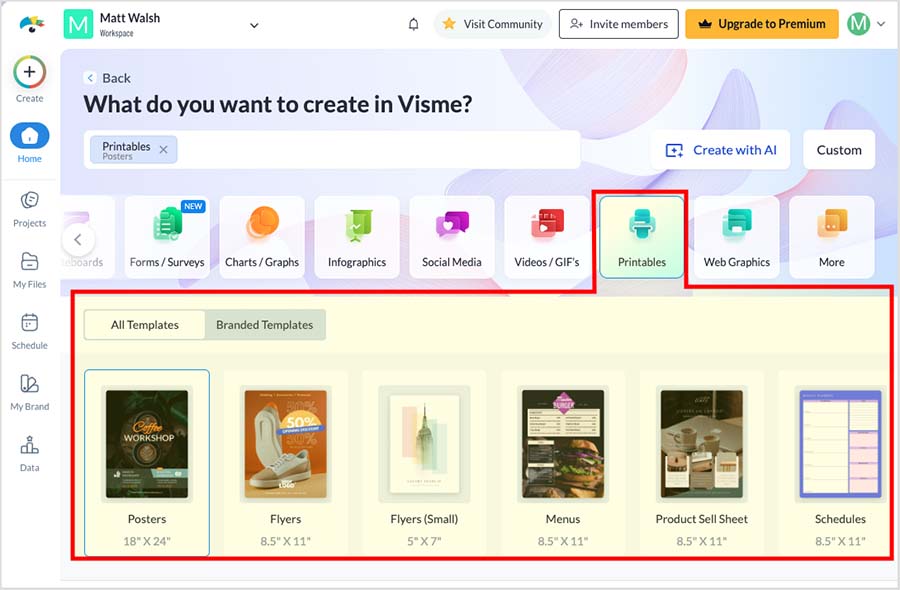
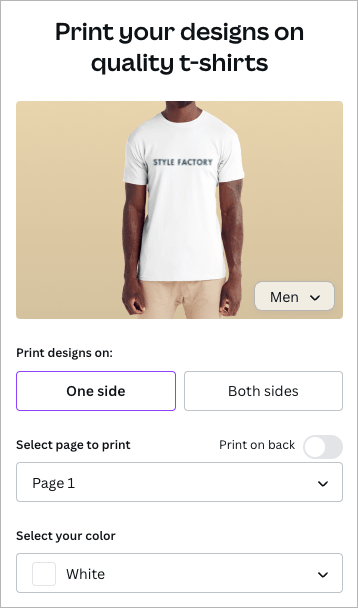
Canva goes one better however, by actually acting as your printer. If you go to its ‘Printed products’ section, you can choose a template, edit it and then click a ‘Print’ button to get your design professionally printed.
This makes Canva an ideal tool for manufacturing things like business cards, invitations and flyers without the need for any third-party printing or manufacturing companies getting involved.
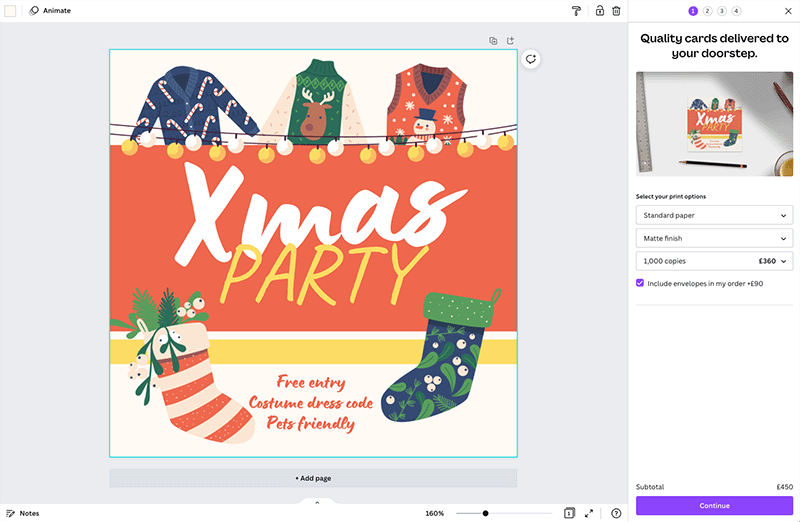
(We’re not necessarily talking about items that you print on paper or card — it’s possible to manufacture a range of other items with Canva too, like tote bags, t-shirts, hoodies and mugs. There are 60+ types of print products in total, and according to Canva, these are all ethically produced).
Additionally, when you use Canva as your printer you can avail of a so-called ‘happiness guarantee’ — which means that if you’re not satisfied with your product, Canva will reprint it for you free of charge.
Additionally, North American users can avail of in-store pickup for some Canva print orders — via FedEx office stores in the US and Staples stores in Canada.
However, you should note that:
- you may be able to get a local printing company or manufacturer to produce your items more cheaply
- limits apply to the number of copies of items you can print with Canva in one go (especially where clothing items are concerned).
But nonetheless, the option to get Canva to print your items is a great one to have, and there isn’t currently a similar feature available from Visme.
Try Canva Pro for free – for 30 days
For a limited time, Canva is currently making a 30-day free trial of Canva Pro available to Style Factory readers. This gives you full access to all the Canva Pro features and assets for several weeks, and lets you export all your designs too.
Apps and integrations
Like a lot of other SaaS (software as a service) products, Canva and Visme both offer a range of apps that add functionality or provide integrations with other popular services.
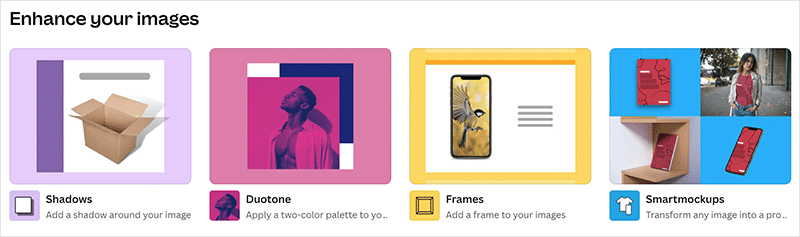
In Canva, you’ll find these in its ‘app directory,’ pictured below.
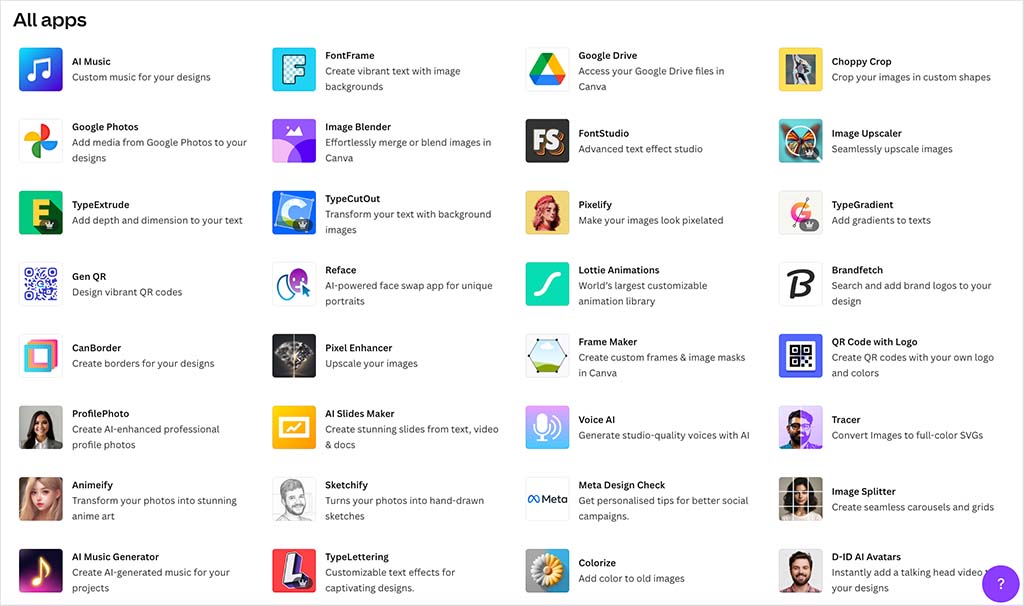
Many of the apps on offer from Canva are to do with adding special effects to your images, or retouching them, but there are also some handy apps available for putting your images inside device frames (i.e., inside an iPhone, on a tablet etc.), or creating product mockups using them.
The Canva integrations help you import images or videos from other apps into the tool. For example, you can connect your Canva account to services like Google Photos, YouTube, Facebook and Google Maps, and incorporate content from those into your designs.
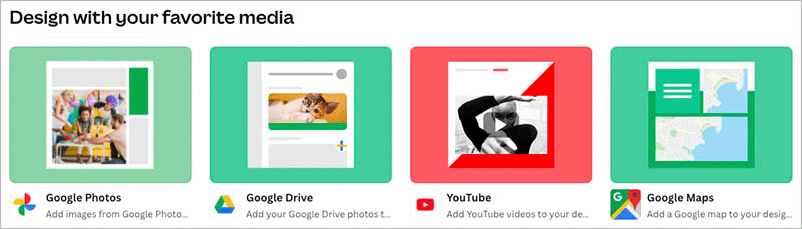
You can also connect Canva to productivity tools like Slack and OneDrive, or email marketing tools like Mailchimp and Constant Contact.
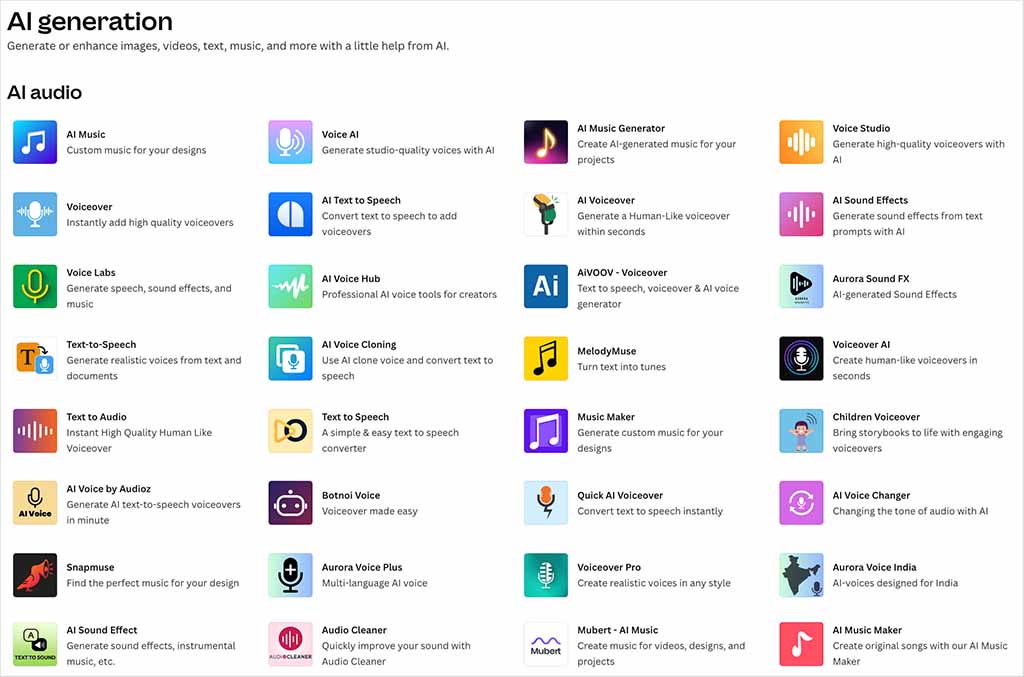
Canva’s app directory also features a growing number of AI-powered apps. These include image generation apps, apps for adding AI presenters and voiceovers to your videos, and apps that generate original music from your prompts.
There are also some apps and integrations available for Visme — but these are far fewer in number (24 to Canva’s 900+ ).
And, whereas the Canva apps provide a mix of additional features plus integrations with third-party tools, the Visme ones are really only about integrations, and mainly to do with getting content in and out of other services — tools like YouTube, Vimeo, Wistia, Dropbox, Google Drive etc.
So when it comes to apps and integrations, the winner is again Canva.
Exporting your designs
When you’ve completed a design in Visme or Canva, it’s time to share it!
To do this, you don’t technically need to export anything — both platforms give you ‘share’ links that let other people view your creation online.
But there are plenty of occasions when you’ll definitely need to export your designs into various formats.
To this end, Visme lets you export your projects into:
- JPG
- PNG
- GIF
- MP4
- XLIFF
- PPTX (PowerPoint)
- HTML5 (web page format)
Canva offers the following output formats:
- JPG
- PNG
- GIF
- SVG
- PPTX
- MP4
Looking at the two lists above, you can see that if you want to convert a project into a website, Visme has an edge: it lets you output to HTML5 format whereas Canva doesn’t.
As discussed earlier, the HTML5 export option technically lets you create web content with Visme — but it also makes your designs more suitable for offline use: for example, you could save professional presentations to your laptop in HTML format, which you could then display on a projector without any need for a WiFi connection.
Canva is a better bet for users who need to export their designs as vector graphics however, thanks to its SVG export option.
(Incidentally, it would be good to see both tools let you output your designs into some other visual formats too — a key example being Adobe Photoshop or Illustrator files, which would let you or a professional designer edit your work in Adobe Photoshop or Illustrator respectively. It is possible to do this in Adobe Express and Photoshop. You can read more about these design tools in our full Adobe Express vs Canva comparison and our detailed Canva vs Photoshop review.)
There’s another aspect of exporting in Canva that’s worth flagging up as a key benefit of the tool — its ‘Resize & Magic Switch’ tool, which lets you ‘repurpose’ existing designs for different platforms really easily. You can take an existing design, and then use the tool to automatically reformat it to suit different social media platforms or other formats.
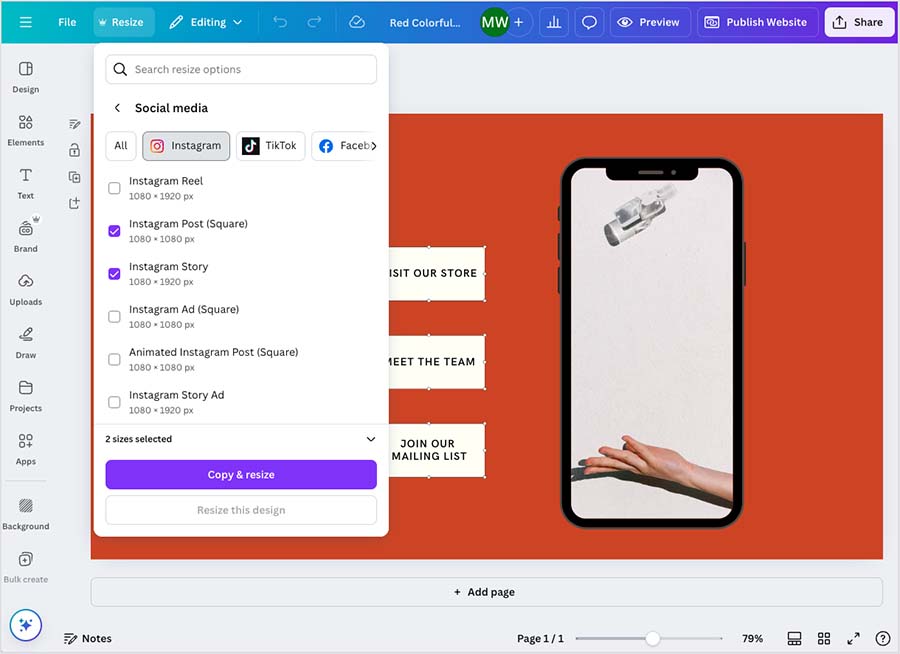
In other words, you can take a particular design and, by using the Magic Switch tool, convert it into a Facebook post, an Instagram post, a blog post banner, a presentation etc., and output everything at once.
In addition to resizing your designs for different formats, ‘Resize & Magic Switch’ also lets you translate the text content of your designs into multiple languages, making it very useful for repurposing designs for different local markets.
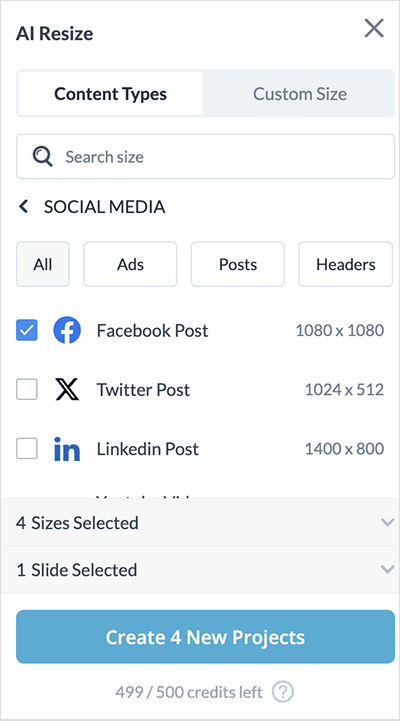
Now to be fair, Visme lets you repurpose content fairly easily too — you can use its new ‘AI Resize’ feature to change a design’s dimensions and convert it to a different aspect ratio or make bulk changes / exports. However, unlike Canva’s ‘Magic Resize’ tool mentioned above, Visme’s ‘AI Resize’ feature doesn’t have any translation or localization features for adapting your designs to different markets or language regions.
(Additionally, Visme users are limited to 500 uses of the ‘AI Resize’ tool per month, while Canva’s ‘Magic Switch’ tool can be used as often as you like.)
Finally, the biggest difference between Visme and Canva when it comes to download options is the fact that Canva lets you export your designs on its free plan, whereas with Visme, you have to be on a paid-for one — and an expensive paid-for one if you want to avail of all the available export formats.
Canva does place some restrictions on export formats on its free plan: you can’t use compression tools, output PNGs with transparent backgrounds or download your work in SVG format. But you still get access to a lot of download options for free — and if you want more, you’re looking at a fairly low fee: $15 per month.
By contrast with Visme, you only get access to the full range of output options on its $59 per month ‘Pro’ plan.
So overall, unless you need to export your work in HTML5 format, the better-value option when it comes to exporting designs is unquestionably Canva.
Mobile apps
Both Canva and Visme provide iOS and Android mobile apps for editing your designs on the go.
User reviews of the Canva app are very positive — it scores 4.9 stars out of 5 in both the Apple app store and the Google Play store.
The two versions of Visme’s mobile app are also popular with users — it has a current score of 4.6 and 4.4 stars out of 5 in the Apple and Google app stores respectively.
I tested the iOS Canva and Visme apps and found them both extremely easy to use — and while I would always be inclined to use a desktop version of either product to do any ‘serious’ design work, both apps were great for designing on the go.

You can take a photo, import it into either app, add a bit of text and have a fantastic looking social post ready to publish in seconds.
Customer support
When it comes to the sort of customer service you can avail of, Visme has the edge. It provides more support channels — email and live chat, to Canva’s email-only service — and faster turnaround times too.
With Canva, how long you’ll wait for a reply to a help ticket will depend on the type of plan you’re on. The turnaround times for each plan are listed as follows:
- Canva Pro – within 24 hours
- Canva Business – within 24 hours
- Print — within 24 hours
- Nonprofit and Education – within 48 hours
- Canva Free – 1 week
Because Visme offers live chat, you can be fairly confident of a faster response. (When I addressed some queries to the Visme help team, the responses were instantaneous).
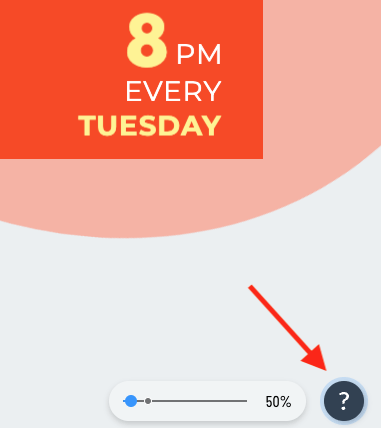
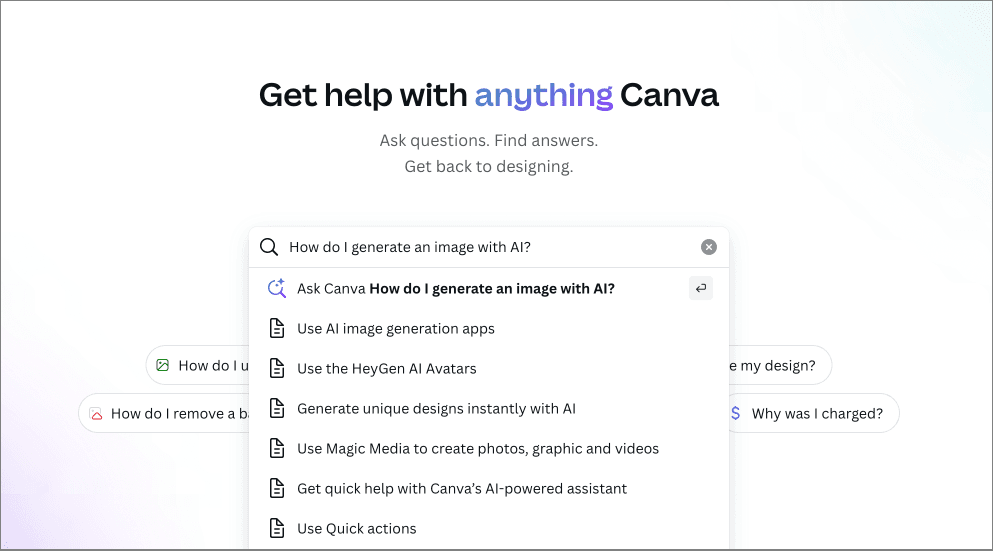
Both platforms make it very easy to access contextual support within their design interfaces — question mark icons at the bottom right of both designers allow you to quickly locate relevant help materials or seek further support.
(Canva’s contextual support is provided by an AI chatbot, whereas Visme’s comes from a real-life support team).
Finally, both tools provide you with a wide range of support materials via searchable online help portals.
User reviews
Up to now, I’ve shared my take on the main features, pricing, and usability of both platforms — but it’s also helpful to see how users rate their experiences on key review sites like G2, TrustRadius, Capterra, and SourceForge.
| User site reviews | Visme | Canva |
| G2 | 4.5/5 (460 reviews) | 4.7/5 (6,607 reviews) |
| TrustRadius | 8.8/10 (19 reviews) | 9.1/10 (2,007 reviews) |
| Capterra | 4.5 (718 reviews) | 4.7/5 (13,138 reviews) |
| SourceForge | 4/5 (8 reviews) | 4.5/5 (90 reviews) |
| Average score (out of 5) | 4.4 | 4.7 |
As you can see, Canva enjoys a higher average user rating of 4.7/5 compared to 4.4/5 for Visme, and it has been reviewed by far more users overall — giving its results greater weight.
Visme vs Canva: conclusion
Visme and Canva are both extremely useful tools for anybody who needs to create visual content but who doesn’t have a budget to spend on graphic designers. For a relatively modest fee, both tools give you access to a huge range of royalty-free images and videos, and design tools that let you create quite stunning results with them. But because of its fully-functional free plan, its stronger feature set and above all its more competitive pricing, Canva is definitely the winner in this contest.
Unlike Visme’s free plan, which doesn’t let you export your work or even share designs online, Canva’s free plan is feature-packed and lets you create, share and download your designs.
Canva’s better video editing interface, web design builder, mobile app offering, Magic Switch tool and significantly wider range of templates give it a clear advantage in the features department.
But it’s Canva’s value-for-money that is ultimately its main selling point: for just $60 per month in total, 3 users can enjoy all of Canva’s premium features and assets. By comparison, if paying monthly, the total Visme cost for three users is $119 every month (on the ‘Pro team of 3’ plan). This significant extra cost could be justifiable if the Visme feature set was considerably stronger — but it isn’t.
Visme does have a couple of advantages over Canva: it lets you export your work to HTML5 format, its brand kit feature is more comprehensive and it offers more support channels to its customers.
But overall, out of the two content creation tools under discussion, the champion is Canva.
I’ll leave you with a summary of the key pros and cons of both tools; and if you have any questions about Canva vs Visme, do pop them in the comments — we read them all and will do our best to help.
Visme vs Canva — pros and cons summary
Advantages of using Canva over Visme
- Canva’s free plan lets you share and export your designs; Visme’s doesn’t.
- Canva premium plans are priced much more competitively, are much more affordable for small businesses, and represent significantly better value for money overall.
- It offers a wider range of templates and comes with more features.
- Its video editing tool is much easier to use than Visme’s.
- Thanks to its ‘Resize & Magic Switch’ tool, Canva gives you more powerful features for repurposing existing designs.
- Canva lets you export your designs in SVG format; Visme doesn’t.
- A web design builder is available in Canva (albeit a very basic one).
- You can order printed products (business cards, invitations, t-shirts etc.) directly from the Canva interface.
- Significantly more apps and integrations are available for Canva.
Advantages of using Visme over Canva
- Visme comes with more powerful form-building and data capture features.
- It lets you output your work in HTML5 format; Canva doesn’t.
- The brand kit features in Visme are a bit stronger than Canva’s.
- Visme offers more support channels than Canva.
Update details
This article was updated on January 7, 2026. The following updates were made:
- The number of Canva users was updated.
- Product screenshots were updated.
- The quantity of apps available in the Canva app marketplace was updated.
- App scores for both platforms’ mobile apps were updated.
- The section on AI tools was expanded.
Comments (3)