We have a strict honest review policy, but please note that when you buy through our links, we may receive a commission. This is at no extra cost to you.
In this post, I’m going to show you how to connect Printful to WordPress. Read on to learn how to add the Printful plugin to your WordPress store, and how to sync your customized Printful print-on-demand products with it.
Article contents
- Create your Printful account
- Add WooCommerce to your WordPress account
- Install the Printful plugin on your WordPress account
- Configure your WordPress permalink and WooCommerce API
- Connect your WordPress / WooCommerce store to Printful
- Add your Printful products to WordPress
- Promote your Printful / WordPress store
1. Create your Printful account
Before you can start selling Printful products with WordPress, you’ll need a Printful account.
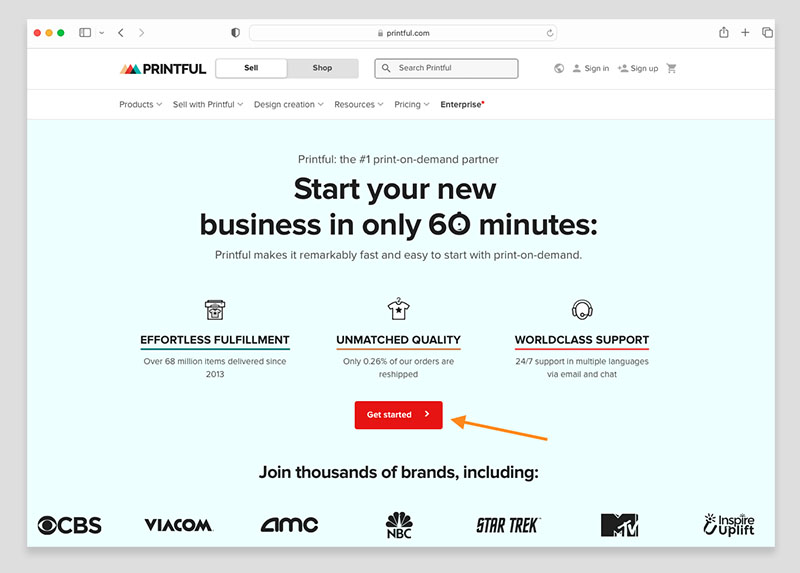
To get one, head over to the Printful homepage, where you’ll see a prominent red button that says ‘Get started.’ Click on this button.
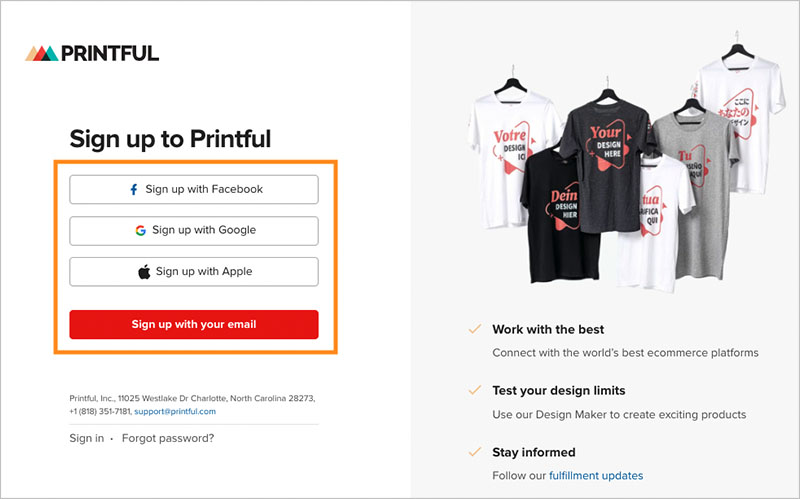
You’ll then be directed to the Printful sign-up page, where you can set up your account. You can sign up with your:
- Facebook account
- Google account
- Apple account
- Email account
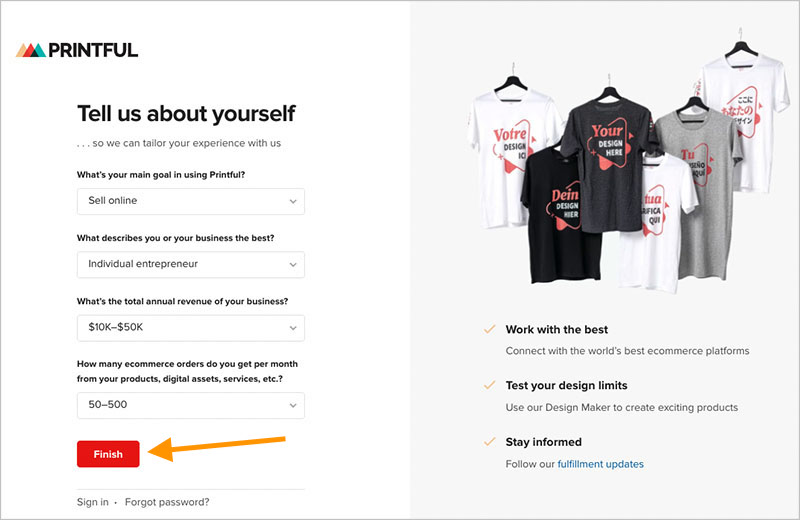
Once you’ve selected your preferred sign-up method and successfully registered your account, Printful will guide you through a few onboarding questions about your business and its objectives. Answer these questions, and when you’re done, click the ‘Finish’ button to complete the process and access your new Printful account.
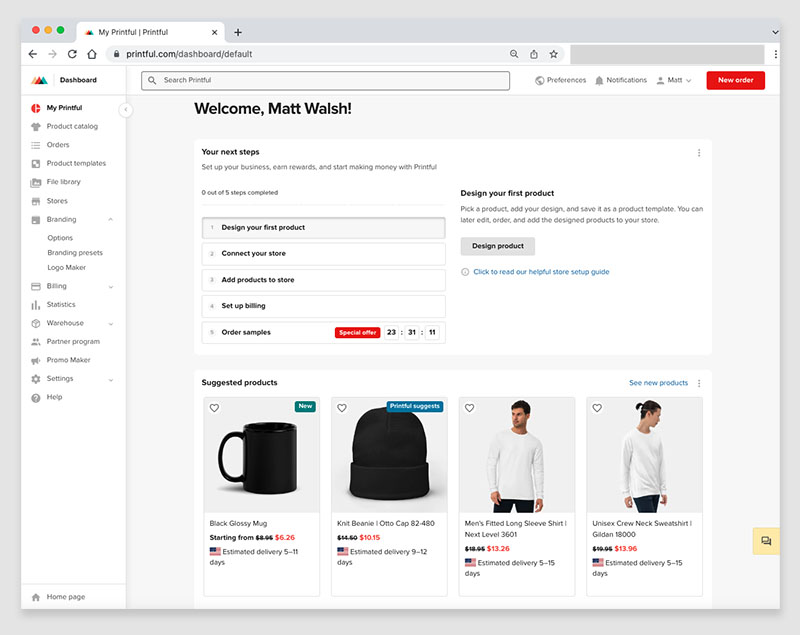
Upon logging in to Printful, you’ll find yourself in your account dashboard (pictured below). This dashboard serves as your central hub for managing essential Printful account tasks, like product design, order tracking, shipping management and promotion creation.
Now that your Printful account is up and running, the next step is to add ecommerce functionality to your WordPress account.
Let’s look at how to do that next.
2. Add the WooCommerce plugin to your WordPress account
Note: There are 2 versions of WordPress available:
- Hosted WordPress — a software as a service (SaaS) website builder available at wordpress.com).
- Self-hosted WordPress — a piece of software (downloadable from wordpress.org) that you install on your own web server.
(You can learn more about these 2 different versions of WordPress in our Shopify vs WordPress and Squarespace vs WordPress comparisons).
Below, I show you how to add WooCommerce to a self-hosted WordPress site.
To sell Printful products on your WordPress site, you’ll need to add the WooCommerce ecommerce plugin for WordPress.
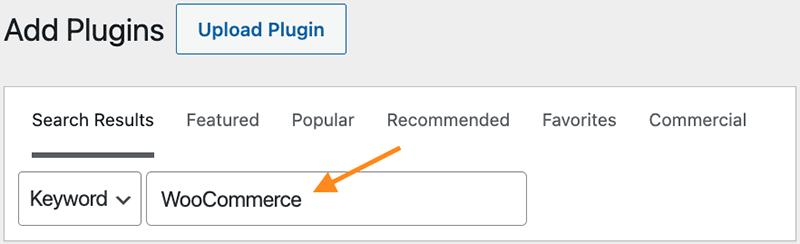
To add WooCommerce to WordPress, go to the ‘Plugins’ section in your WordPress dashboard and click ‘Add New’.
Then, enter ‘WooCommerce’ into the search box.
You will now see the WooCommerce plugin appear as the top result in your search query.
Click on the ‘Install Now’ button, followed by the ‘Activate’ button to add it to your WordPress account.

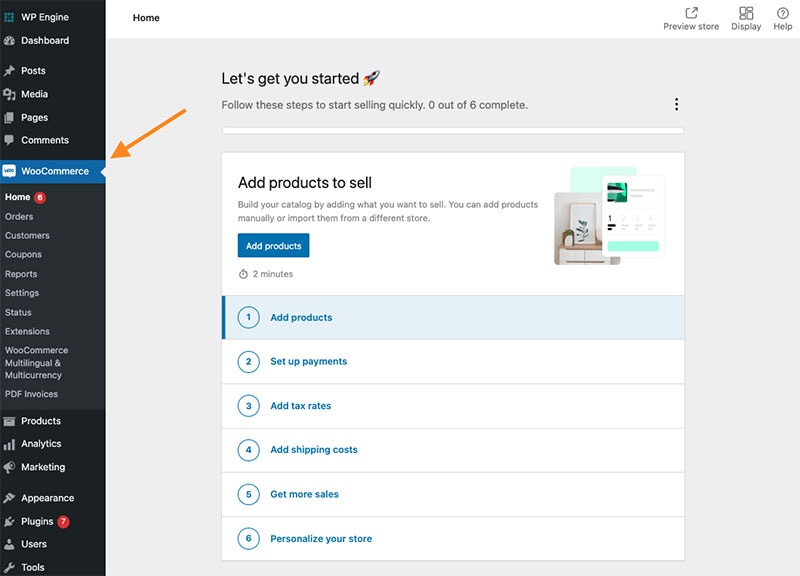
Once done, you’ll see a WooCommerce section in the WordPress menu on the left-hand side of your dashboard. When you click on this, you’ll be greeted by the ‘WooCommerce Setup Wizard.’
Just follow the steps provided to complete the WooCommerce setup process.
Tip: For more details on setting up WooCommerce on WordPress, read this guide in the WooCommerce help center.
Next, let’s add Printful to WordPress.
3. Install the Printful plugin on your WordPress account
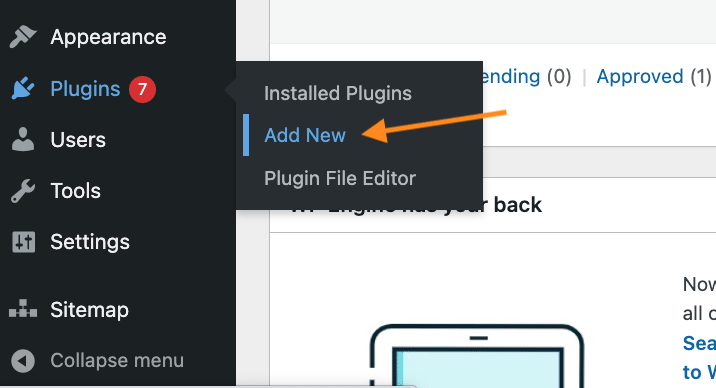
To add Printful to your WordPress account, hover your cursor over ‘Plugins’ in the side menu of your WordPress dashboard, and click ‘Add new’ in the pop up box that appears.
Then, enter ‘Printful’ into the search bar and hit return on your keyboard.
The ‘Printful Integration for WooCommerce’ will be shown as the top search result.
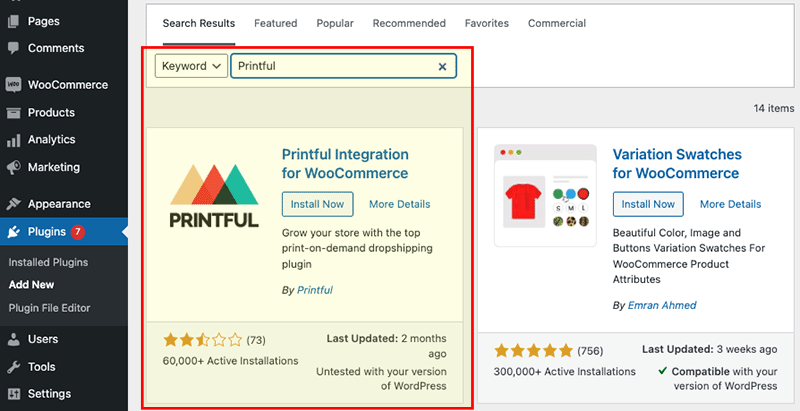
Click on the Printful plugin’s ‘Install Now’ button — this will add the Printful plugin’s code to your WordPress account.
Then, click on the ‘Activate’ button that appears beside the Printful app — as the button’s title suggests, this turns on the Printful app in your account.
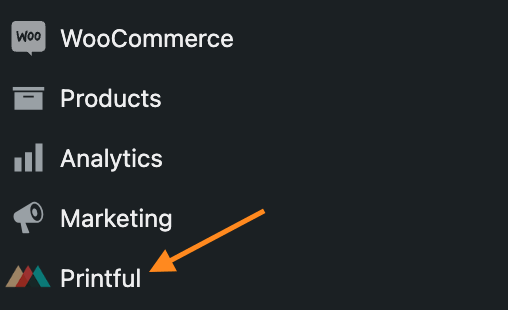
You’ll now see a Printful section on the left hand side of your WordPress dashboard.
There are just a few more quick tasks to complete before you can start adding Printful products to your WordPress store: configure your WordPress permalink and adjust your WooCommerce API settings.
But don’t worry! This setup process is not as scary as it sounds.
Let’s get to it…
4. Configure your WordPress permalink and WooCommerce API
When you click on the newly-installed Printful plugin in your WordPress account, you will probably see a ‘Connect to Printful’ message accompanied by 2 error messages (see screenshot below).
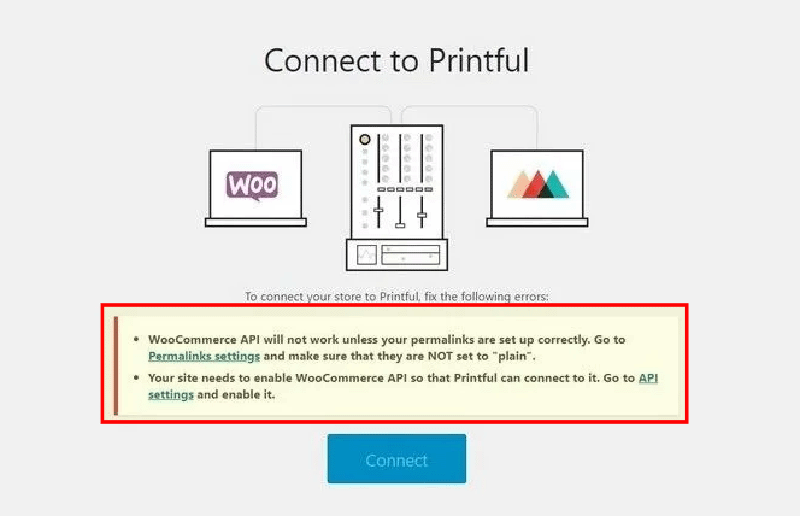
If you don’t see any error messages, you can skip ahead to the next step.
But if you do see them, you’ll need to adjust a few key settings in WordPress.
First, you’ll need to adjust your permalink settings…
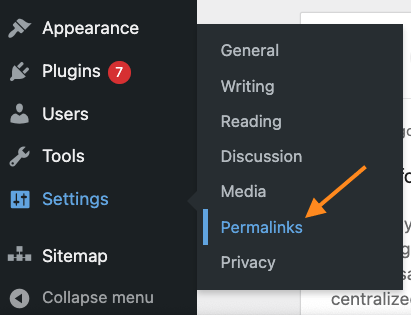
Configuring WordPress permalink settings
Permalink settings can be accessed via the link in the error message itself, or alternatively, you can get to them via Settings > Permalinks in your WordPress dashboard menu.
Scroll down the ‘Permalink Settings’ page, where you’ll see that your ‘Permalink structure’ is set to ‘Plain’. You will need to change this.

So, check the radio button beside one of the other options — it doesn’t really matter which one so long as it is no longer set to ‘Plain’.
For this example, let’s select ‘Post name’.
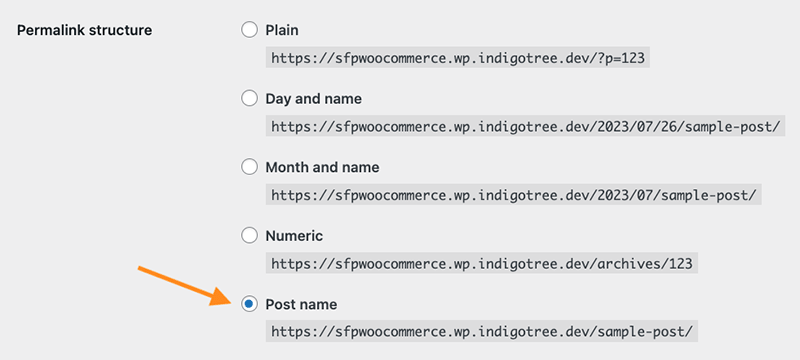
To apply these new settings to your WordPress account, scroll down to the bottom of the page and click ‘Save Changes’.
Then it’s time to adjust the WooCommerce API settings.
Configuring WooCommerce API settings
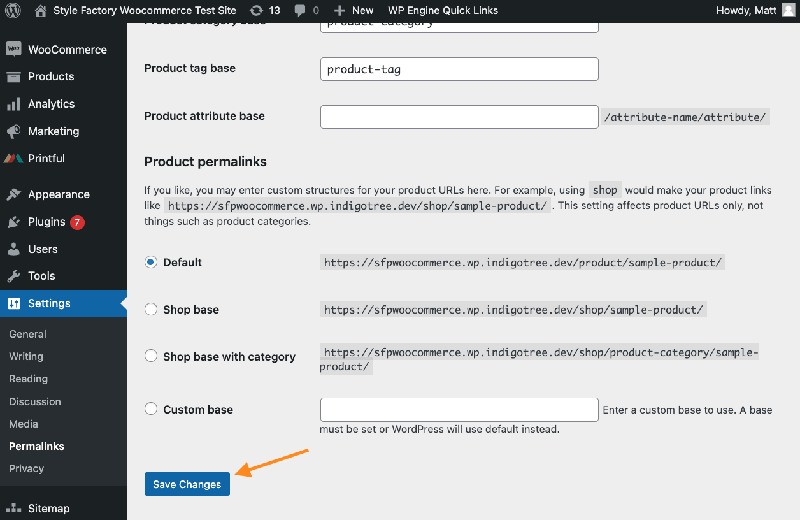
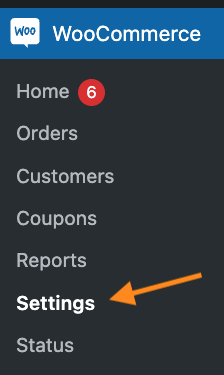
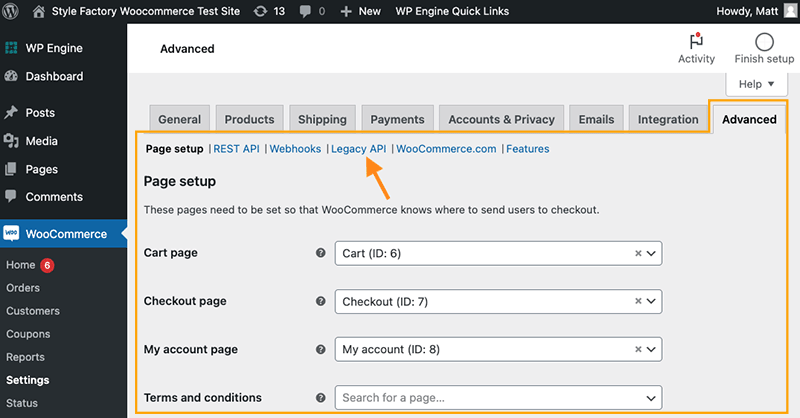
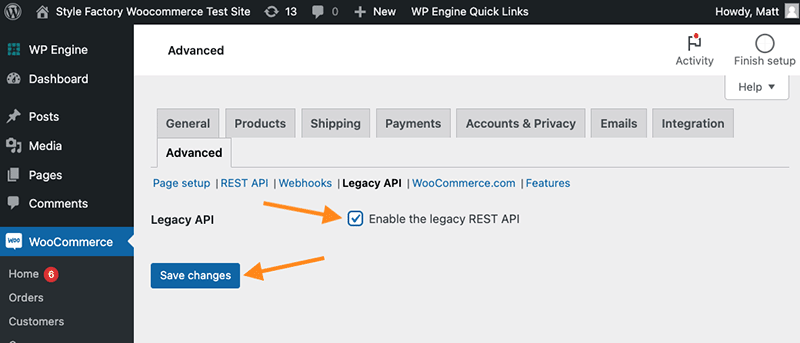
To change your WooCommerce API settings, click on the ‘API setting’ link in the error message (see above), or alternatively, navigate to WooCommerce > Settings in the WordPress dashboard menu.
On the WooCommerce settings page, select the ‘Advanced’ tab in the top right corner of the page, and then click the ‘Legacy API’ option (see screenshot below).
In the ‘Legacy API’ settings screen, select ‘Enable the legacy REST API’, followed by ‘Save Changes.’
With these changes applied to your WordPress permalink and WooCommerce API settings, you’ll now be able to complete your WordPress-Printful connection.
5. Connect your WordPress / WooCommerce store to Printful
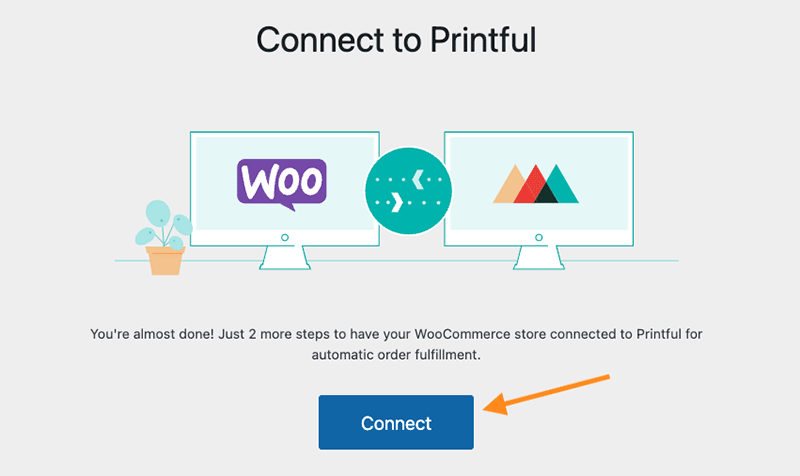
In your WordPress menu, click on the Printful option, and on the screen that appears, click the ‘Connect’ button.
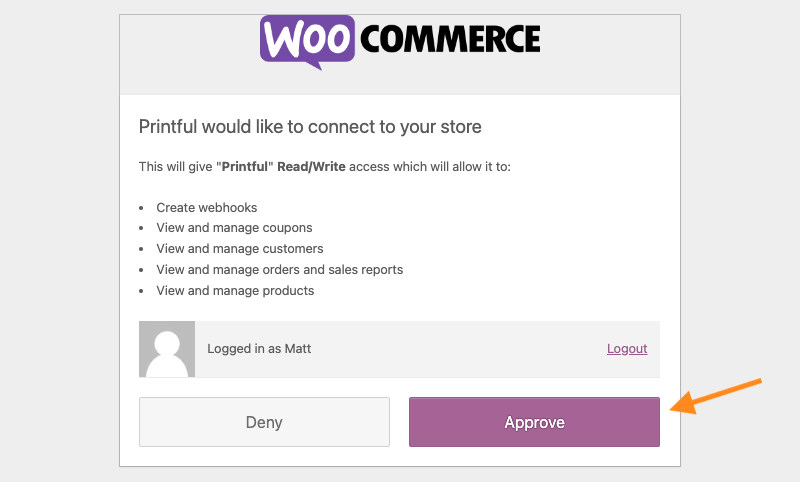
You will then be asked to approve the connection between WooCommerce and Printful. Click ‘Approve.’
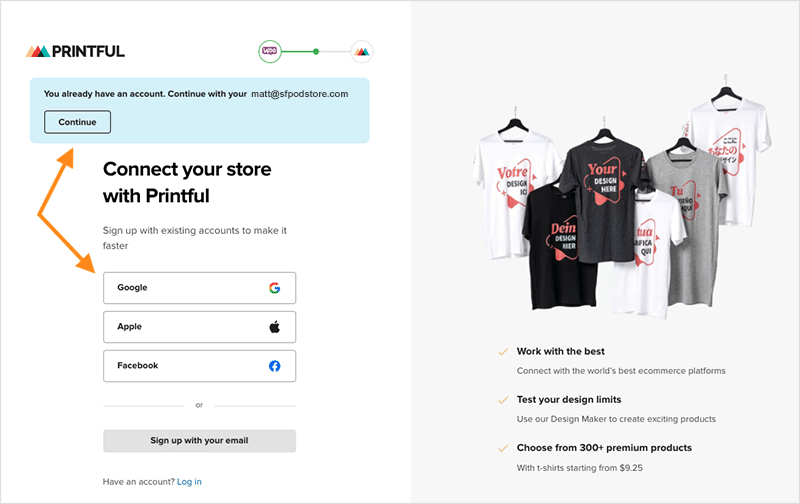
You will then be redirected to the Printful sign in page.
If the Printful system detects that you are using the same email address in your WordPress / WooCommerce store, you can just hit ‘continue’; if it doesn’t, simply log into your Printful account.
Printful will then ask you to confirm the connection between your WooCommerce and Printful accounts, which you do by clicking on the red confirmation button.
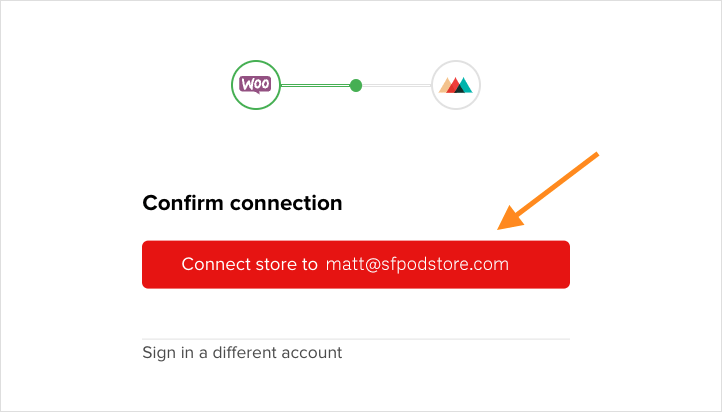
Congratulations. You have successfully connected Printful to your WordPress / WooCommerce store.
You’ll now be able to create custom products in Printful and add them easily to your WordPress / WooCommerce storefront.
So how do you add Printful products to WordPress?
While you’re here, download our free ecommerce e-kit
For a limited time, we’re offering our readers some excellent free tools. Sign up free to immediately receive:
- our e-book on how to start a Shopify store
- our online store comparison chart
- a downloadable cheatsheet on how to create an online store
- our SEO, blogging and ‘how to start a business’ cheatsheets
- extended free trials and discount codes for essential business apps
- our latest tips on ecommerce and growing a business
6. Add your Printful products to WordPress
Before you can add a Printful product to WordPress, you first need to create a product in Printful.
To do this, click on the ‘Start designing’ button in your Printful dashboard.
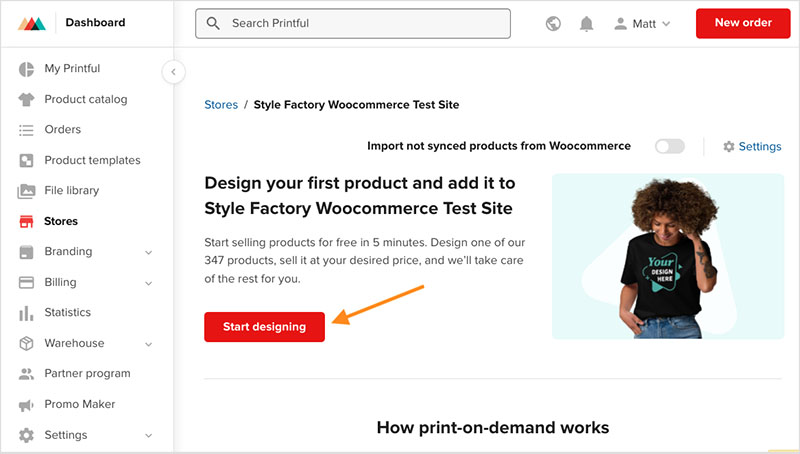
This takes you to Printful’s product catalog, which contains over 340 different printable products in several categories (these include ‘Men’s clothing,’ ‘Women’s clothing,’ ‘Hats,’ Home & living,’ ‘Eco-friendly products’ and more).
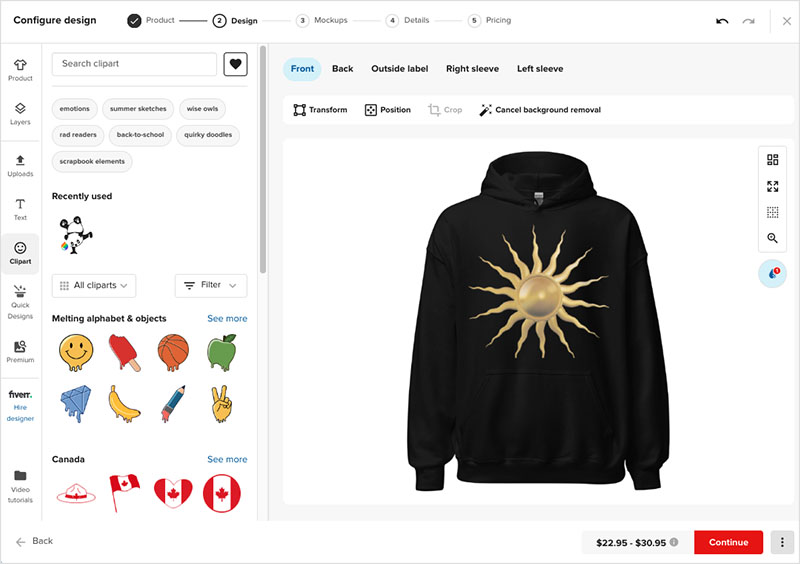
Select the product you want to add a design to by using the search box and filters provided, then click on it to start the customization process.
This takes you to Printful’s product designer feature — you use this to specify the printing technique (’embroidery,’ ‘all-over print,’ etc.), upload your artwork files, and apply an array of effects to your design.
(The designer also allows you to add custom labels to your products.)
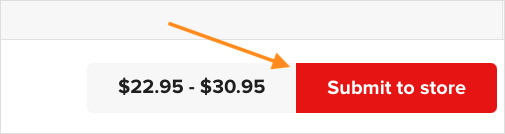
Once you’re happy with how your new product looks, Printful walks you through the key steps to completing a product listing before you add it to your WordPress / WooCommerce store.
These include:
- adding mock ups to your product
- adding a product description
- setting prices.
When you’ve gone though these steps, you’ll see a ‘Submit to store’ button at the bottom of the pricing page in the product designer. Click on this button to instantly add your product to your WordPress store.
To check that your product has been correctly added, click on the ‘Stores’ menu item in your Printful dashboard, and then click on ‘View store’ next to your WooCommerce store details.
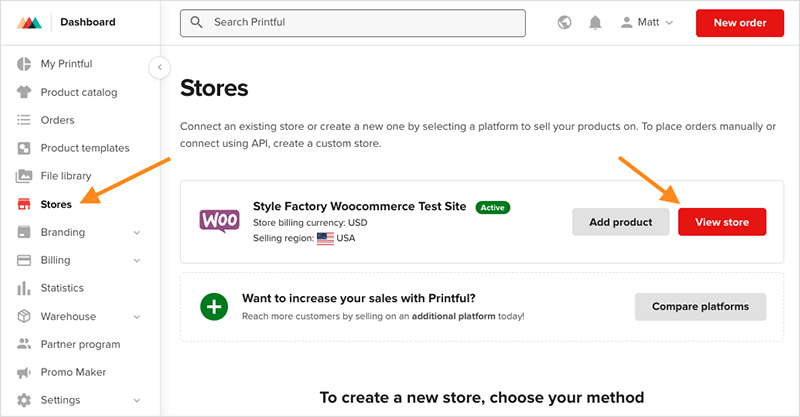
You’ll now see your newly created product in your Printful product list.
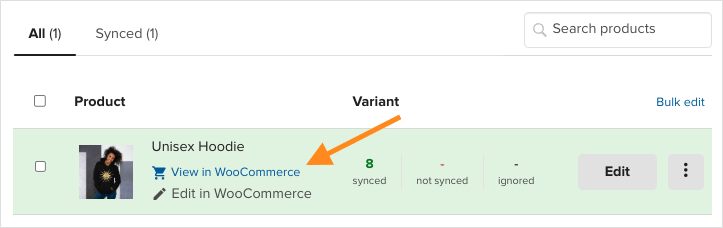
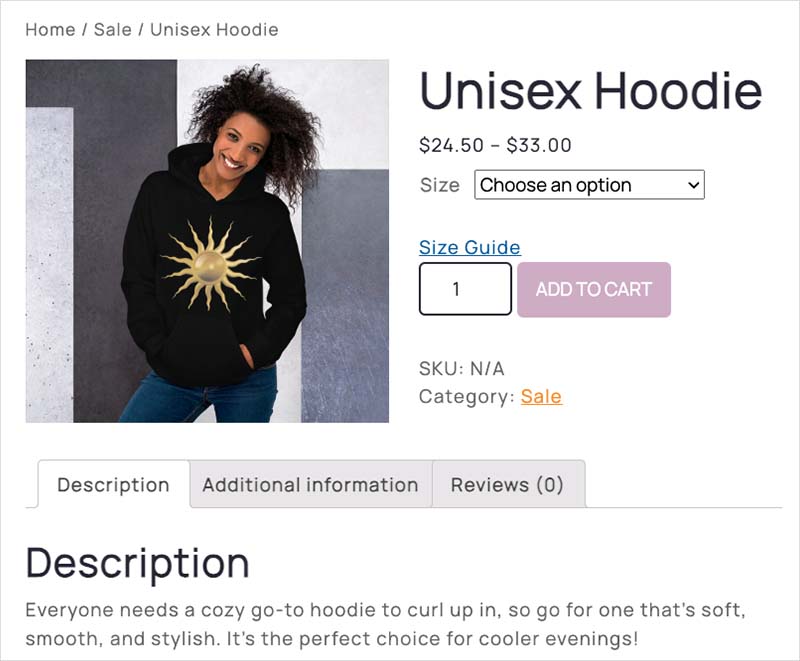
As you can see from the screenshot above, this gives you the option to view your product in WooCommerce. When you click this link you are taken to the live listing of your product on your WordPress website.
If you want to change anything with your listing, you can just return to the product information in Printful, where you’ll find two options — you can either edit your product details further in the Printful backend or over in your WooCommerce store’s dashboard in your WordPress account.
And that’s it! You have now successfully added your first Printful product to your WordPress / WooCommerce store.
7. Promote your Printful / WordPress store
Now you know how to connect Printful to WordPress — but there’s lots more you’ll need to do to build out your print on demand business.
Here are a few pointers on how to develop your Printful store successfully:
- Create more Printful products and add them to your WooCommerce store. Make the most of Printful’s large catalog of customizable products and create a good number of high-quality products for your customers to choose from. Read the Printful blog post on ‘How to Choose Print-on-Demand Products for Your Store‘ to help you flesh out your product offering.
- Perform search engine optimization (SEO) on your WordPress / WooCommerce store (check out our guide to maximising site visibility here for some tips on this).
- Engage in content marketing. Use WordPress’ formidable blogging features to drive sales of your Printful products. By regularly posting engaging blog articles that focus on topics in your product niche, you can significantly improve your search rankings and increase organic traffic to your store. Read our guide on how to increase blog traffic for some advice on how to go about doing this.
- Use email marketing. Although WordPress doesn’t come with a built-in email marketing tool, you can easily connect it to professional email marketing platforms like GetResponse and Mailchimp. You can use these tools to promote your Printful products, announce new designs and offer discounts and special offers to your subscribers. To learn more about gaining email subscribers, check out our guide on how to grow an email list.
Other Printful and WordPress resources from Style Factory
Printful resources
- What is Printful?
- Printful review
- Printful vs Printify
- Printful Pricing
- SPOD vs Printful
- Printful vs Teespring
- How to connect Printful to Shopify
- How to connect Printful to Squarespace
- How to connect Printful to WooCommerce
- How to connect Printful to Wix
- How to connect Printful to Etsy
No comments