We have a strict honest review policy, but please note that when you buy through our links, we may receive a commission. This is at no extra cost to you.
In this post, I’m show going to show you how to connect Printful to Shopify. Read on to discover how to set up an account with both platforms and how to sync your customized Printful print-on-demand products to your Shopify online store.
1. Start a free Shopify trial
Note: If you already have a Shopify account, you can skip ahead to step 2 below.
To start selling Printful products (or indeed anything else!) on Shopify, the first thing you need to do is start a free Shopify trial.
This lasts for a few days, and once it’s over, Shopify gives you access to your first month of service at a discounted price of just one dollar.
(You can learn more about how this offer works here).
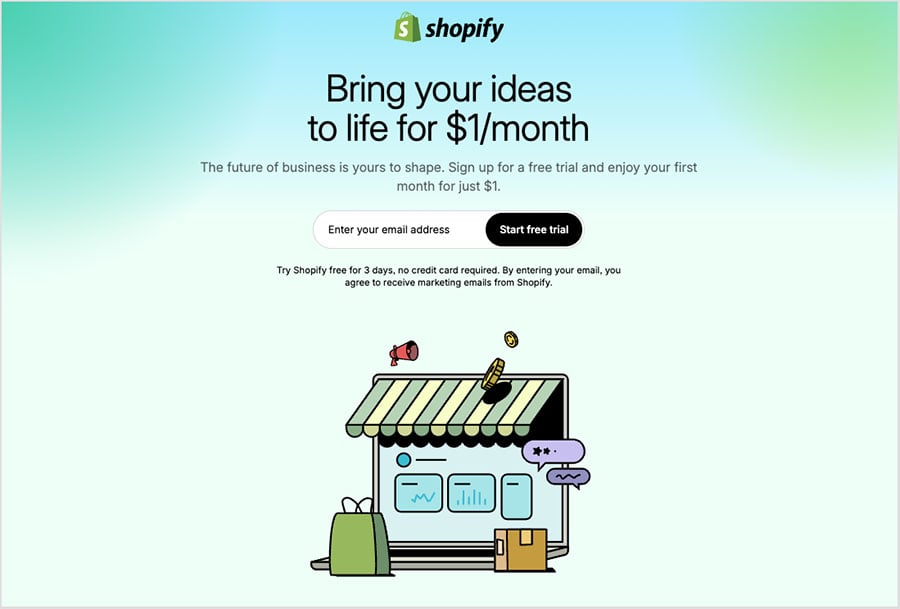
But since you’re planning on selling print-on-demand products via Printful, there is an alternative version of the Shopify free trial to consider: Shopify’s ‘dropshipping starter kit.’ This is a special version of Shopify’s free trial that is specifically tailored to dropshippers and POD sellers.
It gives you access to the regular free trial along with a wide range of special dropshipping resources (these include lots of helpful material on how to use print-on-demand services like Printful effectively).
With your Shopify trial underway, it’s time to…
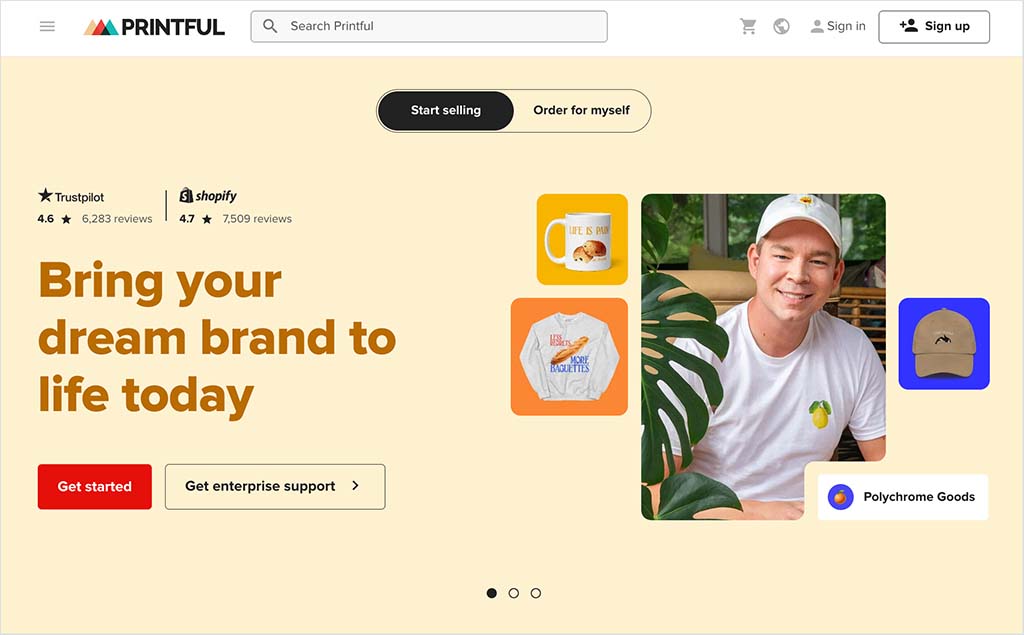
2. Create your Printful account
To create a Printful account, you simply go the Printful home page and click on the red ‘Let’s go’ button to go to the sign up page.
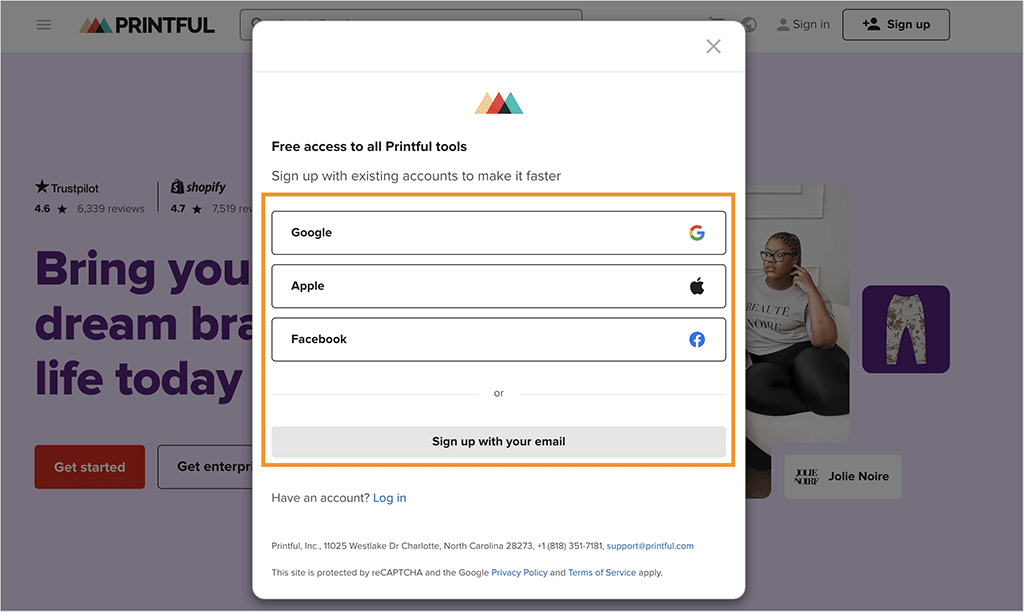
You’ll then be given the option to sign up with your:
- Facebook account
- Google account
- Apple account
- email account.
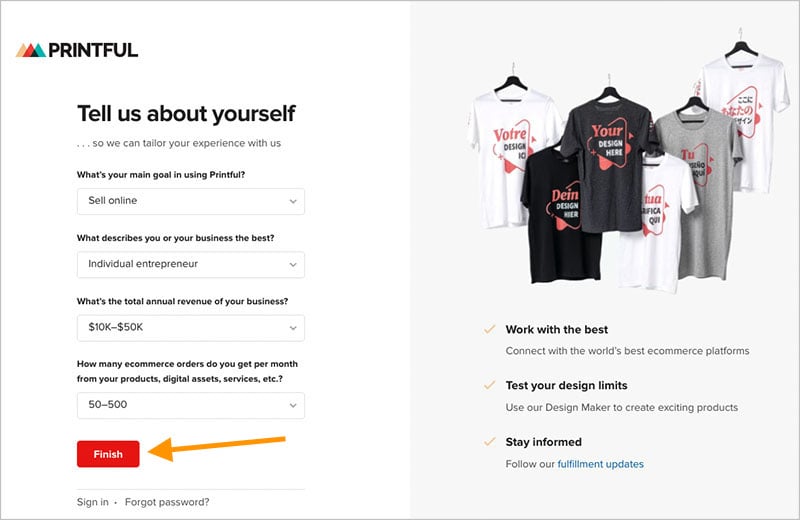
Once you’ve sign up via your preferred method, Printful then asks you a few onboarding questions about your business and goals. When you’ve answered them, click the ‘Finish’ button to go to your new Printful account.
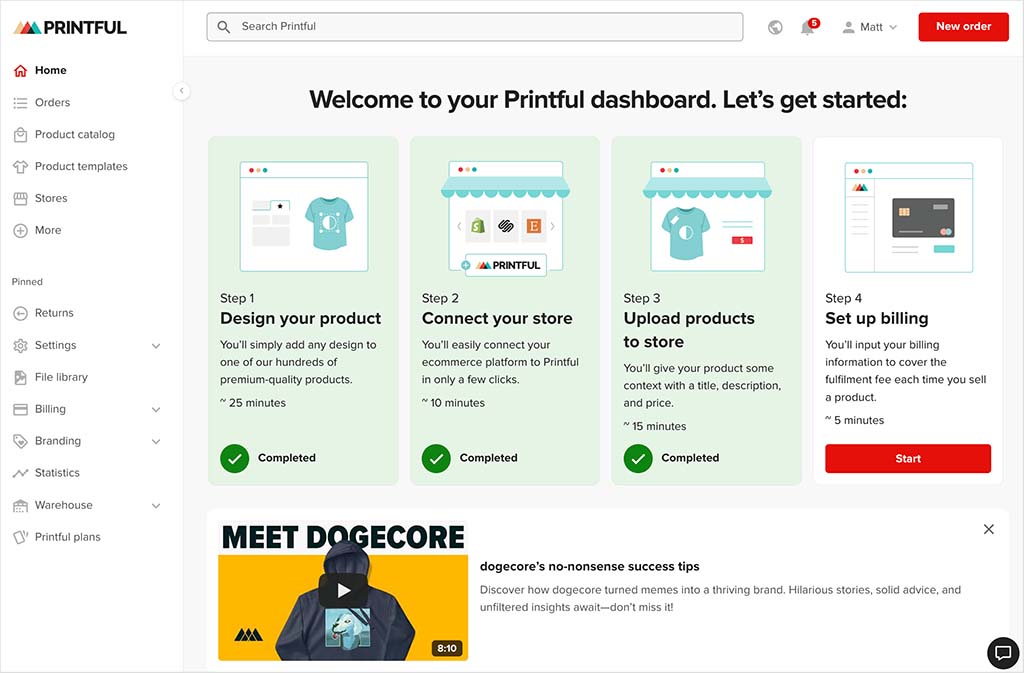
You’ll then see your Printful dashboard (pictured below), from where you can manage all aspects of your account and perform key tasks like product design, order tracking, billing and promotion management.
Once you’ve got your Printful account set up, it’s time to connect it to your Shopify store.
Let’s see how to do that next.
3. Install the Printful app for Shopify
The next step is to add the Printful app to your Shopify store.
To do that, go to your Shopify account and click on ‘Apps’ at the bottom of the left hand menu of your Shopify dashboard.
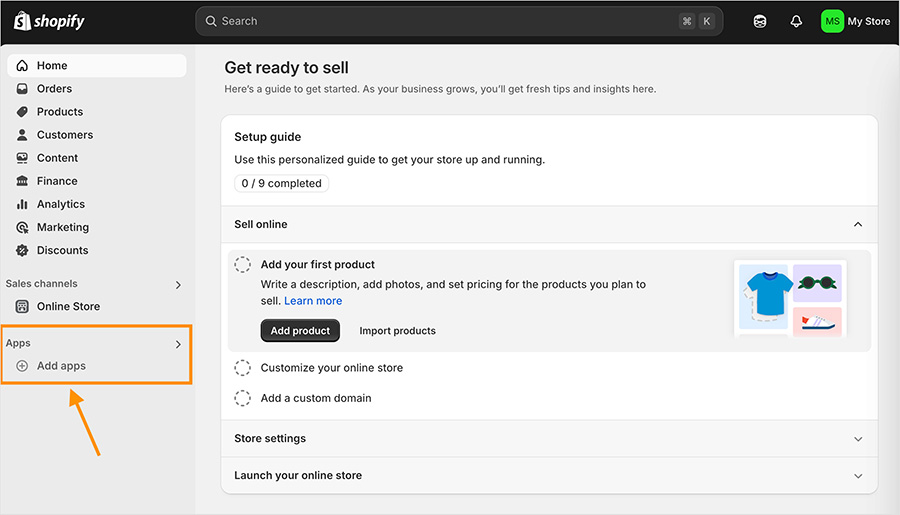
This opens up a search box at the top of the screen.
Simply enter ‘Printful’ into the box provided and hit return on your keyboard.
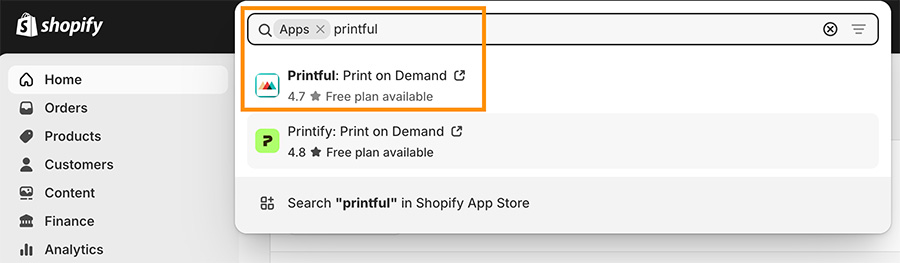
This will bring you to the Shopify App Store, where you’ll see the Printful app at the top of the results. Click on it and then the ‘Add app’ button (pictured below).
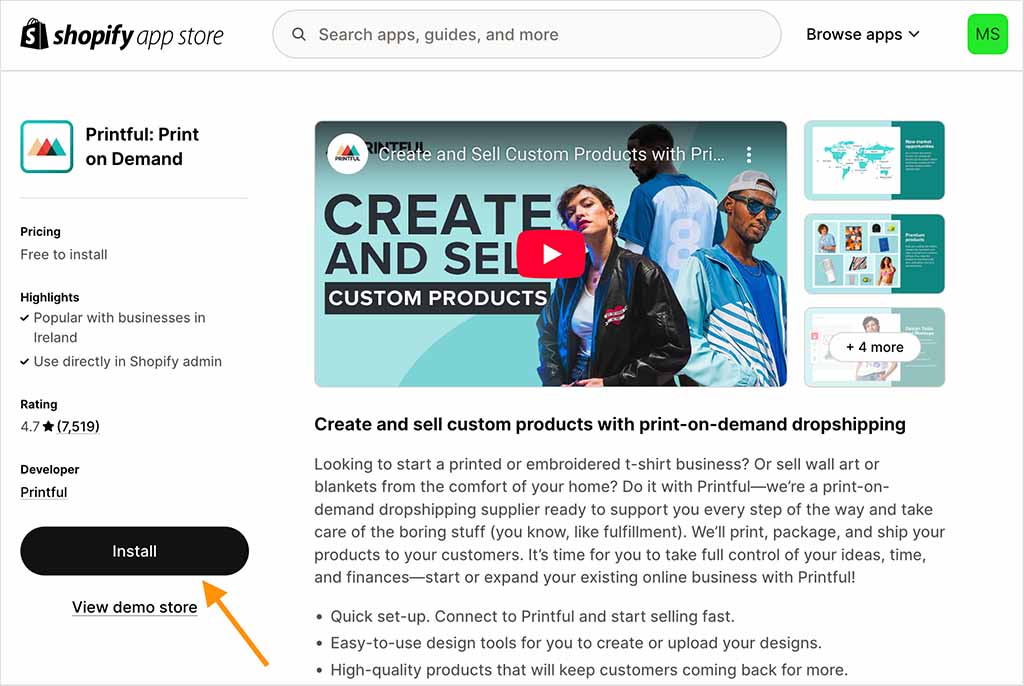
Next, you just need to confirm your choice with Shopify by clicking the ‘Install’ button that appears at the bottom of the ‘Install app’ page in your Shopify admin.
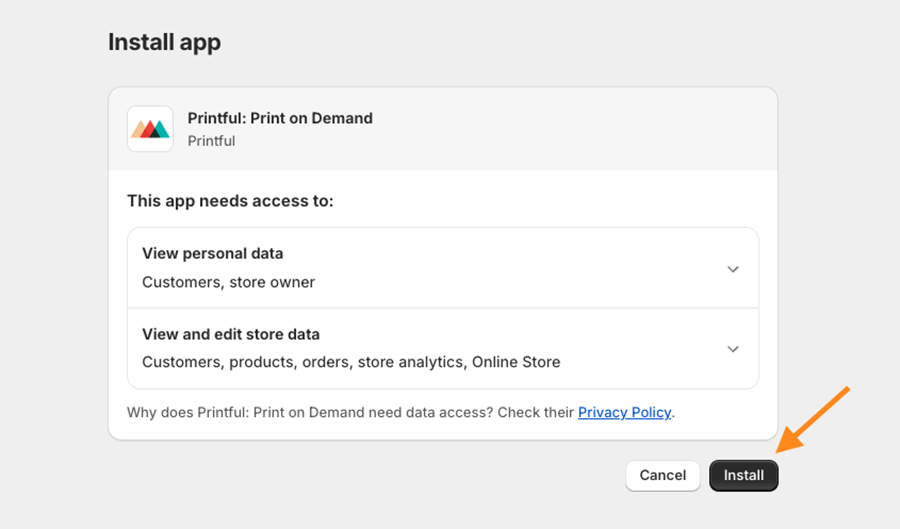
Once you hit this button, the Printful app will be installed on your Shopify store.
4. Connect your Shopify store to Printful
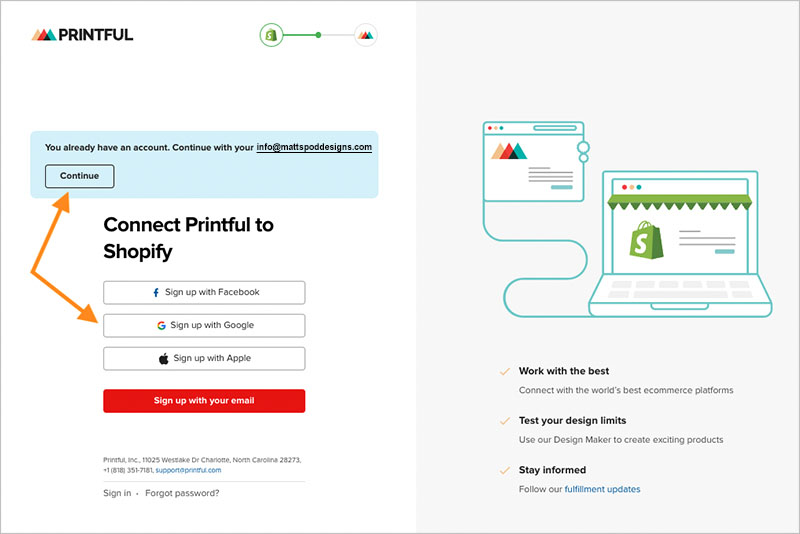
When the Printful app installs on your Shopify store, you’ll be taken to the Printful sign in page.
If the Printful system detects that you are using the same email address in your Shopify store, you can just hit ‘continue’; if it doesn’t, simply sign in with any of the 4 methods mentioned previously.
Printful now asks you to confirm the connection between your Shopify and Printful account, which you do by clicking on the red confirmation button.
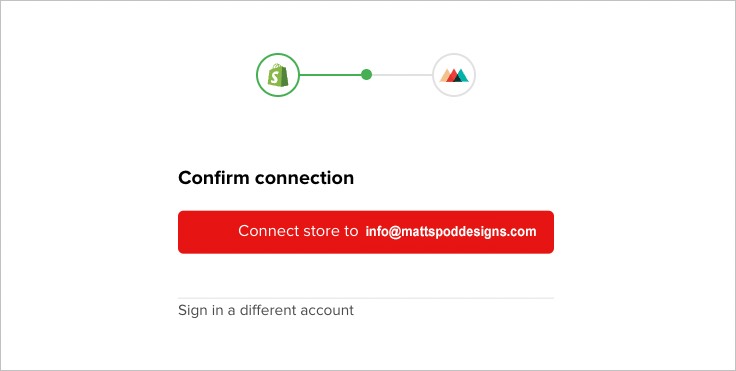
With that done, you have successfully connected Printful with your Shopify store!
You’ll now be able to design custom products in Printful and easily add them to your Shopify storefront.
So how do you add Printful products to Shopify?
5. Add your Printful products to Shopify
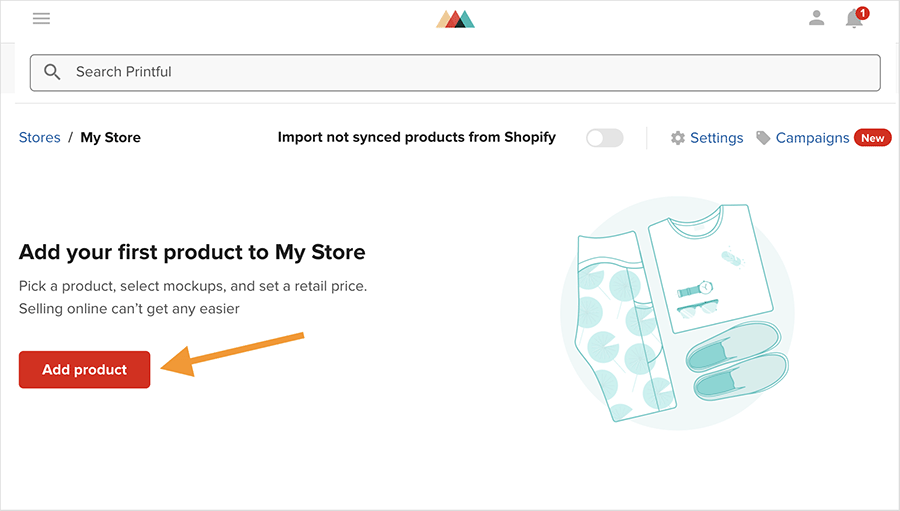
The first thing to do before you add a Printful product to Shopify is create a product in Printful.
To do this, click on the ‘Add product’ button in your Printful dashboard.
This takes you to Printful’s product catalog, which contains close to 400 different printable products in several categories (these include ‘Men’s clothing,’ ‘Women’s clothing,’ ‘Hats,’ Home & living,’ ‘Eco-friendly products’ and more).
Select the product you want to create by using the search box and filters provided, and when you’ve found the one you want to customize, click on it to start the customization process.
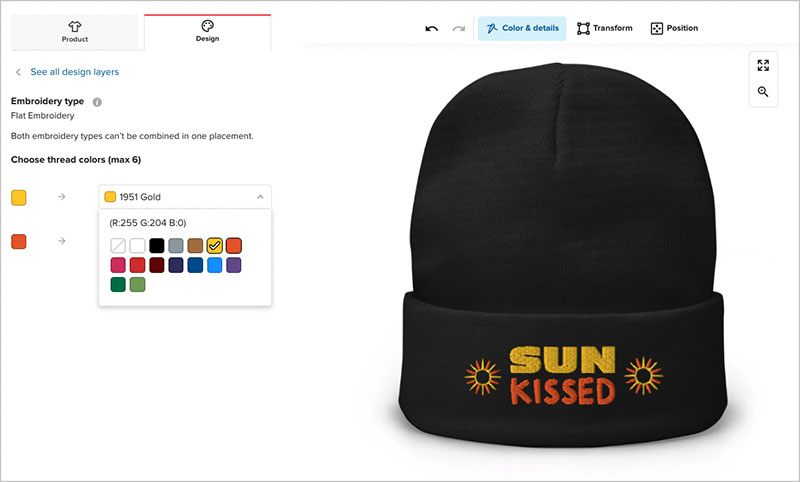
This takes you to Printful’s product designer interface — you use this to define the print process for your product (’embroidery’, ‘all-over print’, etc.), upload your artwork files, and apply a wide range of effects such as text effects and clip art. You can also use the designer to add custom labels featuring your own brand logo on your products.
When you’re happy with how your product looks, Printful will lead you through the key steps to take to complete a product listing before you add it to your Shopify store.
These involve:
- adding mock ups to your product
- adding a product description
- setting prices.
When you’ve completed the pricing step, you’ll see a ‘Submit to store’ button at the bottom of the Product designer. Click on this button to instantly add your product — including images, product description and pricing — to your Shopify store.
To check that your product has been correctly added, click on the ‘Stores’ menu item in your Printful dashboard, and then click on ‘View store’ next to your Shopify store details.
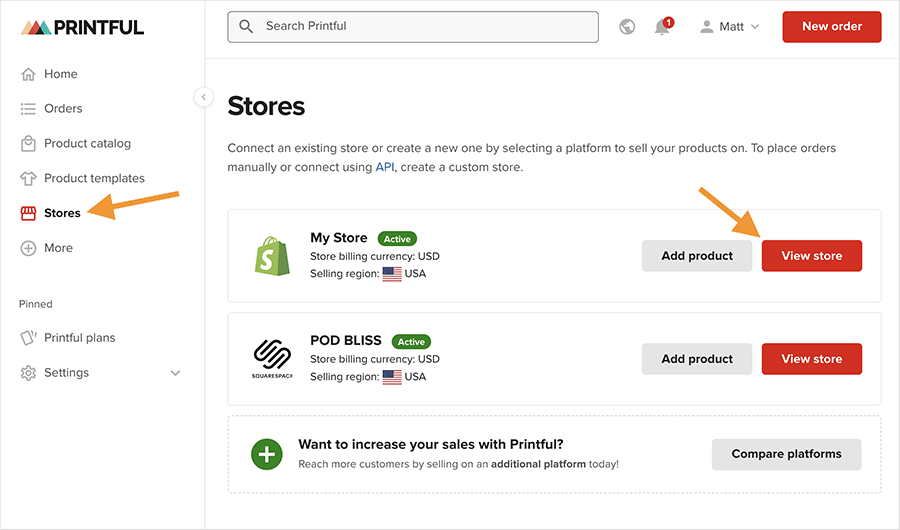
You’ll now see your newly created product in your Printful product list.
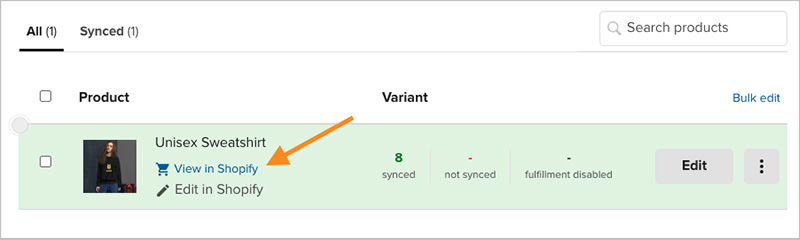
As you can see from the screenshot above, this gives you the option to view your product in Shopify. When you click this link you are taken to the live listing of your product on your Shopify store.
This is an important ‘quality assurance’ step to take, because — as this is your live listing in your Shopify store — it is exactly what your customers will see.
If you want to change anything with your listing, you can just return to the product information in Printful from where you have two options — you can either edit your product details further in the Printful backend or over in your Shopify store’s admin dashboard.

Congratulations! You have now successfully added your first Printful product to your Shopify store.
6. Promote your Printful / Shopify store
Now that you’ve got your Printful / Shopify connection up and running, there’s lots more you can do to build out your print on demand store.
Here are a few tips on how to do just that:
- Create more Printful products and add them to your Shopify store. No Shopify store is complete without a strong range of products, so make sure to create a good number of high-quality ones in Printful and add them all to your Shopify store. Read the Printful blog post on ‘How to Choose Print-on-Demand Products for Your Store‘ to help you flesh out your product offering.
- Perform search engine optimization (SEO) on your Shopify store— this involves creating and configuring content in a way that encourages Google and other search engines to rank it highly in organic search results. Take a look at our Shopify SEO checklist and give your Printful products a rankings boost.
- Engage in content marketing — make use of Shopify’s built-in blogging tool to attract people to your POD products. By regularly posting engaging blog articles that focus on topics in your selling niche, you can significantly improve your search rankings and increase organic traffic to your store. Take a look at our10-step guide on how to increase blog traffic to learn how to perform content marketing effectively for your store and its products.
- Use email marketing: you can use Shopify’s built-in email marketing tool — Shopify Email — to promote your Printful products, announce new designs and offer discounts and special offers to your subscribers. To learn how to build up subscriber numbers, you’ll find our guide on how to grow an email list particularly useful.
- Consider using online advertising for your Printful / Shopify store. With even a small budget of a few dollars a day to invest in promoting your store, you can get surprisingly good sales from online advertising services like Google Ads and Facebook ads (so long as you set up the ads correctly!). These tools offer extremely sophisticated ways to target niche interest audiences. You can learn more about using online advertising with Shopify here.
One important thing to remember before embarking on any promotional activity for your store is this: remember to place a sample order on your store before doing so! This lets you check that your store, shipping settings and fulfilment process are working as expected before spending any time or money on marketing.
Other Printful and Shopify resources from Style Factory
- Guide to setting up a Shopify POD business (YouTube)
- Printful review
- What is Printful?
- Printful pricing guide
- Printful vs Printify
- SPOD vs Printful
- Printful vs Teespring (now Spring)
- What is Print on Demand?
- How to connect Printful to Squarespace
- How to connect Printful and Wix
- How to connect Printful to Etsy
- How to connect Printful to WordPress
- How to Add Printful to WooCommerce
- Shopify review
- Checklist for launching a Shopify store
- Shopify pricing and fees
- Shopify side hustles
- Things to sell on Shopify
- Dropshipping with Shopify
- Dropshipping resource hub
Update details
This article was updated on 9 May 2025. The following key edits were made:
- Screenshots of the Printful home page, signup page and dashboard were updated.
- A new image of the Printful app in the Shopify app store was added.
- The quantity of POD products in Printful’s product catalog was updated.
No comments