In this Shopify SEO guide, I walk you through the key steps you need to take to make sure that your store ranks highly in search results. Use the checklist below to gain organic traffic — and increase sales on your store.
1. Make sure you’re using a custom domain name
When you set up a Shopify store, you are by default given a ‘myshopify.com’ domain name — ‘yoursite.myshopify.com’ etc.
However, search engines and their users tend to trust custom domain names more than the standard Shopify ones, and using them can lead to better performance and more clickthroughs in search results.
(A custom domain name would be something like ‘yourstorename.com’ etc.)
So make sure that:
- you register a relevant domain name for your site
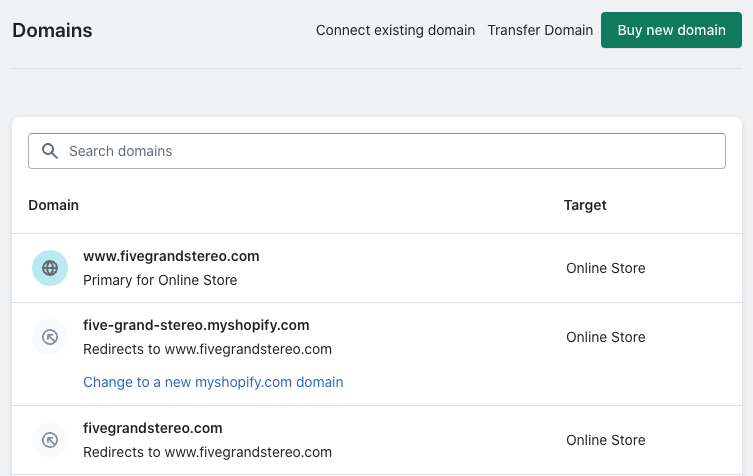
- you connect it to your Shopify store (you can do this in the ‘Settings > Domains’ section of your Shopify dashboard — see screenshot above).
- you set your custom domain name as your primary domain (this stops Google getting confused by the existence of multiple domains).
2. Use an SEO-friendly site structure
Clear, logical site structures make it easier for search engines to to crawl and index pages — and improve the chances of your store ranking higher in search results. Additionally, search engines tend to attach more importance to the pages that you include in your site navigation.
To create an SEO-friendly site structure, think about what your most important product collections are — and make sure that they:
- are named in a way that makes it easy for search engines and users to understand (‘Men’s shirts’, ‘Kids’ clothes’ etc. rather than anything unclear or obscure)
- are included in your navigation (along with other key pages — ‘About us’, ‘Contact’ etc.)
The aim is to create a site structure that is super easy for search engines — and of course users — to understand.
In the diagram below, I’ve outlined what a good Shopify structure typically looks like.
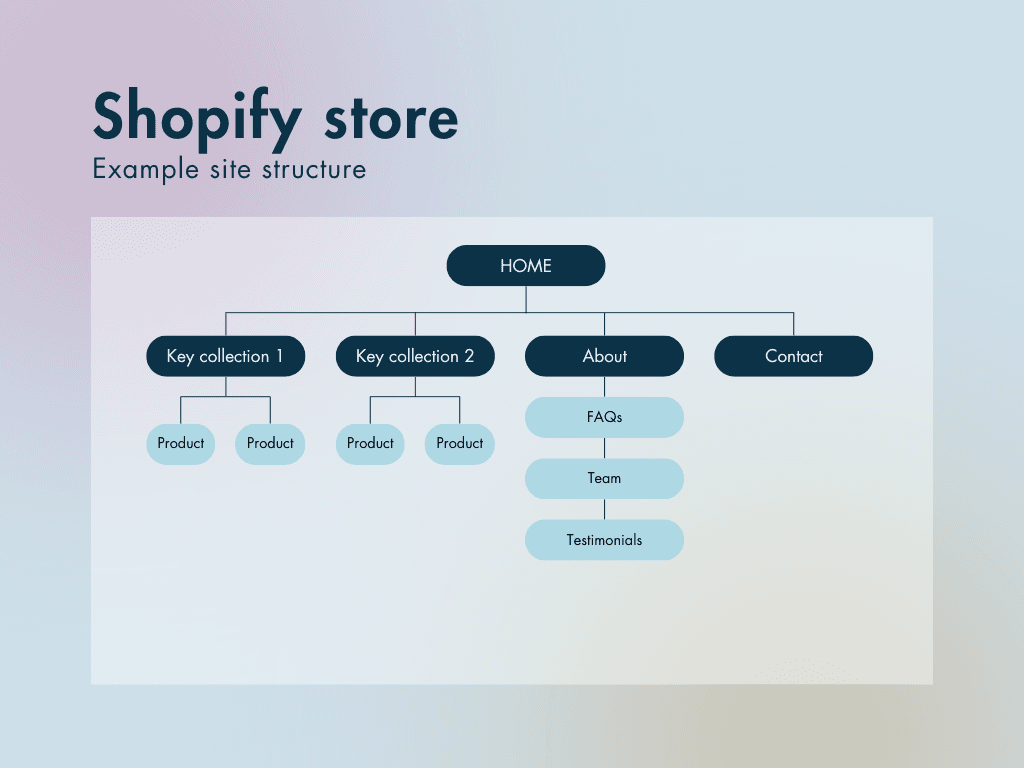
(This is of course a simplified navigation: you can of course include more than two collections in your site structure — and there will be other pages that you might want to add to it too. The main thing is to make it logical and clear for both search engines and users.)
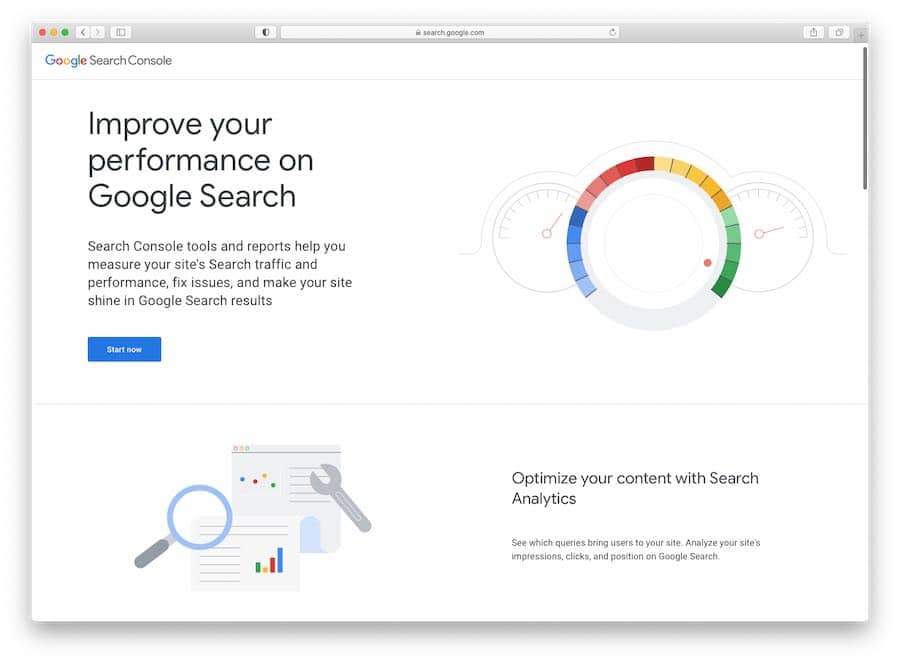
3. Register your Shopify store on Google Search Console and Bing Webmaster Tools
Registering a site with Google Search Console and Bing Webmaster Tools is something that all website owners who are serious about search engine optimization should do — regardless of the platform they’ve used to build it.
By registering your Shopify website with these services, you are telling Google and Bing that your store exists — and making sure it gets indexed.
Search Console and Bing Webmaster Tools will also give you notifications of any technical issues that that are preventing them from crawling your site properly.
Registering a domain with Google Search Console and Bing Webmaster Tools is very easy — but if you need more information on the process, you can check out the below resources:
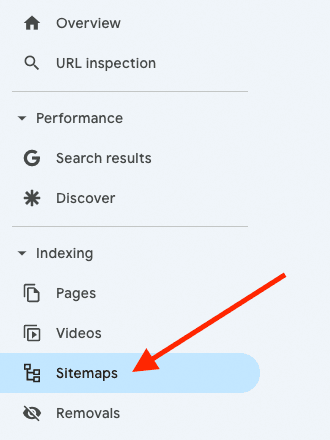
Once you’ve registered your Shopify website with Google Search Console and Bing Webmaster Tools, you’ll then need to submit an XML sitemap to both services — this helps both services index your site accurately and quickly.
Helpfully, Shopify generates a sitemap automatically for you — the URL for this on your store is simply www.yourdomain.com/sitemap.xml.
In both Search Console and Bing Webmaster Tools you can submit this sitemap this by going to your site’s dashboard, and then clicking ‘sitemaps.’
💡 Bonus tip: don’t forget Google Business
If you use your online store to sell online and in a physical location (i.e., using a point of sale system), make sure you also register your site not just on Search Console but on Google Business too.
This will get your site listed on Google Maps and can lead to an enhanced presence in search results in your local area.
4. Do your keyword research
One of the best ways to improve your Shopify store’s search rankings is to ensure that your site content, collections and products contain the keywords that people are actually searching for. To do this, you’ll need to perform keyword research.
Keyword research typically involves getting three key pieces of information:
the keywords (phrases) that people are entering into search engines when looking for products or content like yours
the volume of searches for each of those keywords
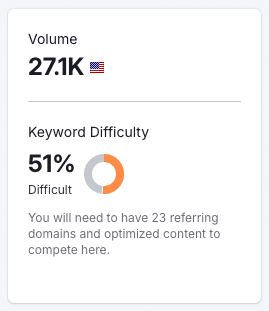
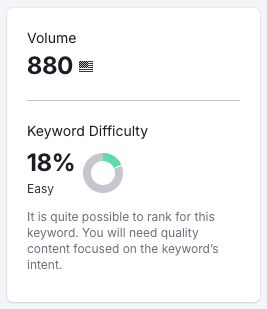
how difficult it will be to rank for each keyword (based on how many existing authoritative sites or pages already perform well in search results for those keywords).
When you have these three pieces of information, you can usually identify the keywords to optimize your content for — or the kind of content you’ll need to create in the first place.
This is because you have enough data to find a ‘sweet spot’ – keywords that are popular enough to generate a reasonable amount of traffic, without being so popular that there are already lots of other sites dominating search results for them.
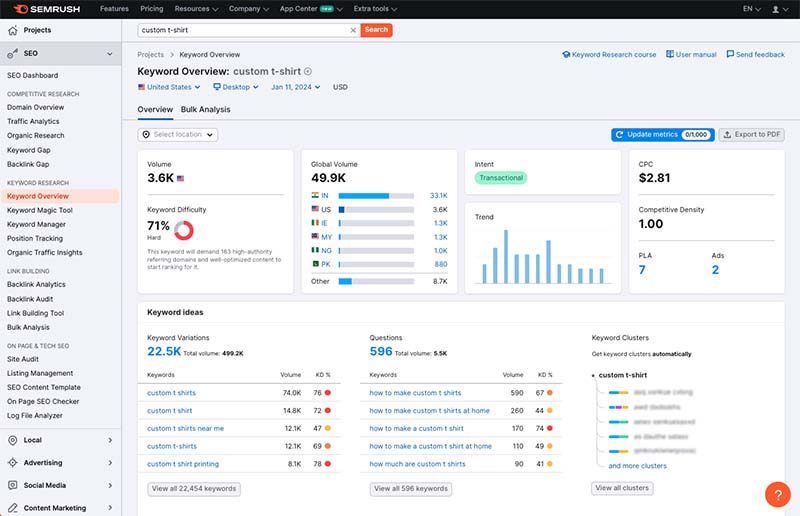
Getting your hands on this information involves using a dedicated keyword research tool like Semrush or Ahrefs; these let you enter keywords and see all the above statistics for each one, along with lots of other useful information (lists of competing sites that currently rank well for your chosen keywords; suggested alternative keywords; and country-specific search results).
💡Tip: You can learn how to do keyword research here.
Once you’ve got your keyword research sorted, it’s time to look at the more technical things you can do to your Shopify store to make sure that it performs well in searches for your chosen keywords.

5. Consider creating separate products for variants
If you’re selling an item that comes in multiple variants, Shopify lets you create one product for it, enter the different product options (size, color etc.) and let your store visitors pick the version of it that they want.
This is helpful from a user perspective, but because of an SEO technique applied by Shopify — canonicalization — it leads to a situation where Google is told to index a ‘master product’ and ignore the variants.
And this can lead to a missed opportunity. Say you’re running an online guitar store — if you created a ‘Les Paul’ guitar product with variants for each color, you might struggle to get traffic to any of them, because the general ‘Les Paul’ phrase is very hard to rank for, and your variants are not being indexed.
But if you created a separate ‘Black Les Paul’ product, you might be able to take advantage of the fact that the phrase ‘Black Les Paul’ is very easy to rank for. Yes, there’s a much smaller number of searches for this phrase each month — but you’d be able to capitalize on them a lot easier and quite possibly generate more sales than if you had targeted the generic phrase.
This approach won’t work in every context, but if your keyword research is strongly suggesting that product variant keywords might drive traffic, it’s definitely worth considering.
6. Ensure your Shopify store is loading quickly
Page speed is a signal used by search engines to rank websites in search results, with fast-loading sites often given preference over slower ones.
Now, your options with regard to reducing page speed are a bit limited with Shopify — because rather than being able to buy your own hosting and code your own template, you have to use Shopify’s servers and Shopify templates (which, while perfectly good, don’t give you fine-grain control over the speed at which your site loads).
That said, there are some things you can do to make a Shopify site load as quickly as possible.
- Remove any Shopify apps that you are not using or don’t really need.
- Avoid using a large number of web fonts on your site, or even consider ditching them entirely in favour of web safe fonts (these load much faster).
- Use image compression tools like Tiny Png to reduce the size of any pictures you’re uploading to Shopify.
- Keep use of any external scripts or custom code on your site to a minimum.
- Avoid using image sliders (in favour of one, well-optimized image).
Recently, Shopify introduced a ‘web performance’ report in its Analytics dashboard; this can be used to check how well your site is doing from a speed perspective.
To access this, go to Analytics > Reports in your Shopify dashboard and then click on the ‘Web Performance’ report.
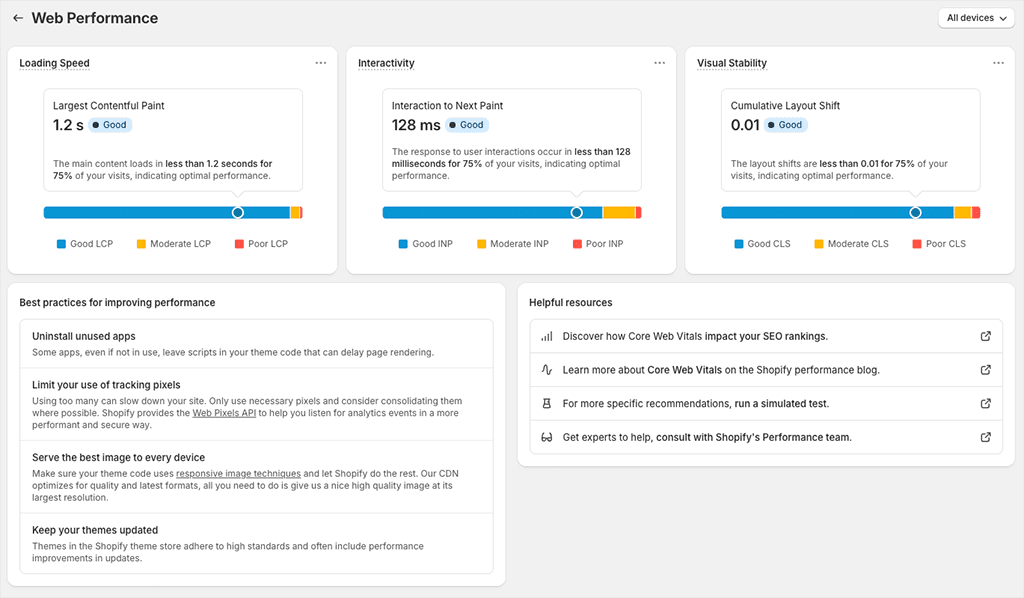
As you can see from my screenshot above, in addition to giving you data on loading speed, this report also provides some information about other performance metrics — interactivity and visual stability. These form part of of Google’s ‘Core Web Vitals’ — a set of targets that Google ideally wants you to hit.
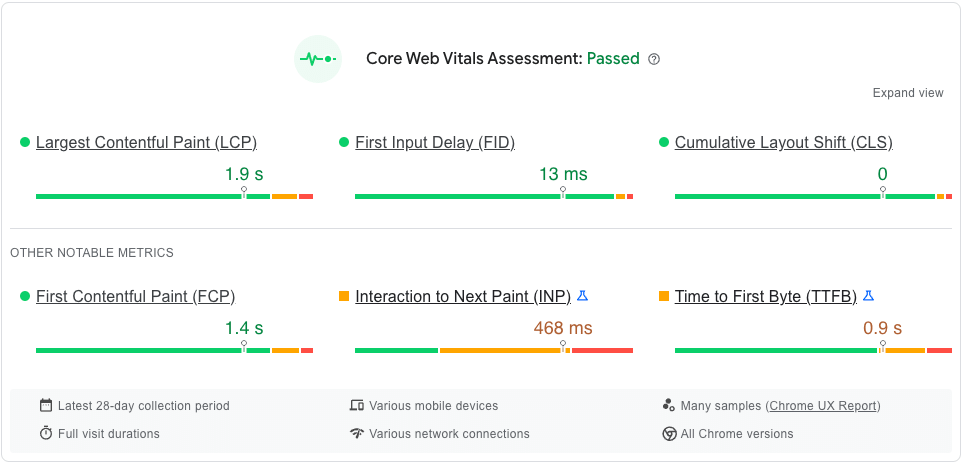
For more detailed analysis of how your Shopify store is meeting these (or not!), along with suggestions on how to do so, you can use Google’s PageSpeed Insights tool (pictured below).
7. Get your page and product titles right
One of the most significant elements of a web page is its title. Search engines treat ‘title tags’ as key pieces of information when working out how to categorize and rank your content, and your title itself shows up as the largest component of a search result (as well as at the top of browser windows).
You should ensure that your Shopify page and blog post titles are never vague in nature, and always start with your target keyword (the phrase you want to rank for in search results).
For example, if you ran a business called “Sarah’s Yummy Bakery” that sold white chocolate cakes, you would be better off using a page title that included the phrase ‘white chocolate cakes’ instead — just a more conventional (but less SEO-friendly) ‘Sarah’s Yummy Bakery’.
So, a good page title for the above example would be ‘White Chocolate Cakes — Sarah’s Yummy Bakery.’
In Shopify, there are two different processes for editing page titles: one for your home page, and one for every other type of page. Let’s look at both in turn.
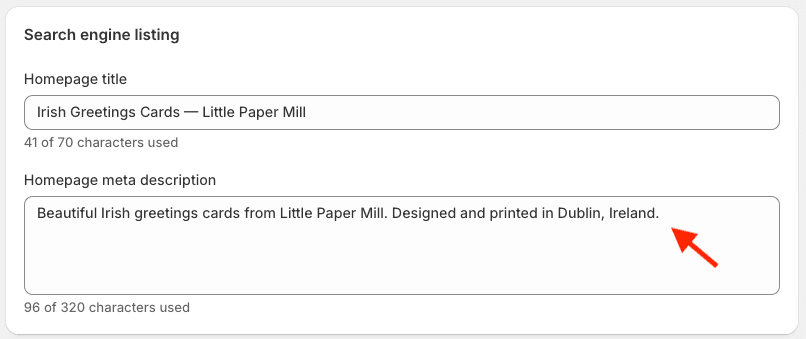
Editing your Shopify home page title
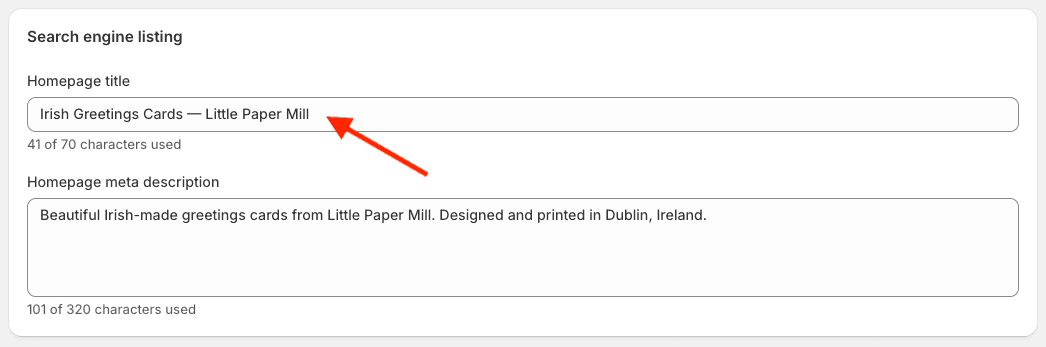
To edit your home page title, you need to click Online Store > Preferences. Then, use the ‘homepage title’ box in the ‘search engine listing’ section provided to enter your home page title.
Editing other page titles in Shopify
For other pages, the method you use to edit a page title in Shopify is more or less the same, regardless of whether you’re working with a static page, product or post.
You need to locate your page, post or product in the Shopify dashboard (using the Online Store > Pages and Online Store > Blog posts options for pages and posts or the ‘Products’ tab to access products).
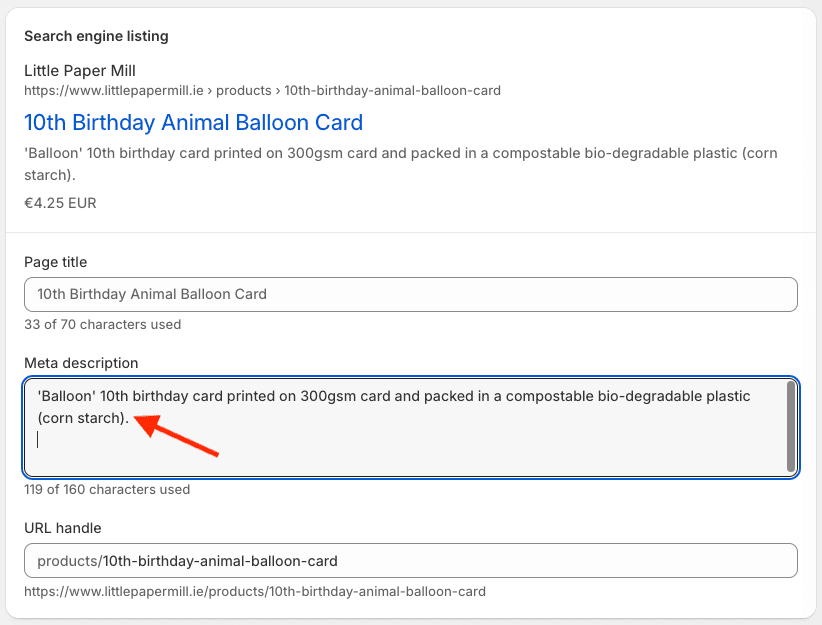
Once you’ve found it, it’s simply a case of scrolling down to the bottom of it and clicking the ‘Edit’ option (a pencil icon) in the ‘search engine listing’ section.
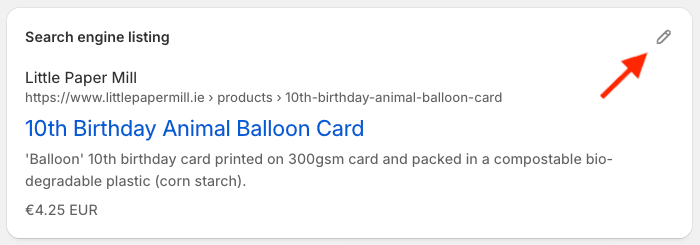
You’ll then be able to edit the page title using the ‘page title’ field provided.
8. Use headings properly
Ignoring headings is a common mistake made by merchants who build and update their online stores using ecommerce platforms like Shopify.
Instead of applying headings correctly (Heading 1, Heading 2, Heading 3 etc.) to their text — as a professional developer or webmaster might do — they add bold or capitalized text to break up their content.
This can cause quite a few problems:
- From an aesthetics point of view it can look pretty bad.
- It makes it more difficult for visually impaired visitors to your site to understand your content (screen readers rely on headings to help users navigate web pages).
- It makes it more difficult for search engines to index your content accurately.
Adding headings and subheadings in Shopify is extremely easy: when editing a page or product description, you just highlight a piece of text and then choose your desired heading from the formatting drop down menu.
To do this, just click the formatting icon with the capital ‘A’, as per the screenshot below.
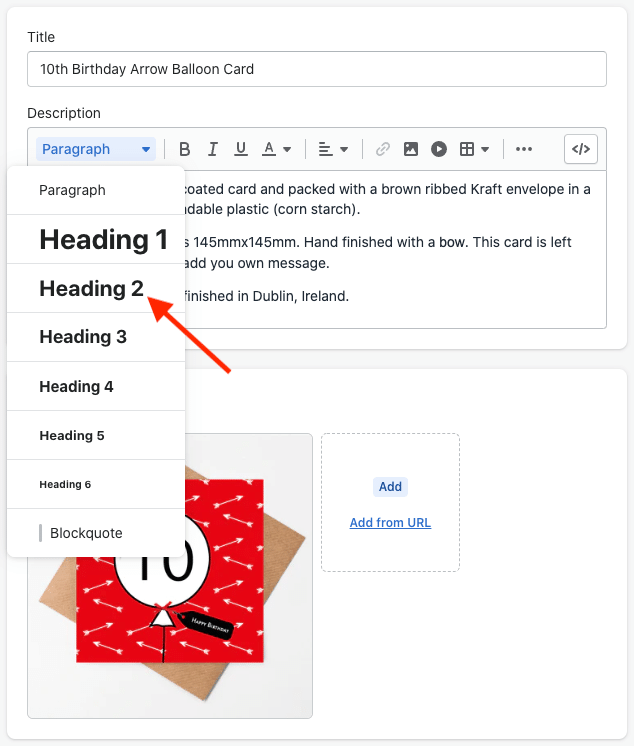
As you can see, headings are numbered 1 to 6 in Shopify.
As you might expect, your Heading 1 (H1) is the most important, because search engines use it — along with the page title — as a primary way of ranking the page. So it should always include, and ideally start with, your target keyword.
It’s a good idea to include a few H2s and H3s containing relevant keywords on your pages and product descriptions too.
9. Use engaging meta descriptions
Meta descriptions (also known as ‘meta tags’) are short summaries of web pages that appear underneath the blue clickable links in a search engine results page.
Although Google says that they aren’t a ranking factor, a well-written meta description can encourage more clickthroughs to your website — thus improving the clickthrough rate (CTR) of a page.
Although there’s a bit of debate about this, the CTR to pages in search results IS believed by many SEO experts to be a ranking factor — so getting meta descriptions right is important (if nothing else, more clicks generally equates to more sales!).
Your meta description for your Shopify products and pages should:
- be concise (155 – 160 characters)
- be accurate
- contain the keywords you are hoping to rank for.
As with page titles, different processes apply depending on whether you want to edit your home page meta description — or the description for any other page.
To edit your home page’s meta description, you’ll need to click Online Store > Preferences and use the ‘homepage meta description’ box provided on the right of the screen to add or change it.
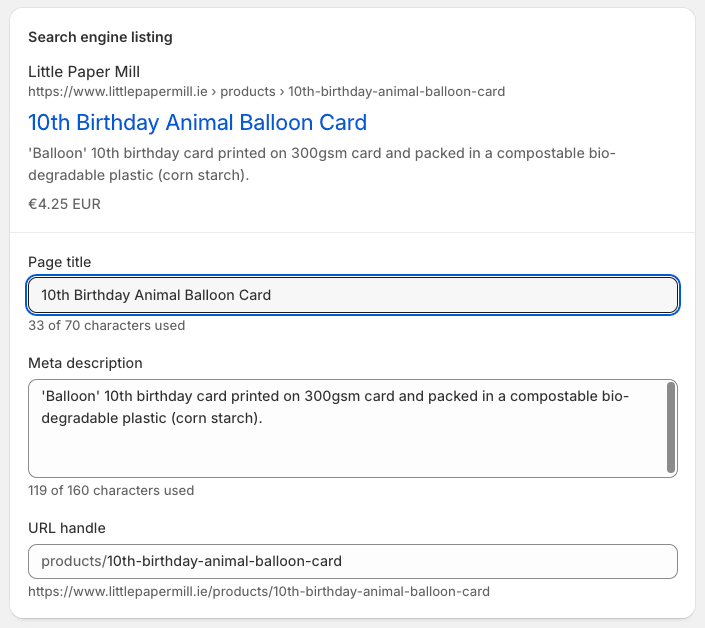
To edit a meta description for other types of pages, you just need to locate your page, post or product and then scroll down to the the ‘Edit website SEO’ link in the search engine listing preview.
You’ll then get the option to edit your meta description — use the meta description field, shown below, to do so.
10. Make your product titles and descriptions unique
A common way of speeding up the process of adding products to a Shopify store is by using the ‘Duplicate product’ option.
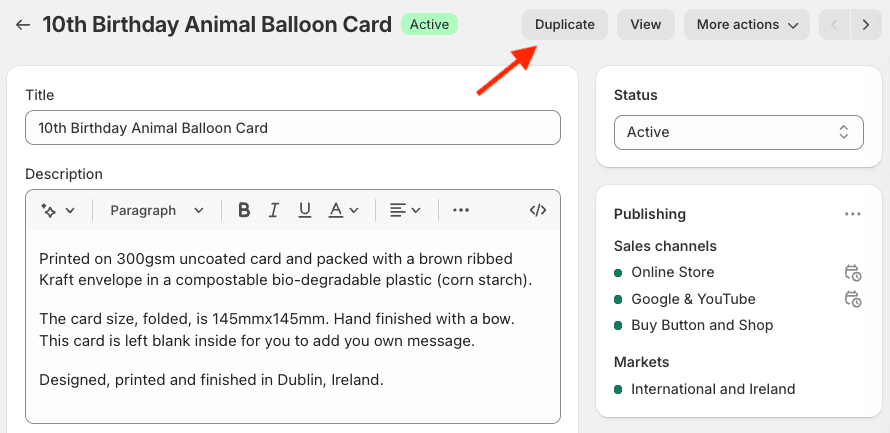
Although this is definitely an easy way to add a new product to your store, it can lead to a lot of very similar — or even entirely duplicated — product titles and descriptions being created by accident (or laziness!).
This is something that search engines can get confused by, and it’s not great for your visitors either. Duplicate content can lead to poorer performance in search results, so always try to make your product titles and descriptions as unique as possible.
💡 Tip: use Shopify’s autowrite feature to create product descriptions
If you’re struggling to write product descriptions in Shopify, you could try using its new AI-powered ‘autowrite’ feature.
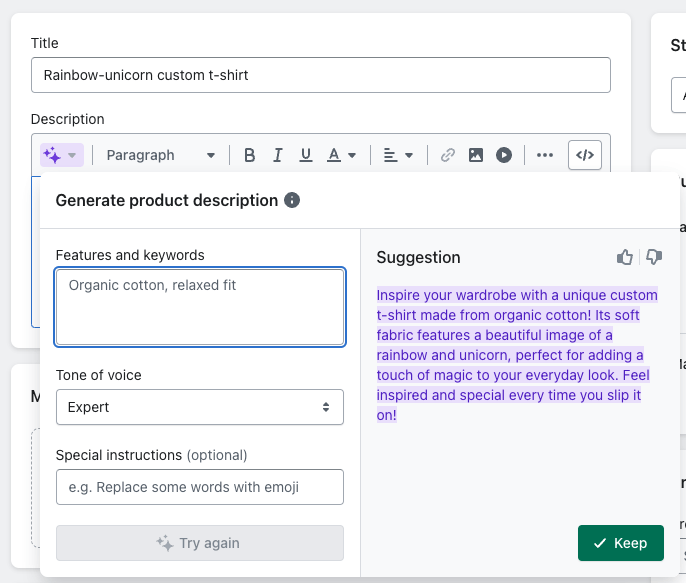
To generate these, you’ll need to list some of your product’s features and keywords in the product description field and then select a tone of voice for your text; Shopify’s autowriter will then produce a product description for you based on your keywords.
You can ask Shopify to rewrite these automatic descriptions until you arrive at one you are happy with, and if you like you can make the output more unique by editing the generated text yourself.
11. Optimize your image alt text and file names
Search engine algorithms don’t just look at the words on your Shopify store when indexing it — they factor in its images too.
To do this, they examine two bits of data associated with your pictures:
- ‘alt text’
- file names.
Let’s look at alt text first.
There are three main reasons why you should add alternative text (known as ‘alt text’ or ‘alt tags’) to your images:
- Screen readers use it to provide a description of an image to visually impaired users visiting your website.
- Search engines use it to categorize and better understand your content.
- If your image fails to load, a description of the image will be displayed to help avoid confusion.
You should aim to add alt text that works for both screen readers and search engines — a description that contains your target keywords but is still perfectly understandable to anybody who is using a screen reader to access your content.
Editing alt text is really easy in Shopify, but the process varies slightly depending on the type of content you’re working on.
Adding alt text to Shopify pages or posts
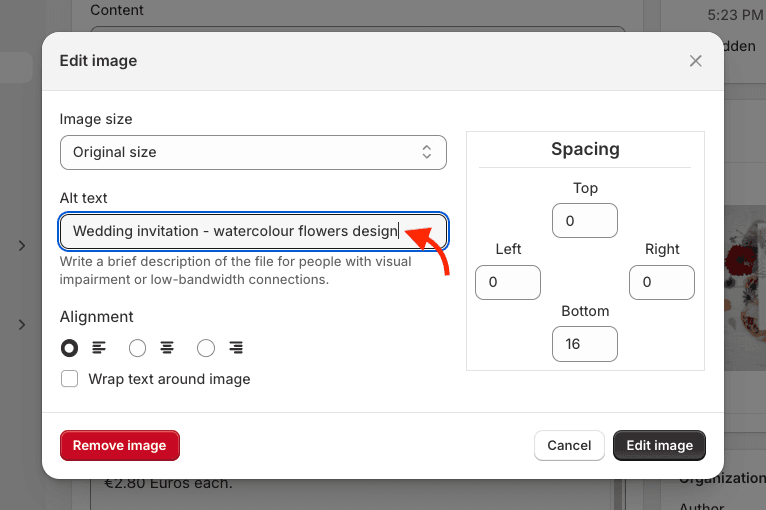
To add alt text to images on static pages or posts,
- Navigate to your page / post (via Online Store > Pages or Online Store > Blog posts).
- Locate the relevant picture.
- Double click on it.
You’ll then see a box appear where you can edit various aspects of the image, including alt text.
Adding alt text to Shopify products
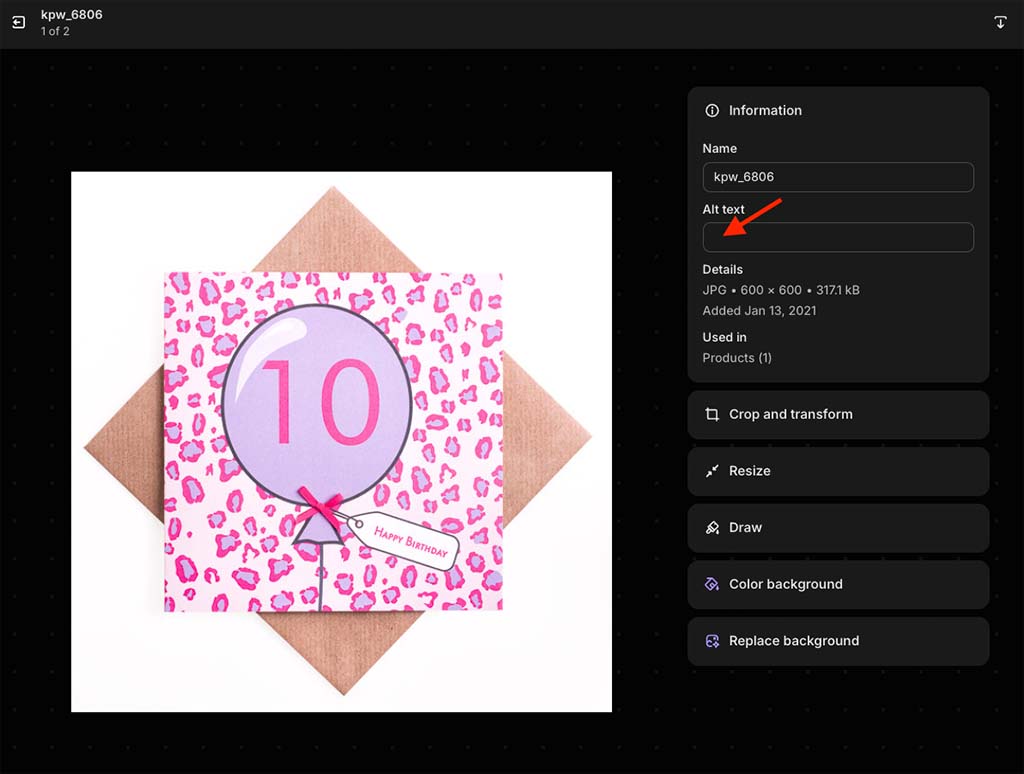
To add alt text to product images,
- Locate your product by clicking Products on your Shopify dashboard.
- Once you’ve found your product, click on the relevant product image.
- Click the ‘Add alt text’ option to the right of the image to add your alt text.
Using optimized image file names in Shopify
Search engines can also factor in the file names you use for your images when indexing pages — so ideally, you should include relevant keywords in them.
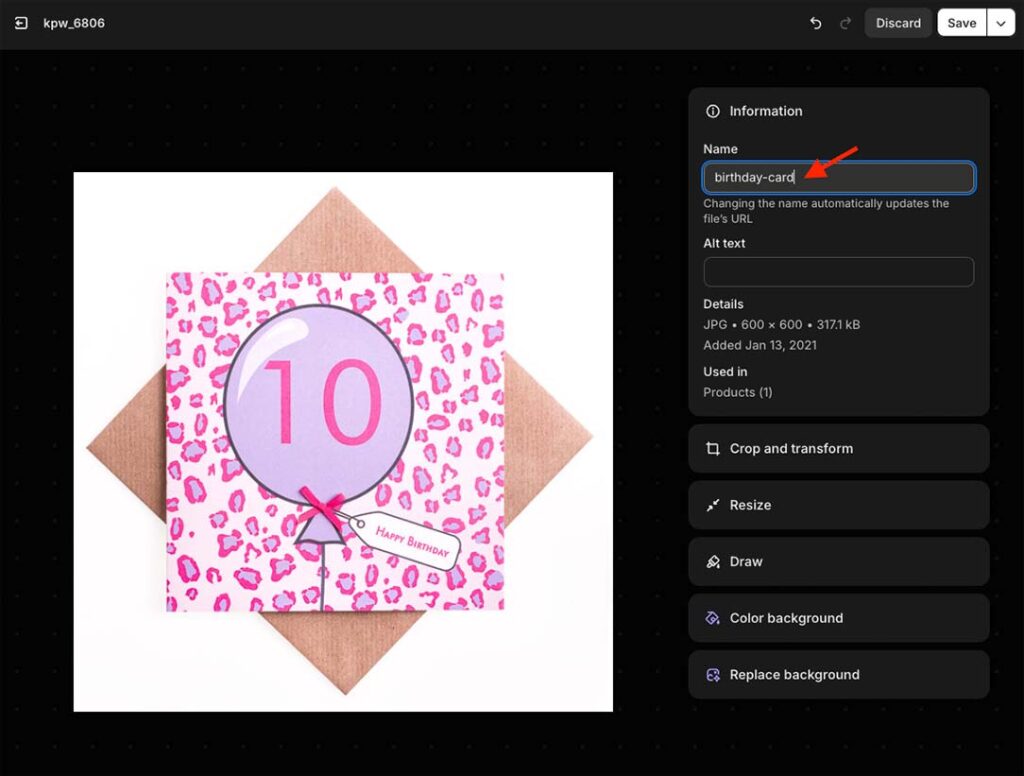
For example, if you were selling a blue toy airplane in your Shopify store, it would be better to give it a file name of ‘blue-toy-airplane.jpg’ instead of something indecipherable like ‘IMG1234567.jpg.’
Ideally you should do this before uploading images to Shopify, because not all image file names can be edited after they’re uploaded.
Product images can, however, and this is easy to do. Just locate the relevant product in Shopify, click on its image, and then use the ‘Name’ field provided to change its file name (see screenshot below).
If the image is on a page template that you’re editing via the Shopify drag and drop editor, it’s a case of selecting the image, clicking the ‘edit’ option and applying a new file name. (This is a pretty straightforward process).
For all other image types, it’s unfortunately going to be a case of replacing them with re-uploaded versions that contains your focus keywords in its file name.
12. Use ‘clean’ URLs
Using ‘clean’, SEO-friendly URLs is something that is encouraged by Google. Clean URLs are short, simple and easy to understand.
For example, if you were selling blue guitars, it would be advisable to use a URL of www.yourdomain.com/blue-guitars rather than www.yourdomain.com/prds/ct/p223.php?ref=14556bluegtr
So, always ensure that your Shopify store’s URLs are as intelligible as possible and include a focus keyword. This will help both search engines and humans understand what your content is about.
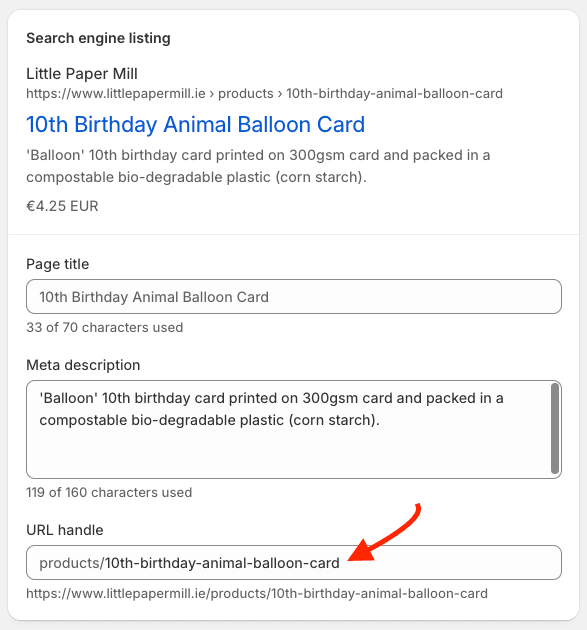
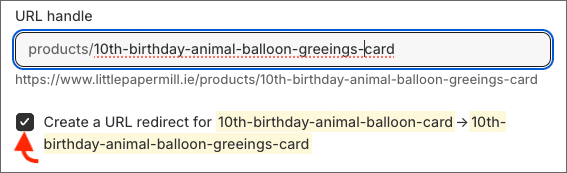
To edit a page URL in Shopify, go to the page, product or post you wish to edit, scroll down to the bottom of it and then click ‘Edit Website SEO.’
Then, make your changes in the ‘URL and handle’ box (see screenshot below). If you DO change a Shopify URL, make sure that you tick the ‘create URL redirect’ option.
This prevents users (and Google!) encountering broken links, and lets Google knows that you have changed the URL.
Now, changing URLs of pages that aren’t currently performing well in organic search results is usually fine — but if you are contemplating changing the URL of a page that IS already ranking very highly, you should proceed a bit more carefully.
This is because a high-ranking, high-traffic page is likely to have a lot of backlinks to it, and these won’t count for anything at all if you don’t create a redirect from your old URL to the new one.
(Backlinks are links from other sites to yours).
Changing a URL can also affect the ‘social proof‘ of a page because it will reset the stats displayed on your social shares counter for that page to zero.
So, in an ideal world, it’s good to get the URL structure right at the point at which you create your Shopify page or product, or shortly afterwards.
And, if you do end up changing a page URL on your Shopify store, always check that ‘Create a URL redirect’ box (highlighted below).
13. Add rich snippets to your products and pages
Rich snippets are pieces of ‘structured data’ that can be added to your content to help both searchers and search engines understand what a page is about, and they are an important part of how your website behaves in search results.
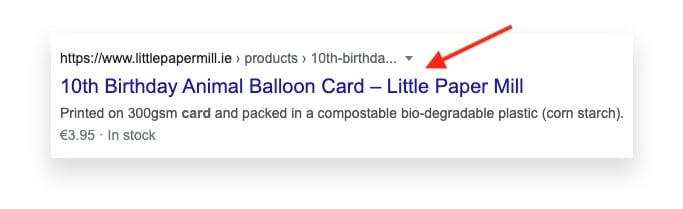
Rich snippets feature visual clues about the content of a product, page or post — for example star ratings, author, FAQ, prices, pros and cons etc.
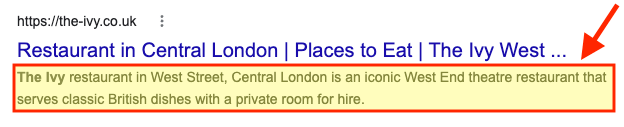
These appear just after the search result’s meta description, as per the example below:
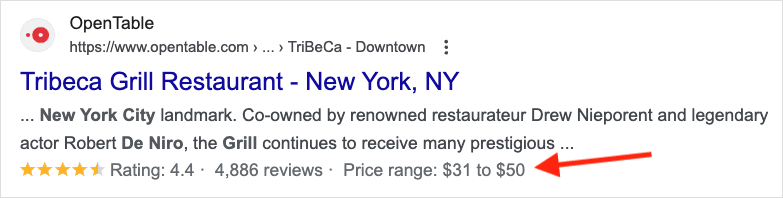
As you can see, rich snippets have been used to enhance the above search result for a restaurant with a star rating, the number of reviews it has received and a meal price range.
Search engines like rich snippets because they provide an additional source of data that can be used to categorize and index content better.
Humans like them because they add more relevance and context to search results (and this can lead to more clickthroughs, which in turn may lead to algorithms surfacing a result more often).
Rich snippets are typically generated through the addition of ‘Schema Markup’ — HTML code featuring tags defined by Schema.org (a collaborative project involving Google, Yahoo!, Bing and Yandex aimed at helping webmasters provide more accurate information to search engines).
There are a couple of ways to add rich snippets to a Shopify store. The first is to manually add some ‘data markup’ code to your Shopify templates (you’ll find some more information about this along with a code example here).
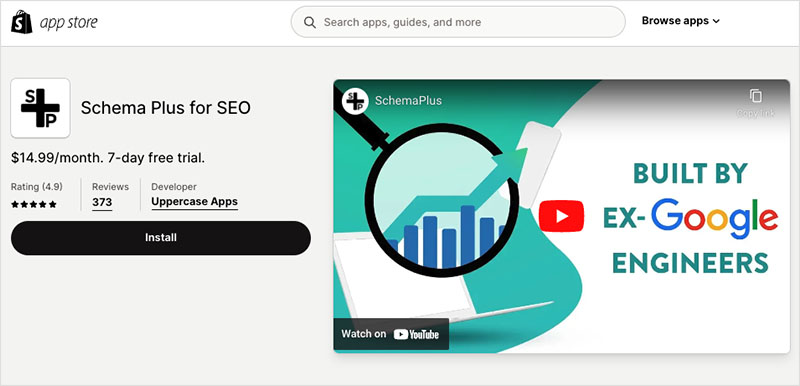
The second approach is to use a rich snippets app — there are tons of these available from the Shopify app store.
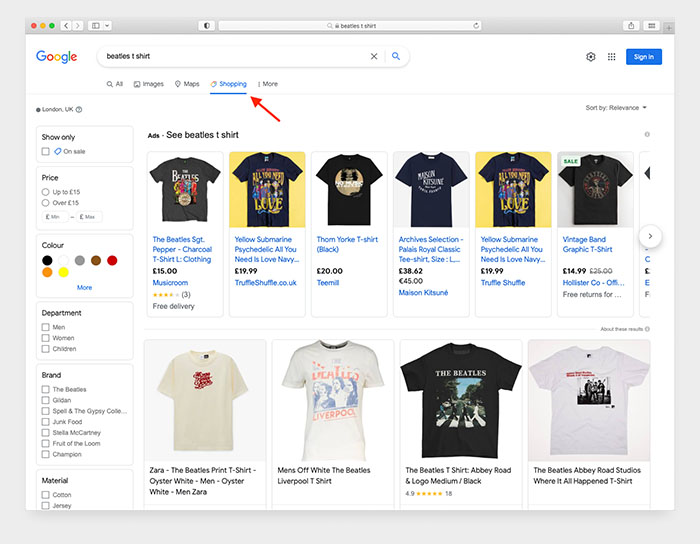
What about Google Shopping?
Getting your products onto the Google Shopping tab in search results (pictured below) is another way that you can boost your Shopify store’s visibility in search.
To do this, you’ll need to add the ‘Google & Youtube channel’ app to your Shopify store. This app is available for free.
14. Use the Yoast SEO app
Yoast SEO is a tool that helps you identify tweaks you can make to your content that can help it perform better in search results. Until recently, Yoast was only available to WordPress users, but the good news is that it’s now available to Shopify users too.
Yoast works by scanning your content and outputting a list of actionable tips to help you improve it. It looks at everything from meta description length to keyword density to page readability — and it’s a really handy tool to have in your Shopify SEO toolkit.
Using Yoast for Shopify does involve a fee ($19 per month) but it is usually worth it — particularly if you are planning to drive traffic to your Shopify store via blogging and inbound marketing.
And speaking of blogging…
15. Make full use of your Shopify blog
A lot of Shopify users focus so much on their product catalogs (the images, the descriptions, the keywords used etc.) that they forget a hugely important aspect of SEO — creating great content, usually in the form of blog posts.
Sites that feature in-depth, informative blog posts on topics that people are interested in tend to perform better in search results.
You’ll find some key tips on how to create the sort of engaging content that ranks in our article about increasing blog traffic.
📚 Related resources about keyword research tools
Before you invest time in writing great content, some keyword research is essential.
This helps you get a strong understanding of the phrases associated with your niche that people are actually using when searching for content.
See our Ahrefs vs Semrush comparison, our Semrush review, our Moz vs Ahrefs comparison and our Ahrefs review for more information on the sort of tools you’ll need to do this with.
16. Build backlinks to your Shopify store
Backlinks are links from another site to yours, and they constitute a very important part of SEO.
This is because search engines view backlinks as ‘votes’ for the quality of a piece of content. Generally speaking, the more of these ‘votes’ that the products and pages on your store have, the more likely they are to rank highly in search results.
Getting backlinks is one of the most difficult aspects of SEO, but it’s very important to do.
To get backlinks, you typically have to ‘reach out’ to other site owners in your niche and persuade them to link to your content. This can be hard — but is made easier if the content you’ve created is really strong.
Strong content also tends to attract backlinks without as much outreach too, because people like linking to interesting products, posts and free tools.
One thing that you should usually avoid doing is buying links — search engines are wise to this practice and can penalize your site in search results if they discover evidence of it. Link exchange schemes are technically against Google’s webmaster guidelines too.
17. Increase ‘dwell time’ on your Shopify store
‘Dwell time’ is a phrase that SEO experts use to refer to the length of time a user spends on a website before returning to search results.
There is a general consensus in the SEO community that the longer your dwell time, the more likely your content is to perform well in search results — because it indicates to search engines that it is satisfying user queries.
So, it makes sense to create your Shopify site in a way that retains attention for as long as possible.
Here’s how you can do this:
- Create genuinely great content — whether that means writing engaging, in-depth blog posts or showcasing fantastic images on your product pages, give people a a reason to hang about and eyeball your content for ages!
- Consider using bucket brigades in your copy — phrases or questions that encourage the reader to keep on reading (i.e.,”Now:”, “But first”, “Let’s get started” etc.).
- Use a simple navigation structure that makes it easy for users to get from one part of your website to another, and encourages them to browse longer.
- Make use of internal linking — for example, add ‘related products’ or ‘suggested further reading’ calls to action. This encourages visitors to spend more time on your store digesting not just the first page they landed on, but other products and content too. (Internal links can bring other SEO benefits too).
- Encourage people to leave comments on your blog posts (and to read them).
- Embed videos on your pages (watching them can take your visitors a while!).
One thing that’s very important to remember however is not to just put any old content or ‘fluff’ on a page to keep people on it longer.
Whatever you place on it has to provide genuine value to a user.
18. Ensure your site is trustworthy
Google looks for ‘E-E-A-T signals’ on websites, with this acronym standing for Experience, Expertise, Authoritativeness, and Trustworthiness. Sites that display these characteristics can perform better in search results.
You can add E-E-A-T signals to your Shopify store by ensuring that it contains:
- an about page
- an easy way to contact you
- a privacy policy
- a refund policy
- website terms and conditions
- author biographies.
Getting links from authoritative sites to yours along with mentions of your brand name online can also help establish the necessary trust.
Get more Shopify SEO resources
The above tips and best practices should definitely help make a difference to the performance of your Shopify store in search results, but there is a lot more that you can do to tackle SEO issues and make your Shopify store rank higher on Google.
If you’re interested in finding out more about the whole topic of search engine optimization, and want to make sure your store performs well in search results, then make sure you download our free SEO toolkit below. We’ll send you all our key resources and guides, keep you up to date with the latest SEO advice and send you tips on how to start a successful business.
And do leave a comment if you have any Shopify SEO queries! We read them all and will help if we can.
Don’t miss out on our free SEO toolkit
For a limited time only we’re offering our readers some excellent free SEO tools and resources. Sign up now to immediately receive:
- our downloadable cheatsheet containing the 20 key steps to ranking highly in search results
- extended free trials and discounts for leading SEO tools
- our downloadable cheatsheet on how to grow organic traffic to a blog
- 2 in-depth guides to SEO
- ongoing free tips and advice on SEO and growing your business
Shopify SEO FAQ
Is Shopify good for SEO?
Yes — Shopify is designed in a way which adheres to SEO best practice, and it lets you access and manipulate all the key SEO elements easily. You don’t have control over hosting, so you’ll have less ways to manipulate page speed (an increasingly important ranking factor), but Shopify’s hosting setup is generally fast and the company uses a CDN (content delivery network) to further ensure that stores built on the platform load quickly.
How can I make a Shopify store rank highly in search results?
There are quite a few steps you’ll need to take to ensure that a Shopify store ranks highly in search results, but the key ones are making sure that it (1) is registered with Google Search Console, (2) always uses unique product descriptions, (3) contains compelling content for which keyword research has been carried out and (4) has high quality backlinks pointing to it.
Why is my Shopify store not showing up in Google?
If your Shopify store isn’t appearing on Google at all, check that you’ve registered it with Google Search Console. Additionally, try to source some high-quality links from other websites to your store — this is one of the best things you can do to increase a site’s visibility in search results. Remember also that brand new sites can take a while to get indexed by search engines — several weeks, in fact.
Is SEO better on WordPress or Shopify?
Technically speaking, WordPress is the better platform for SEO — the platform gives you much more control over site code and hosting, and this allows you to create a super fast site with a great technical SEO setup. However, in order to do this, you will need excellent development skills (or access to a good developer) and a top-class hosting package.
Comments (19)