In this tutorial, I’m going to show you how to start a Shopify store from scratch. I’ll walk you through the steps involved in a simple, jargon-free way — and help you get your store live quickly and easily.
(Plus, at the end of the post, I’ll give you some bonus tips on how to ensure that your brand new ecommerce store becomes a successful one).
Ready? Let’s dive in.
1. Get everything you need for your Shopify store ready
Before building your Shopify store, it’s a good idea to have everything you need for it to hand — this will speed up the process and lead to a better-looking store. The key things you’ll usually need are:
- A business idea
- A strong business name
- A logo
- Products
- Photos of your products
- Content for your store’s pages (about us, contact us, FAQs etc.)
2. Start a free trial
The next thing that you’ll need to do is start a free trial of Shopify. The free trial lets you try the product out for three days, after which you only pay $1 for the first three months of your Shopify subscription.
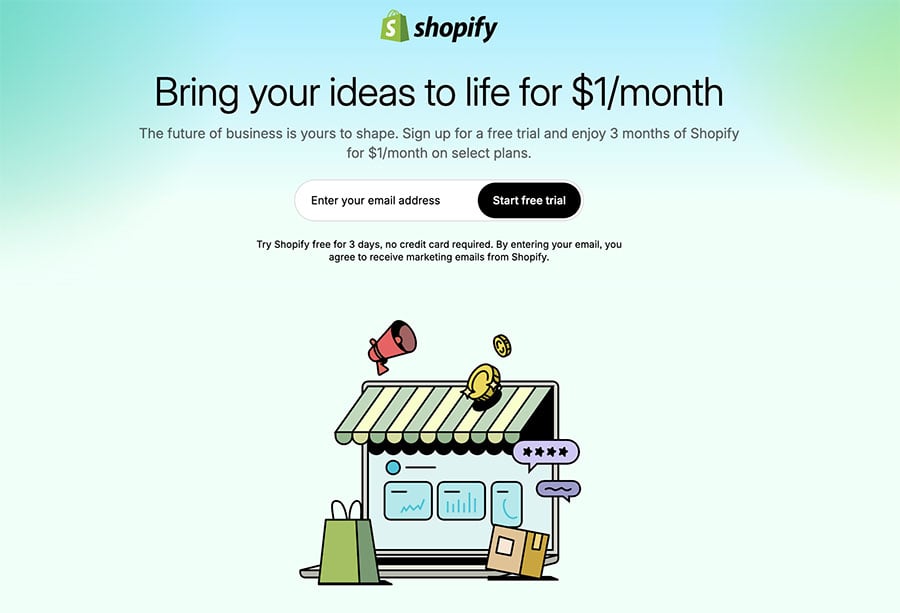
You don’t need to enter any credit card details to create your Shopify account and start your trial — however, you will be asked a few onboarding questions about the type of business you are creating on Shopify.
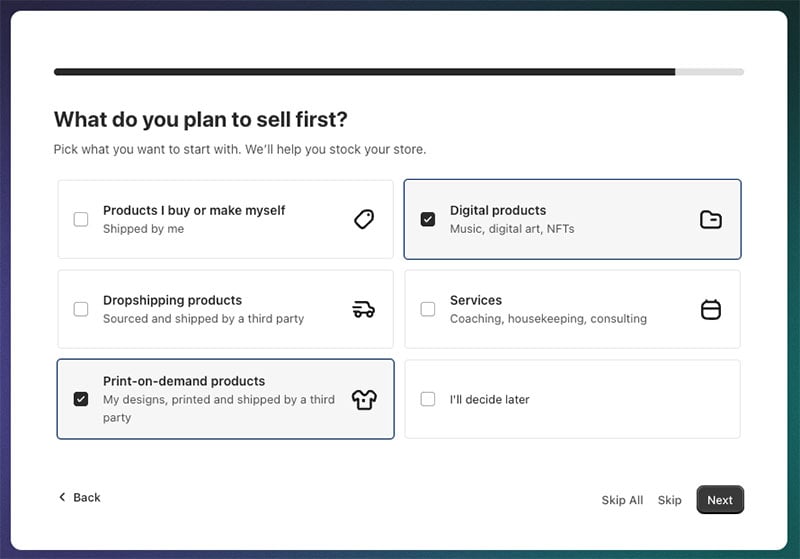
Although you can skip these questions if you wish, it can be a good idea to provide as much information to Shopify as possible, because the platform tailors your store’s setup guide based on your answers.

Once you’ve answered Shopify’s questions, you’ll find yourself inside your brand new Shopify account! Now you can add products, pick a theme and configure your payment and shipping options.
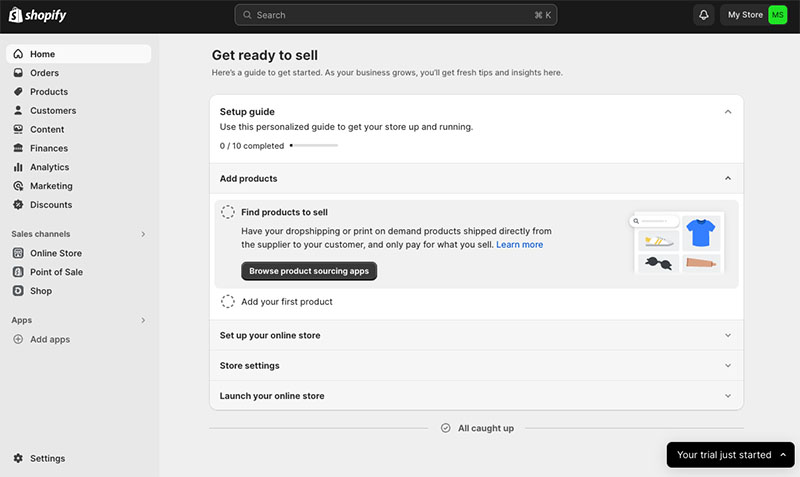
Let’s start with the ‘adding products’ bit.
Download our free Shopify Startup Kit
Our free Shopify Startup Kit is a must for anyone thinking of building an online store with Shopify. Containing a comprehensive e-book on starting a Shopify store, video tutorials, PDF cheatsheets and much more, it’s packed full of practical advice on how to get a Shopify business off the ground. It’s available for free to Style Factory readers — but for a limited time only.
3. Add products to your Shopify store
Once you’ve signed up for your Shopify free trial, you might be tempted to start picking themes and playing around with your new store’s design.
(To be fair, this can be the most fun part of starting a Shopify store!).
However, it’s much better to add your products first.
This is because your product range will have a big impact on the look and feel of your store — and accordingly, it’s best to avoid spending a long time choosing and customizing a theme only to find that your product photos don’t work well with it.
So ideally, you should aim to design your store around your products and their imagery — not the other way round.
To add your first product, just go to Products > Add your products in your Shopify dashboard.
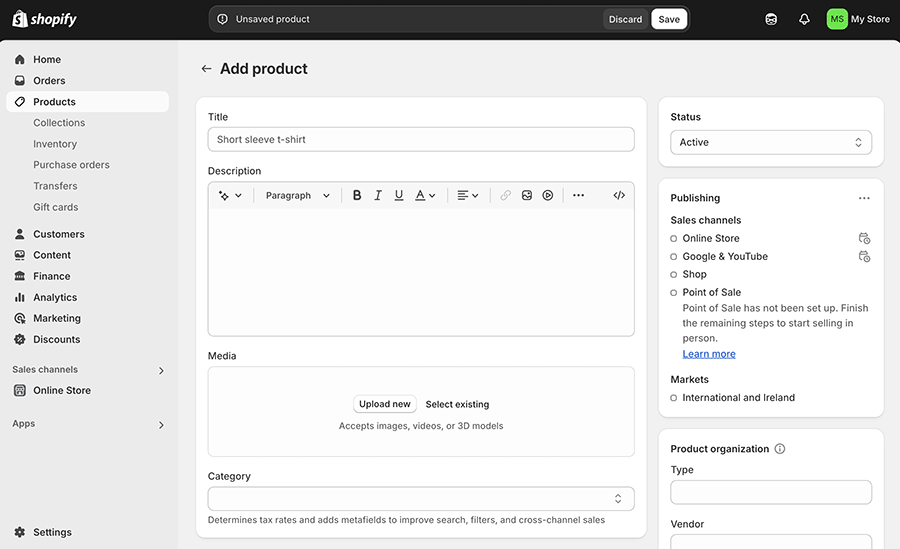
Then, it’s a case of adding in the key information about your product, namely:
- product title
- description
- media
- category
- pricing
- inventory
- shipping
- variants
- search engine listing preview
Let’s go through these quickly now.
Product title
This is what your customers will see when they come across your product either in your store or in Google search results.
So, your title should be
- clear
- accurate
- engaging
- relatively short.
Product description
This field gives you the opportunity to really sell your product!
However, it’s important not to write a long piece of blurb that goes on and on about how great your store is — you need to be strategic here. So, when writing your product descriptions…
- Be very aware of your buyer persona — the kind of person who’s most likely to be browsing your store. Tailor your product descriptions so that they speak to your target audience clearly and in a relevant way.
- Make your descriptions extremely easy to read — explain your products in simple terms and use headings, bullet points and short paragraphs to lay out your copy (this will help potential customers access key information about your products quickly; and search engines like this approach to copywriting too).
- Highlight any unique selling points (USPs) associated with your products — features that elevate them above similar goods. Include any incentives or special offers associated with them (discount codes, the fact that you offer free shipping etc.).
- Overcome objections — try to work out why a potential customer would feel nervous about parting with cash for your products, and provide reassurance that calms those nerves.
Product media
The ‘media’ section of your product page gives you the option to add photos, videos and 3D models of your products.
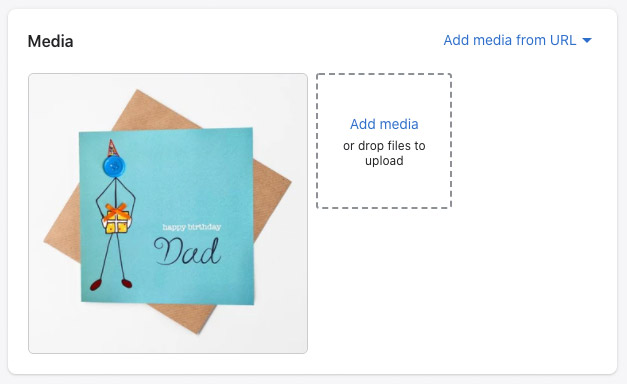
There are a few key things to note when uploading media.
- Ensure that the quality of your product media is as high as possible. If you can, work with a professional product photographer or videographer to create your media. If that’s not possible, it’s fine to take your own product photos or shoot your own videos — just make sure to use a device with a high quality camera when doing so. (Shopify lets you upload videos up to 4K resolution, so you can go to town here if you like!).
- Ensure that you use the same aspect ratio when uploading product photos — Shopify themes look much better when a consistent one is used.
- Be aware of image resolution requirements — for Shopify’s product zoom feature to work properly, images need to have a minimum resolution of 800 x 800 pixels; and if using Shopify to sell online via Amazon or Etsy, you’ll need to ensure that they are at least 1000 x 1000 pixels in size. Shopify actually suggests using photos with a minimum width of 2048 pixels (you can read Shopify’s advice on product images here).
- After you’ve uploaded a product image, add appropriate alt text to it. Alt text lets visitors with visibility impairments understand your content better, and helps search engines index it more accurately too.
- Watch out for video length and file sizes – if you’re uploading your own product videos to Shopify (i.e., rather than embedding YouTube and Vimeo ones), make sure that they don’t exceed 10 minutes in length and 1GB in size.
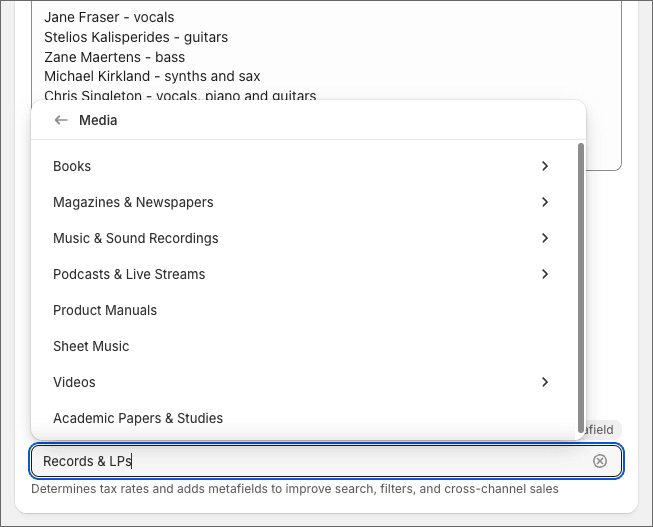
Category
In Shopify, the category field is used to classify products based on ‘taxonomies’ used by Google Shopping, Facebook Shop, Tiktok and other platforms. There’s a large list of categories to choose from, and it’s important to pick the right one for your product, because doing so can make it more visible on all these services.
Additionally, you can use categories to organize your collections in various ways throughout your store.
Simply review the list of options available and pick the right one for the product you’re adding.
Pricing
Now it’s time to set your product price!
When setting a price for an item, you need to aim to strike a balance between:
- your costs — employee costs, raw materials, shipping, rent and so on
- the ‘perceived value’ of the product you’re selling.
Price things too high, and you won’t generate enough sales to turn a profit. But making things too cheap by comparison to similar goods may raise doubts in your customers’ minds about the quality of what you’re selling online (if something sounds too good to be true, it often is).
Pricing can be tricky — but the good news is there’s lots of room for trial and error with ecommerce. You can always test the market with one price, and change it later based on the results you’re getting in your store.
Once you’ve settled on your product price, it’s easy to add it to Shopify — you just enter it into the ‘price’ field on your product page.
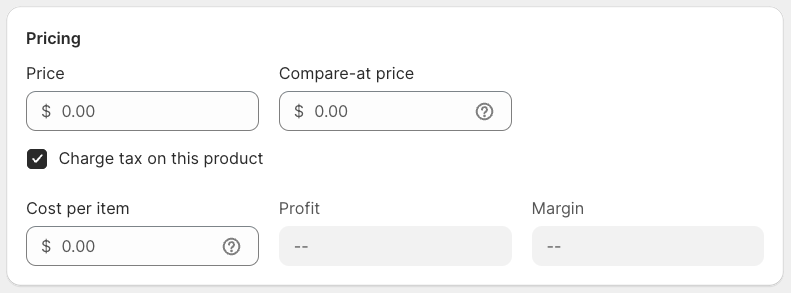
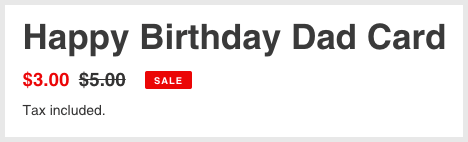
If you like, you can also enter a value into the optional ‘compare at price’ field. This lets your visitors know what the ‘full’ price of an item is, with the ‘price’ appearing as a discounted rate.
For example, entering $3 into the ‘price’ field and $5 into the ‘compare at price’ field will show your store visitors something like this:
The ‘cost per item’ field is also optional — it simply lets you add the cost price of an item into Shopify, so that you can see what your actual profit per sale is.
(This is useful for reporting purposes.)
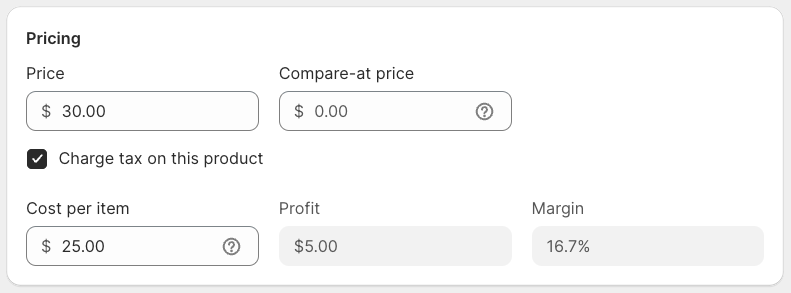
As for the ‘charge tax on this product’ option, whether or not you need to tick this box will depend very much on your product type, location and tax status. If you are planning to charge tax on your goods, just tick it for now — you can edit your tax settings later.
Inventory
As its name suggests, this section of the product page lets you keep tabs on your inventory — and lets Shopify know what to do if you run out of a particular product.
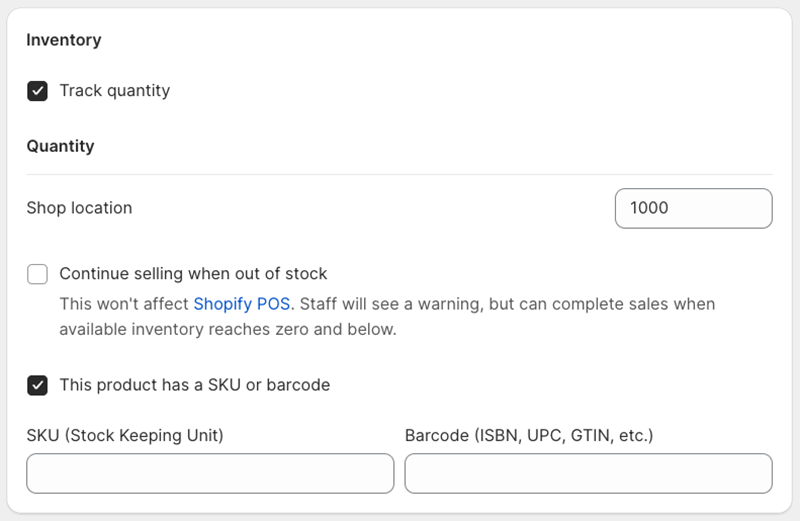
What you need to enter here will depend on your product type (physical, digital etc.) and your own requirements, but you can use the fields provided to add:
- stock keeping units (or SKUs — a product code, basically)
- bar codes
- quantity information.
- location of your inventory.
Of the above, the ‘quantity’ settings are probably the most important — if you sell physical products it makes sense to enter how many are currently available and, using the ‘continue selling when out of stock’ box, instruct Shopify what to do when you run out of goods.
If it doesn’t take you very long to make or source your products, it’s usually best to tick the ‘continue selling’ option — but if it’s going to take a while for you to get more stock, it’s better to leave it unticked (doing so will display a ‘sold out’ notice beside your products until you’ve let Shopify know that the item is back in stock).
If you are using multiple locations to store your products, you can use the location settings provided to let Shopify know how many products you are storing at each of them (you can learn more about inventory locations and Shopify here).
Product shipping
If you’re selling physical products, you can use the shipping section to enter weight and customs information.
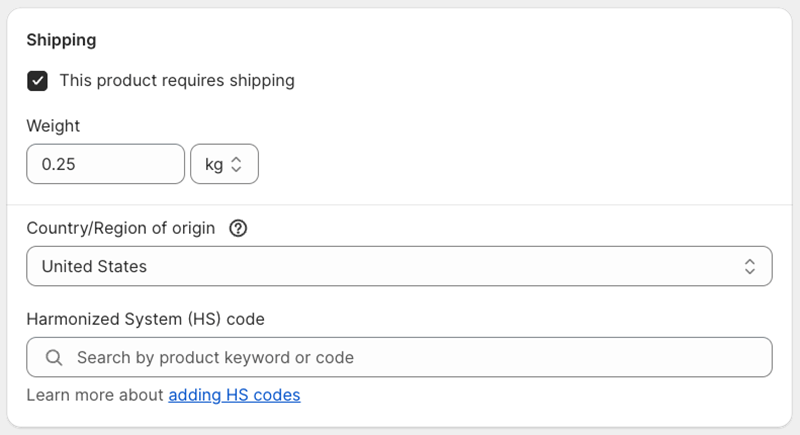
The weight data is particularly important for calculating shipping rates (I discuss how to do that later on in this post).
Product variants
If your product comes in a variety of options — for example different sizes, colors or flavors — this is where you add them (along with the relevant prices, quantities and SKUs for each one).
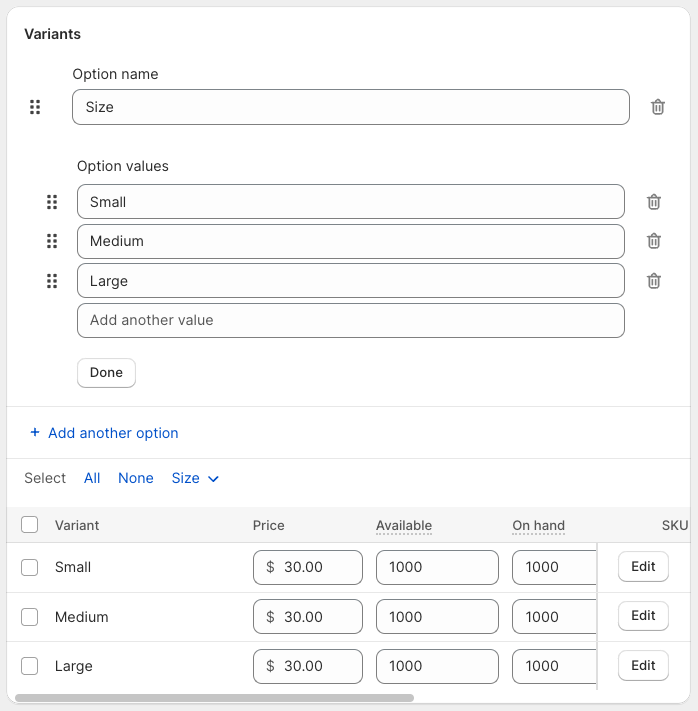
You can create up to 3 options for each Shopify product (for example size, color, material); and up to 100 variants of these.
Variants are combinations of product options — i.e., a large, blue shoe would be one variant; a small, red one would be another and so on.
Tip: if these product and variant limits are too restrictive for your product range, you may need to buy a relevant app from Shopify’s app store (Infinite Options is a popular choice).
Search engine listing preview
This section lets you tell search engines more about your products.
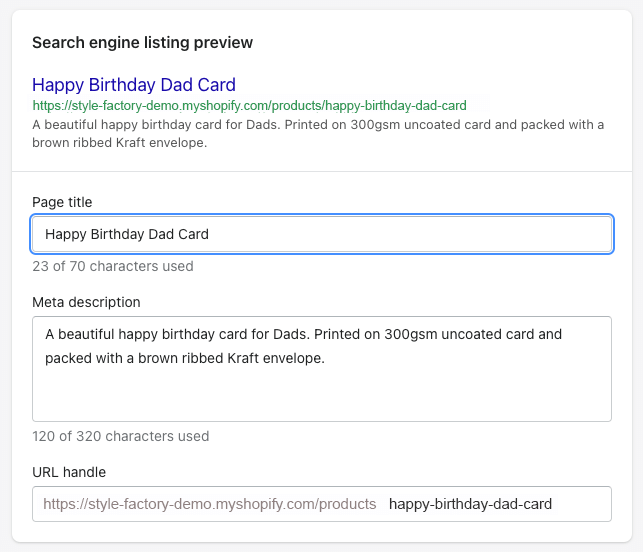
There are three fields to complete here:
- Page title — this is the title that usually appears in search results (the large clickable heading).
- Meta description — this is where you enter your ‘meta description,’ a piece of information that is displayed as the description in search results (though not always — Google often uses it as a guide rather than gospel).
- URL / handle — the web address for your product.
Here’s how all this translates into a Google search result:

For a detailed guide to how you should approach filling in these fields, you might like to check out our Shopify SEO guide or watch our video about Shopify SEO (below).
But for now, here are some key pointers:
- When naming your products, it’s always best to carry out some keyword research first. Keyword research tools like Ahrefs or Semrush can tell you exactly what phrases people are using when searching for products like yours; how many searches there are per month for these phrases; and how difficult it will be to rank for them. For example, using a keyword research tool you might discover that there are 64,000 searches for ‘ketchup’ every month and 5,000 for ‘red sauce’ — and that it will be easier to rank highly for ‘red sauce.’ (You can learn more about keyword research in our Ahrefs review or our Semrush review).
- Include your target keyword in your URL. This helps Google index your products more accurately.
- Keep your meta description around the 155-160 character mark. Try to keep things short, sweet and engaging, as doing so will generate more clickthroughs. (Longer meta descriptions are less likely to be used by Google, or may be truncated).
Product organization
On the right hand side of the product page you’ll find a ‘Product Organization’ section. This lets you add information about your products that make it easier to set up collections and discounts.
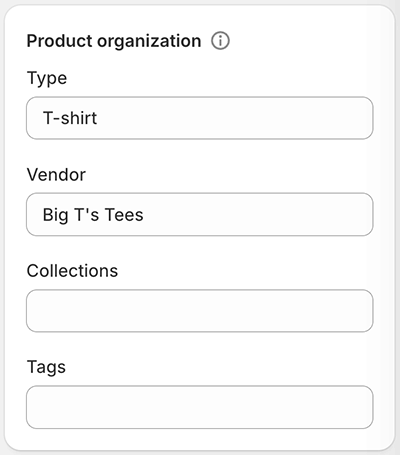
The fields you need to fill in are:
- Product Type — the specific type of product for sale
- Vendor — the manufacturer or seller of the product (in a lot of cases, that’s you).
- Collections — we’ll come back to collections in more depth in a moment, but basically they are catalogs of products that you create either manually or using rules. Collections are important because you can display them in various useful ways on your store — for example as a feature on your home page, or in your navigation.
- Tags — these are keywords that you can associate with your products. They matter because you can use them to automatically create collections, and they help your customers locate products more easily when they search your Shopify store.
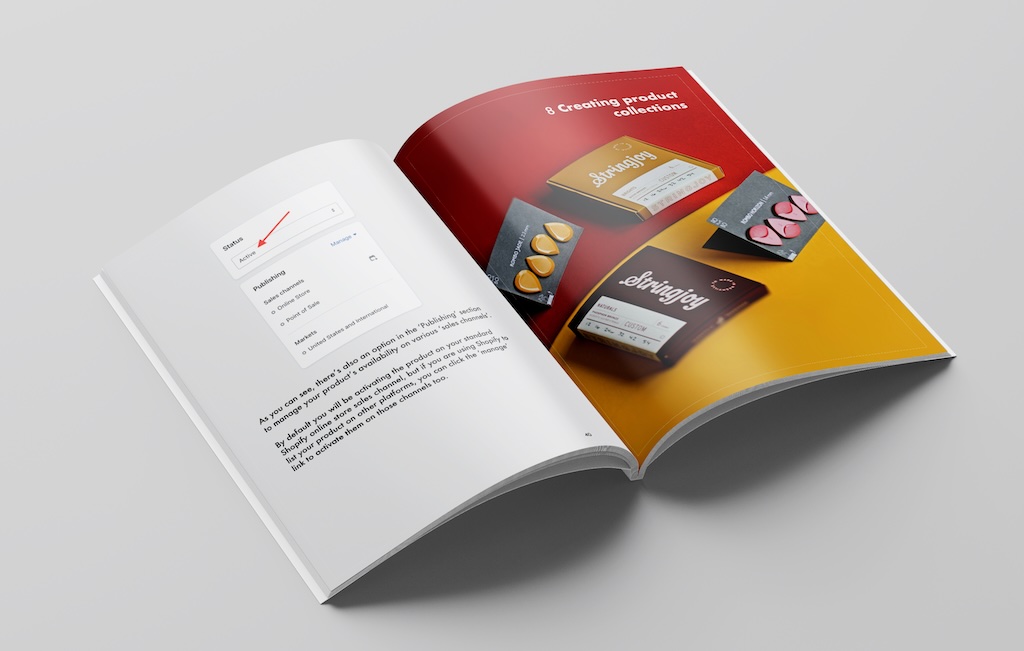
Product status
Once you’re happy with all the information you’ve entered on your product page, you can activate your product.
This is done by setting the product status option box (at the top right corner of the page) to ‘active.’
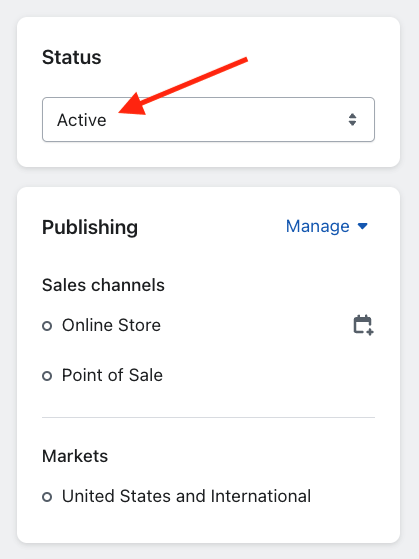
As you can see, there’s also an option in the ‘Publishing’ section to manage your product’s availability on various ‘sales channels’.
By default you will be activating the product on your standard Shopify online store sales channel, but if you are using Shopify to list your product on other platforms, you can click the ‘manage’ link to activate them on those channels too (you can learn more about Shopify sales channels here).
Related resource: our ‘Things to sell on Shopify‘ guide gives you a rundown of 30 profitable product ideas.
4. Create product collections for your store
Once you’ve added a few products to your new Shopify store, you can organize them into ‘collections.’
Collections are groups of similar types of products — for example, if you ran an online greetings card store, you might create a birthday card collection, a Christmas card collection and so on.
There are three main reasons why you might want to do this:
- to display a certain selection of products on your store’s home page
- to create a link in your site navigation to a particular set of products
- to discount a specific selection of products.
To create a collection, just go to Products > Collections in your Shopify store and click ‘Create collection.’
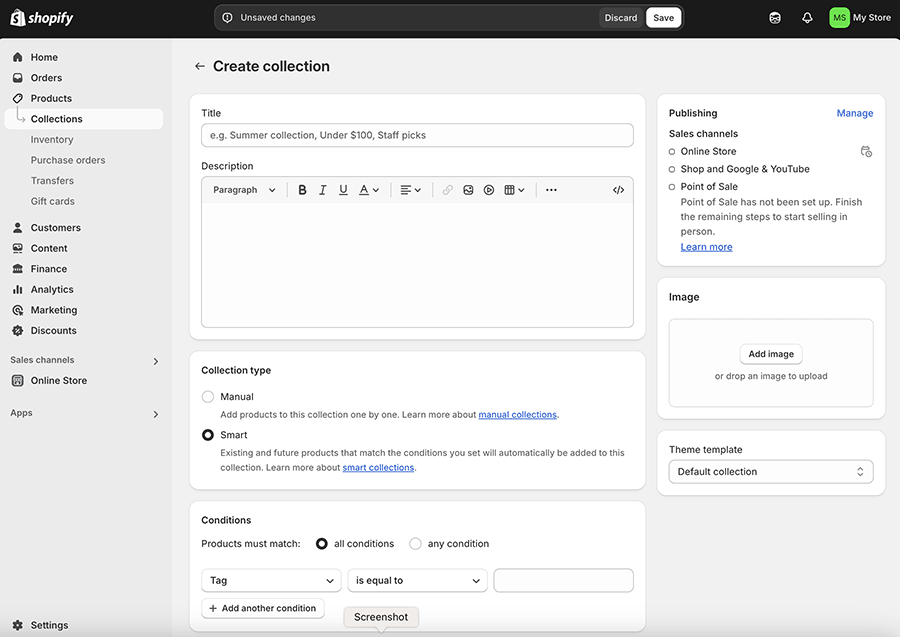
Once you’ve accessed the collection editor, you can enter a title, description, collection image, SEO information and so on — this involves a similar process to creating a product.
What you have to pay particular attention to here is the ‘Collection type’ box. This gives you the option to either create a collection manually, or via automation (Shopify refers to automated collections as ‘smart’ collections).
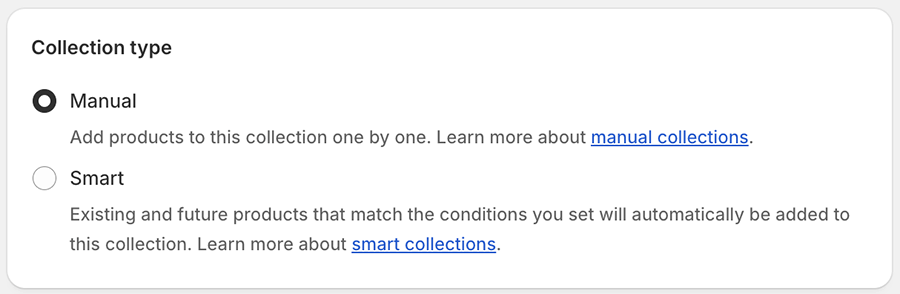
If you choose the ‘manual’ option, you’ll then be given the opportunity to search for products from your catalog and add them to the collection, one by one.
If you choose the ‘smart’ option, you will be asked to set up some simple rules that populate your collection:
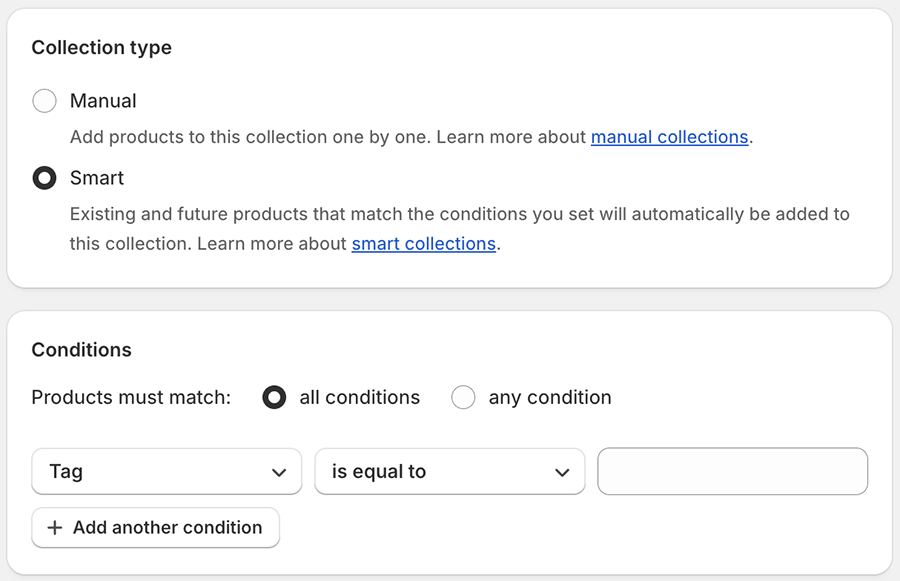
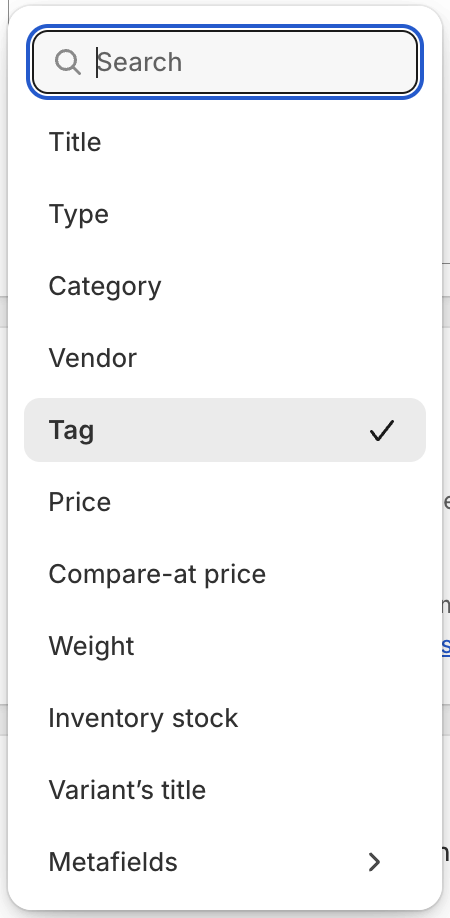
In the above example, I’m creating a Christmas card collection based on product tag. Every time a product is tagged with ‘Christmas Card,’ it will automatically be added to that collection.
You aren’t restricted to using product tags as the basis of these rules, however — you can use several other product attributes to create collections, including product title, type, vendor and price:
In my view this ‘smart collection’ option is one of Shopify’s best features — key competing platforms typically restrict you to creating manual collections only.
Automated collections can save you hours of time, especially if you’re dealing with a large product inventory — so make the most of them!
5. Create your store pages
By now, you’re probably itching to browse the Shopify theme store and pick a glamorous template for your store!
But actually, the best thing to do next is create your store’s pages.
As with products, if you have your key site content in place before applying a theme, you’ll get a much better sense of which templates work best for your store.
The key pages you will usually need to create are:
- About us — an overview of your ecommerce business, your values and story.
- FAQs — a page where you answer frequently asked questions about your products.
- Policy pages — a website terms of use page, cookie notice, privacy notice, shipping policy, returns policy etc.
- Contact page — a page containing your phone number, address and a contact form.
- A blog — this lets you share news about your business or related content that your customers might be interested in.
(You’ll note here that I’ve omitted the home page from this list. This is because this is one page that’s better to add after you’ve picked a theme, as it involves more design work using your theme’s home page customizer. More on this in a moment).
With the exception of the blog, all these pages can be created in the same way. You simply go to Online Store > Pages and click ‘Add page.’
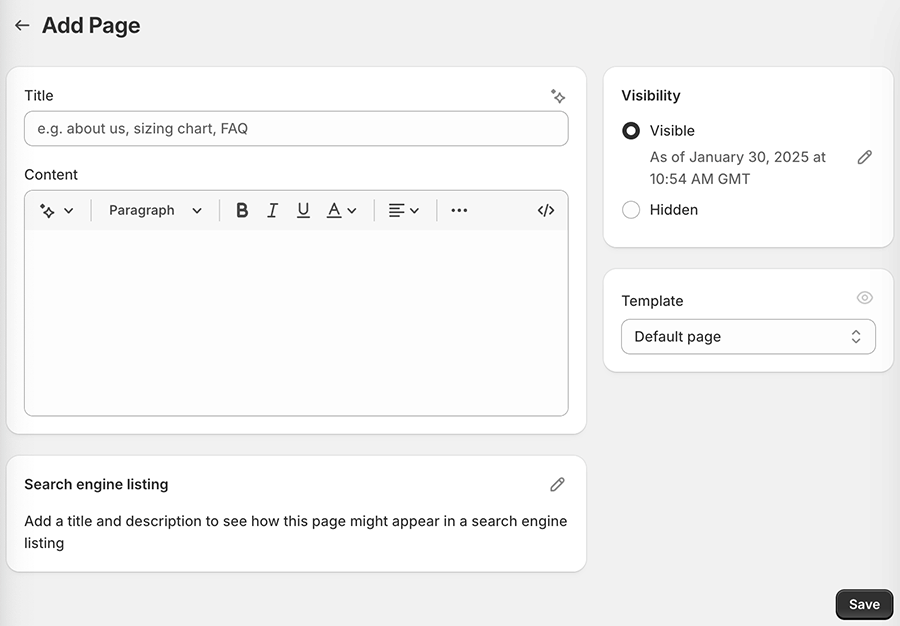
It’s then a case of filling in the blanks — your page title, content, SEO info etc.
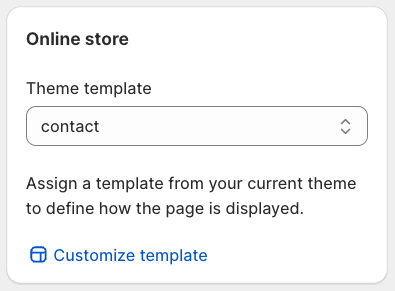
One thing to watch out for when creating your contact pages is the ‘theme template’ option. You will need to set this to ‘contact’ for these.
As for blog posts, to create these you go to Online Store > Blog Posts and click ‘Create blog post’.
For now, it’s probably best just to create one post — a ‘welcome to our new store’ article or similar; you can always add more content to your blog as your store develops.
6. Create your navigation menus
Once you’ve got your products and pages in place, it’s time to create your navigation menus.
To add your navigation to a Shopify store, you go to Content > Menus. You’ll then usually find the option to edit two menus: a ‘main menu’ and a ‘footer menu.’
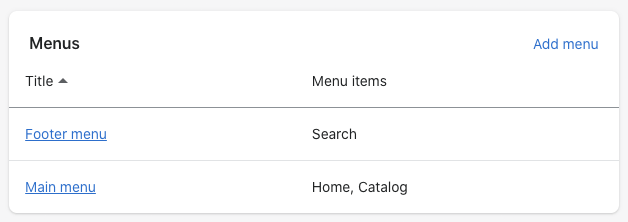
Of these, the ‘main menu’ is the most important for now. Click on that link and you will get the option to add the pages / collections you’ve just created to it.
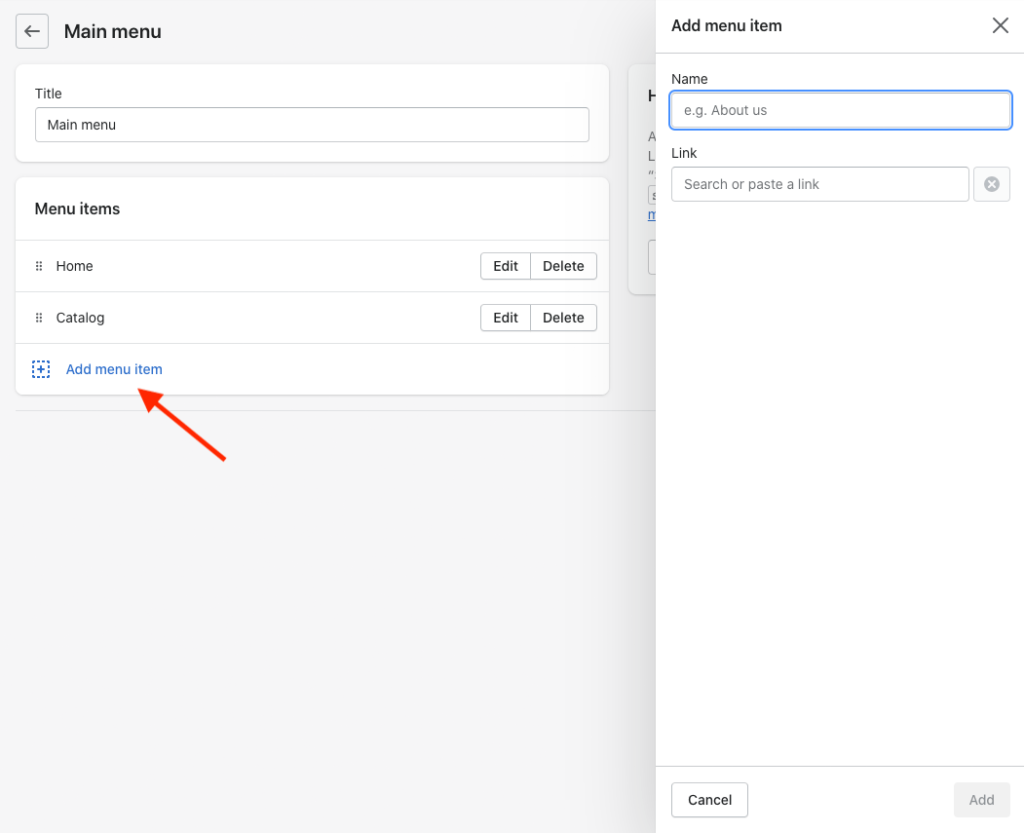
When you’re done, just click the ‘Save menu’ option.
(If you like, you can use this section to create other types of menus too — like footer or sidebar ones, or more complex ‘nested’ menus. For more detailed information about menu creation, see Shopify’s help resource on navigation).
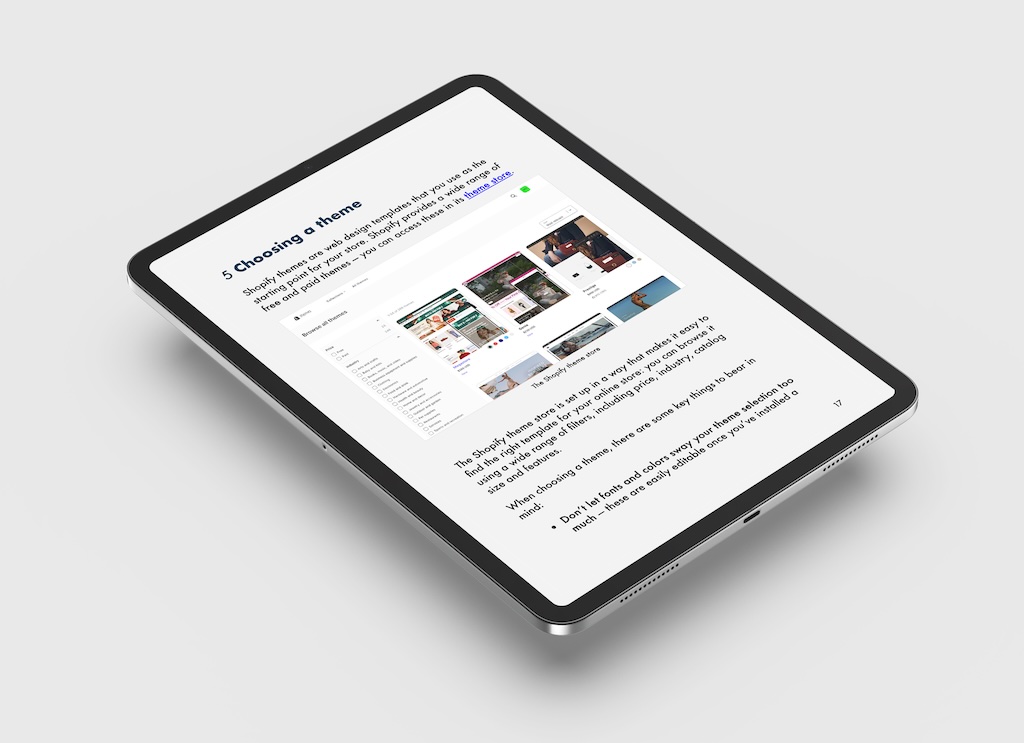
7. Choose a theme
At this point in proceedings you’ve got your products, collections, pages and main navigation all sorted — so it’s finally a great time to pick your Shopify theme! To do this, you can just visit the Shopify theme store, where you’ll find a very wide selection of themes available.
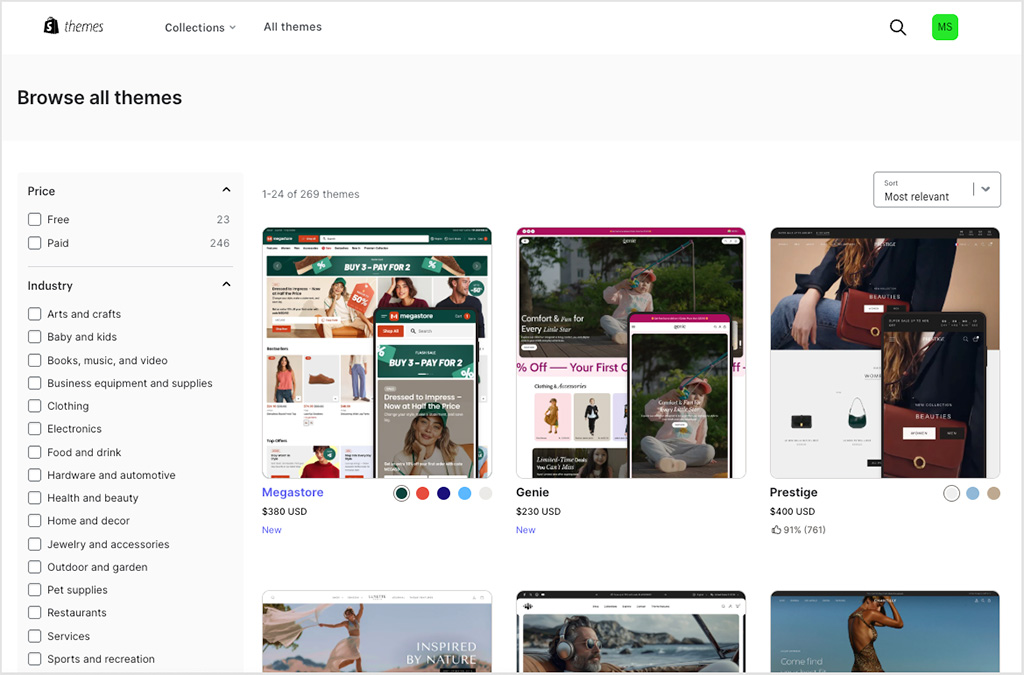
The Shopify theme store is set up in a way that makes it easy to find the right template for your online store: you can browse using a wide range of filters, including price, industry, catalog size and features.
When choosing a theme, there are some key things to bear in mind:
- Don’t let fonts and colors sway your theme selection too much — these are easily editable once you’ve installed a theme. Ensuring that a theme has the features you need (for example particular layouts, search bars etc.) is more important for now.
- Most paid themes come in 2-3 variants — check each version before settling on one.
- You can try paid themes out to see how they look before buying them. (It’s also worth noting that the prices listed for the paid-themes are one-off fees, not monthly charges.)
8. Create your home page
When you’ve settled on your Shopify theme, it’s time to create your store’s home page.
To do this, go to Online Store > Themes and click the ‘Customize’ button. This will take you to a drag-and-drop editor for your home page.
The default layout and the options available to you here will vary a bit by theme, but all Shopify themes typically let you add sections like:
- hero images
- slideshows
- featured collections
- images
- text
- newsletter sign-up forms
- featured products
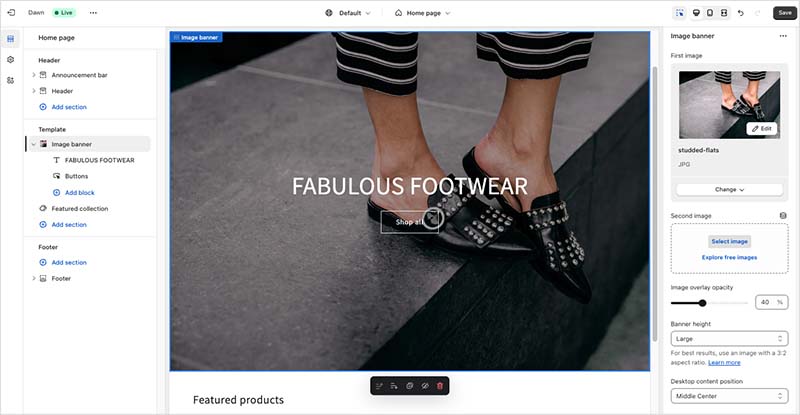
In terms of what you should add to this page, the key thing to remember is to keep things simple — don’t overwhelm your visitors with information. Highlight your best products, avoid clutter and make it super easy for your potential customers to find what they’re looking for.
💡 Tip: why not try a bit of user testing?
If you’re building your own online store, it’s easy to lose perspective and objectivity about its quality. So, when you’ve got a draft of your home page ready, it’s a good idea to run it past a few people to get feedback on how attractive and user-friendly it is.
This can be some friends or colleagues — or you could solicit opinions from members of relevant Facebook groups.
If people consistently identify the same element as needing improvement, spend a bit more time refining it before launch.
9. Apply your brand
Now it’s time to customize your store so that it makes use of your own logo, typefaces and colors — the key elements of your business’ brand.
Adding a logo to your Shopify store
To add a logo to a Shopify store, just go to Online Store > Themes > Customize and click the ‘Header’ option.
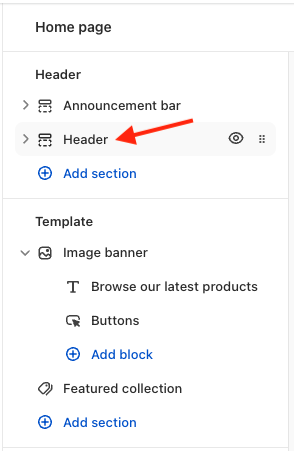
Click on ‘edit your logo in theme settings’ to add your Shopify logo to your store header.
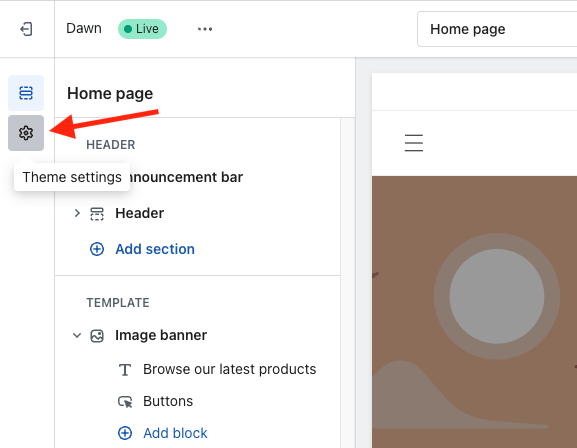
Customizing typefaces and colors
To customize typefaces and colors, you go to Online Store > Themes > Customize and click the ‘Theme Settings’ cog icon in the top left hand corner of the screen.
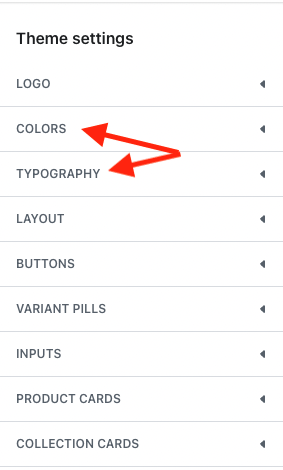
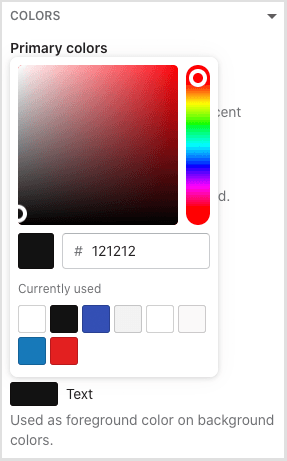
Then, click on the colors and typography options to change colors and fonts respectively.
Editing these elements is very straightforward — you click on what you want to change and are given the controls to do so.
Here are a few things worth bearing in mind when selecting colors and fonts:
- Do your research into how colors and typefaces work together — or better yet, involve a graphic designer in the process. A designer will be able to give you a clear steer on good font and color pairings, save you time and help you get a more professional result.
- When picking a color scheme, don’t forget accessibility. For example, if you pick a light font color and use it for text on a light background, your content will be much harder for your visitors to read (and especially so for those with a visual impairment).
- Keep things simple if you can — if you’re not confident about color and font selection, minimalism is probably your best bet. A monochrome scheme using sans serif fonts will in many cases look more professional than one involving a loud color scheme and ornate typefaces.
- Consider using one font only. This will reduce the loading time of your Shopify store, which can improve user experience (additionally, site speed is a Google ranking factor, so for SEO reasons it makes sense to make your design elements load as quickly as possible).
10. Set up your shipping rates
With your products, content and design all in place, it’s time now to turn to the operational side of things and think about:
- how you’re going to get your products to your customers
- how much tax you’re need to charge on them
- how you’re going to accept payments online.
Let’s start with the first of these, shipping.
To access your shipping settings, you need to go to Settings > Shipping and Delivery in your Shopify dashboard.
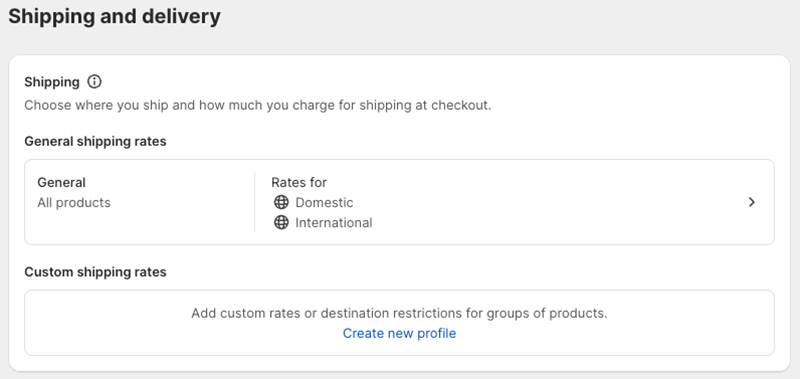
There, you’ll be able to set up various different types of shipping rates:
- flat shipping rates — a rate per item that is not connected to product price or weight
- rates based on product price or weight
- calculated shipping rates — rates that are determined at checkout (in ‘real time’) by a postal company based on the weight / size of the order
- free shipping rates — where the customer doesn’t pay any postage (i.e., it is absorbed into the cost of the item)
- local pickup or delivery.
Which option is for you will really depend on the type of products you’re selling, packaging costs and your customers’ typical shipping destinations.
But as with your pricing strategy, if you don’t get shipping zones and rates right first time, there is always the option to revisit it, and refine your shipping rules at a later stage.
💡 Tip: reduce shipping costs by using the ‘Shopify Shipping’ service
If you live in the US, UK, France, Canada, Italy, Spain or Australia, you can avail of discounted shipping rates by using ‘Shopify Shipping’ — a partnership between Shopify and various postal companies. Discounts can go as high as 88%, depending on plan.
11. Set up your tax rates
Many merchants will need to charge sales tax or VAT (value added tax) on purchases of their products. Rules vary considerably by country, so it’s worth asking a tax professional how you should configure these for your store.
Shopify facilitates automatic tax calculation for certain jurisdictions (and can in fact even cater for the EU’s complex rules on VAT for digital products, VAT MOSS); using this feature will speed the tax setup process up for some merchants.
Others will have to set tax rates in a more manual way.
Either way, the tax settings in Shopify can be located in the Shopify dashboard by going to Settings > Taxes and Duties.

Once you’re in the tax settings section, you’ll get the option to create tax regions (rules for individual countries or areas) and specify how you want to charge tax (for example, you can specify that product prices should be inclusive or exclusive of tax; or whether tax should be applied to shipping rates etc.).
As mentioned above, it’s best to get advice from a tax professional or accountant when setting these rules up; it’s also worth taking a good look at Shopify’s official documentation on tax rates too.
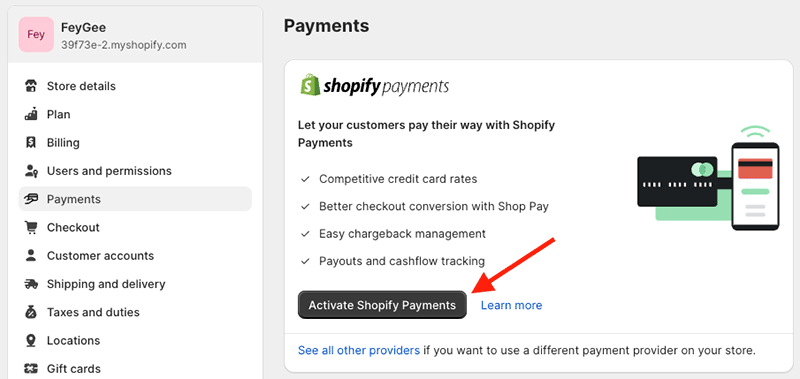
12. Choose a payment gateway for your store
In order to accept payment for your products, you need to choose a payment gateway. This is basically the software that processes credit card purchases made on your store.
Shopify works with a lot of payment gateways (over 300), and has its own one too: Shopify Payments. For many merchants, Shopify Payments will be the quickest payment processor to get started with — and it’s the only one can use without incurring transaction fees.
Shopify Payments is only available in certain countries, however — if you live in an unsupported location, you’ll definitely need to use a third-party payment gateway.
To enable a payment gateway, just go to Settings > Payments in your Shopify dashboard, and follow the instructions provided.
13. Connect your domain
At this point, you’ve essentially completed all the key steps needed to get your Shopify store live — and in fact, if you want, you could simply publish it right now using the ‘myshopify’ URL that was created for you when starting your free trial.
However, it’s generally preferable to use a custom domain for your store — i.e., yoursitename.com. Your own domain will work much better from a branding point of view, and will help your site visitors trust your store more too.
You may already have registered a custom domain already — but if not, there are two ways to buy one:
- from a domain name provider (such as Namecheap, Gandi, Network Solutions etc.).
- direct from Shopify.
If you choose the first option, try to buy a domain from a reputable registrar. In particular, it’s worth choosing one that facilitates two factor authentication.
This helps keep your domain — one of the most important business assets you’ll ever have! — secure.
Using Shopify to buy a domain will make the process of connecting it to your store much easier — doing so will be a simple case of clicking a button in your Shopify interface (and if you buy a domain from Shopify, you get customer support for it too).
The drawback of this approach is that you will be putting all your eggs in one basket — i.e., your content management system, hosting AND your domain will all be associated with one account. This could be a problem if you ever lost access to it, so some users prefer to keep their domain name and Shopify accounts separate.
Whichever approach you decide on, you start the process of domain connection in the same place: under Settings > Domains in your Shopify dashboard.
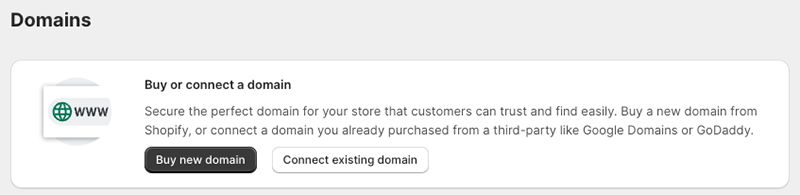
If you’re buying a new domain via Shopify, simply click the ‘buy new domain’ button and follow the instructions provided.
If you’re connecting an existing domain you will need to click the ‘connect existing domain’ option, let Shopify know what the domain name is and again, follow the instructions provided.
If you’re connecting a third-party domain, you’ll need to log into your registrar’s dashboard and change some domain name settings (DNS) so that they point to your Shopify store.
For more information on all this, it’s advisable to read Shopify’s guide to connecting domains.
14. Prepare your store for launch
Once your domain is connected, you could just unleash your store on the world right away!
But it’s much better to check that all aspects of your store are working as expected first — and that’s where a Shopify launch checklist comes in.
Going through a Shopify launch checklist typically involves ensuring that:
- payments are definitely being accepted (to check this, you’ll need to run a test order through your Shopify store)
- sales taxes and shipping options are working as expected
- all product data has definitely been entered correctly
- all copy is factually accurate, grammatically correct and free of spelling errors
- there are no broken links on your store
- you have the relevant legal notices in place (including, if necessary, a GDPR / CCPA compliant cookie consent banner)
- any contact forms are sending emails to the right address
- any order notifications have been customized to suit your processes
- you have added a favicon to your Shopify store (a little icon that represents your business at the top of your browser and in search results)
- you have enabled two-factor authentication in Shopify (this secures your account and makes it much harder to hack)
When you’re done with your pre-launch checks, you can publish your store by removing your password. Go to Online Store > Preferences and scroll down to the ‘Store access’ section to do this.

And that’s it! Your new Shopify store is live and you’re ready to start selling.
But how do you turn your lovely new store into a successful one?
15. Develop your Shopify store further
Once your Shopify store is live, it’s tempting to think that your ecommerce journey is over. However, it’s only just beginning! There are a variety of things you can do to ensure that going forward, your brand new Shopify store makes new customers and becomes a profitable one.
- Add more sales channels. In this post I’ve walked you through setting up a standalone online store — but Shopify lets you connect your site to many other platforms, including Amazon, Etsy, eBay and Facebook. By listing your products on these platforms — all of which have big, existing userbases — you can extend the reach of your store considerably. Learn more about the other Shopify sales channels here.
- Focus on SEO. Good search results are vital to getting sales, so getting the search engine optimization aspect of your Shopify website right is crucial. Check out our Shopify SEO checklist here.
- Engage in content marketing. Shopify stores come with a built-in blogging feature — use it to create fantastic content that attracts people to your store! Done well, blogging is a superb way to generate organic traffic — you can learn how to make the most of it here. For more general content marketing tips, check out our detailed step-by-step guide to content marketing here.
- Enhance your store using apps. The Shopify app store contains a huge number of apps and integrations that let you add a wide range of features to your site. From marketing apps to dropshipping services to analytics tools, you’ll find a lot of useful ways to add functionality to your Shopify site in there.
- Use online advertising to drive sales. PPC services like Google Ads and social networks like Facebook offer a whole host of sophisticated ways to target and retarget the niche audiences that will be most receptive to your products.
Related business / ecommerce resources
If you found our ‘How to Start a Shopify Store’ guide helpful, you may also enjoy the following Style Factory resources:
Update details
- Section 6 was updated with new steps relation to creating navigation menus.
- A new image of the Shopify theme store was added to section 8.
- The steps on changing your store’s password were updated in section 14, with a new image inserted.
Comments (3)