


In this post, I’ll show you how to build a professional small business website from scratch — taking you through everything from choosing a website builder and planning your pages to adding content, optimizing your site for search engines and getting it live.
Building a website for your small business can seem like a daunting task — particularly if you’ve never created one before. But with the right tools and a clear plan, it’s actually a surprisingly straightforward process.
In this guide, I’m going to show you how to build a professional small business website from start to finish. We’ll create a polished site that works well on both desktop and mobile devices and contains all the key ingredients most small businesses need — including a home page, a services section, an about page, and a contact form.
I’ll take you through the whole process step by step — from choosing a website builder and registering a domain name to designing your pages, publishing your site and making it visible in Google search results.
And along the way, I’ll highlight some common website-building mistakes — and show you how to avoid them.
So let’s get started, beginning with one of the most important decisions you’ll make: which website builder to use.
Choosing a website builder
There are lots of website-building tools to choose from — popular options include Shopify, WordPress, Wix, and Squarespace. We’ve tested all of these extensively, and they each have particular strengths — for example, Shopify is great for ecommerce, while WordPress is excellent for content marketing.
But for creating a small business website, I’m going to use Squarespace. There are three key reasons for this.

First, it’s one of the easiest website builders to use. If you’re new to website building, you’re unlikely to struggle with Squarespace — you can get a simple site off the ground with it in about an hour.
Second, it comes with everything most small businesses need — hosting, templates, SEO tools, contact forms, and blogging features. This lets you focus on building your website instead of stitching lots of different services together.
Third, it’s affordable. And because it lets you build and maintain your site yourself, you can avoid expensive developer fees too.
Before we start building in Squarespace, though, it’s worth mapping out exactly what we’re going to create.
What we’re going to build
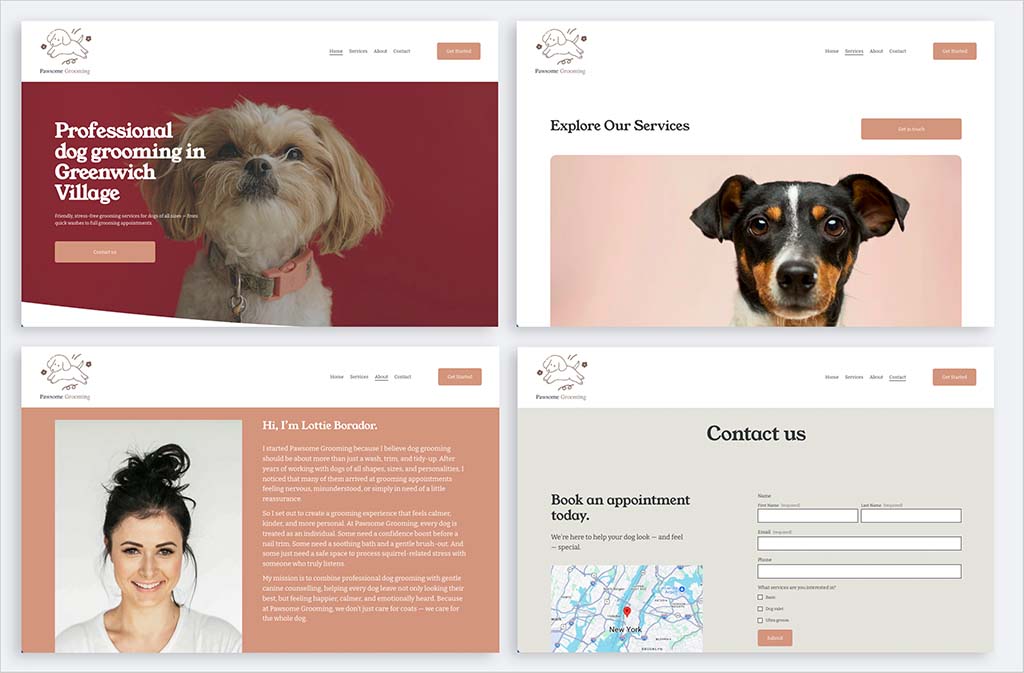
For this tutorial, I’m going to create a simple website for a small service-based business — in this case, a dog grooming company.
The site will have four key pages.
First, a home page that clearly explains what the business does and encourages visitors to take action.
Second, a services page that gives potential customers more detail about what’s on offer.
Third, an about us page that builds trust and gives the business credibility.
And finally, a contact page that makes it easy for visitors to get in touch.

With the basic structure mapped out, the next step is to start a Squarespace trial and choose a template.
Starting a Squarespace trial
As with most website builders, Squarespace lets you build your website using a free trial. I’ve included a link to this below.
When you start your trial, Squarespace gives you two ways to build your site. The first option is to use its AI site builder. You answer a few questions about what you want to do, and Squarespace creates a draft version of your site based on your answers.
The other option is to pick a Squarespace template and customize it yourself. That’s the approach I’m going to take in this tutorial.
Now, it’s quite easy to overthink the template selection process. If you want to save yourself some time, I’d suggest starting with the Almar template. This gives you everything a small business typically needs — a strong home page, service pages, a contact form, and clear calls to action.

I’m going to use this template for the rest of the tutorial, so if you’d like to follow along, you can simply select the Almar template when you start your trial.
The Squarespace editor
On the left-hand side of the Squarespace interface, you’ll find the main controls for your site — including your pages, marketing tools, analytics, and other key settings.
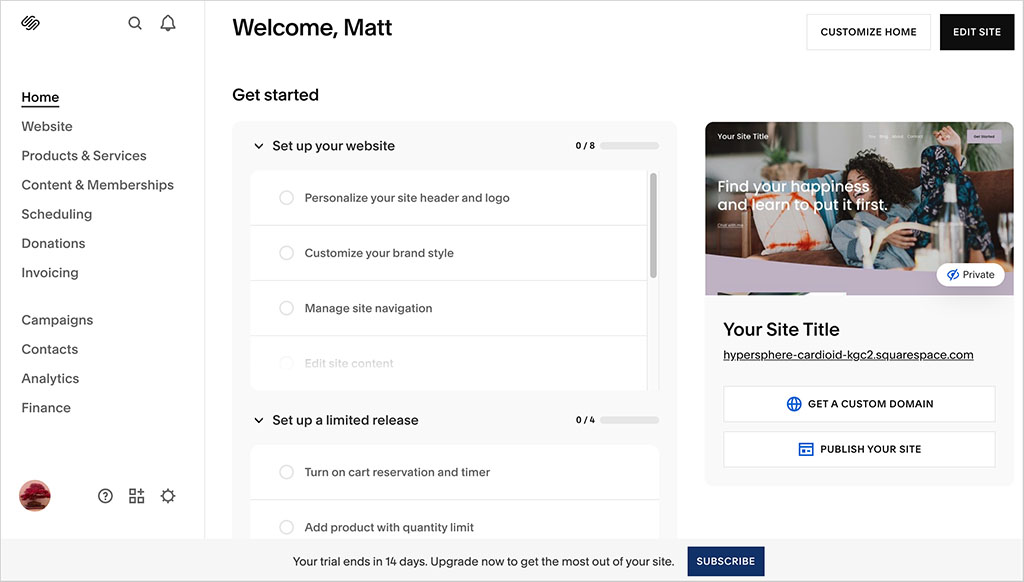
In the main preview area on the right, you can click on different parts of your site and edit them directly.
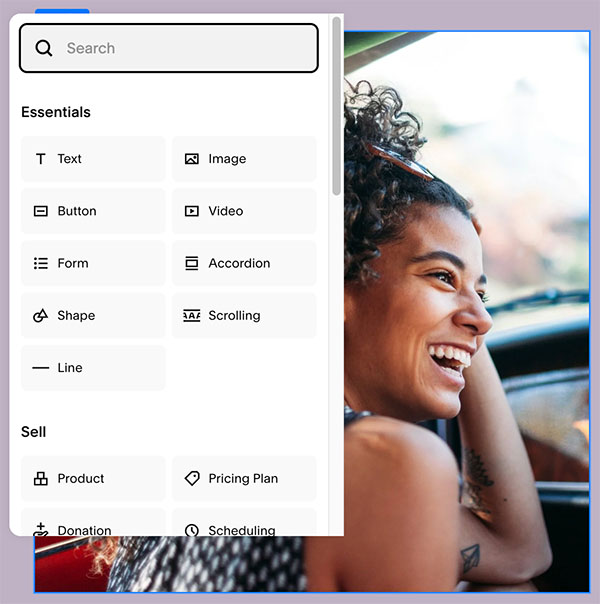
When you want to add new content, you’ll usually do this using sections and blocks. Sections are larger areas of a page — such as a hero area, testimonials section, or contact section. Blocks are the individual pieces of content within those sections — things like text, images, buttons, forms, and maps.
And in the top-right corner of the screen, you’ll find a paintbrush icon that lets you adjust your site styles — including fonts, colors, buttons, and forms.
Before we start editing the site, though, let’s get its basic structure in place by setting up the key pages.
Setting up pages
To create pages for my site, I need to go to the appropriately named Pages section.
Now, when you start a new Squarespace site, you’ll find that this section contains some demo pages. Some of these can be useful, but others might not be needed.
For this site, I’m going to keep things simple. I want a clear navigation menu with four main pages: Home, Services, About, and Contact.
So I’m going to rename or create pages as needed, remove any pages I don’t want, and make sure the main navigation reflects the structure I planned earlier.
I’m also going to remove the “Login” option at the top of the screen, as this isn’t really something that I need right now. Clicking the “Edit” button, followed by “Edit Site Header” lets me do that.

With the site structure in place, the next step is to start adding content.
Adding content
Now it’s time to start adding content to the site, beginning with my logo. To add this, I simply go into the site header settings and upload my logo file.
Next, I’m going to edit the home page. This has one very important job: to explain what your business does quickly and clearly.
So the first thing I’m going to update is the main headline at the top of the page.
A common mistake here is to use something vague like “Welcome to our website” or “Quality service you can trust.” Phrases like these don’t really tell visitors anything useful.
Instead, your headline should make it immediately obvious what you offer — and who it’s for.
So for this dog grooming website, I’m going to use: “Professional dog grooming in Greenwich Village.”
That’s clear and specific, and it also includes the sort of phrase a local customer might search for on Google.
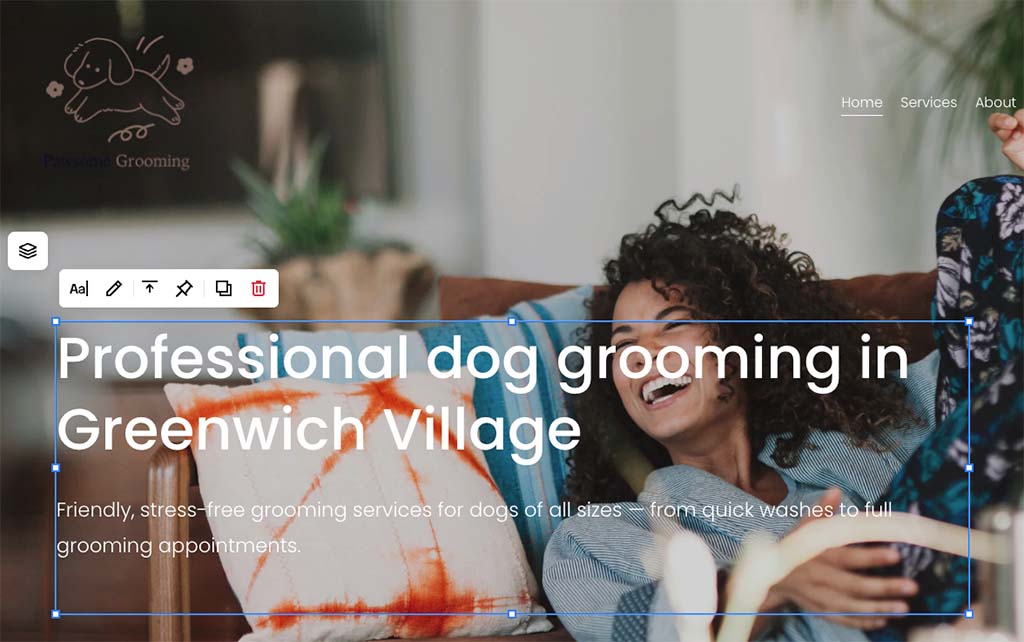
Underneath that, I’m going to add a short description of my services, making sure it contains a couple of keywords that people might use when searching for them too.
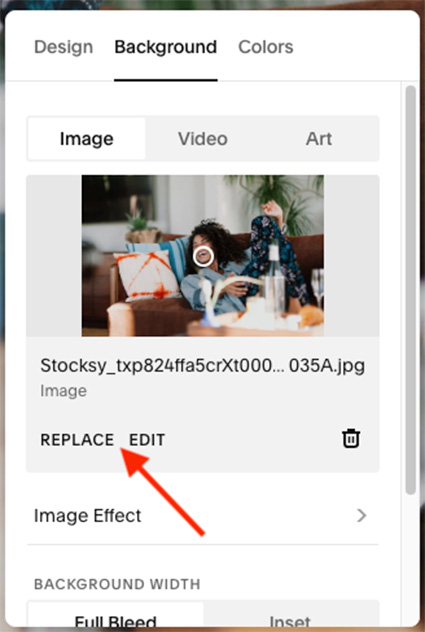
Finally, I’m going to replace the template image with a high-quality photo that fits the business. Hovering over the image and clicking “Edit Section” and then “Background” lets me do this easily.
So, within a few minutes, I’ve turned the top of the home page into something much more useful. It tells people what the business does and where it operates, and includes an appropriate image too.
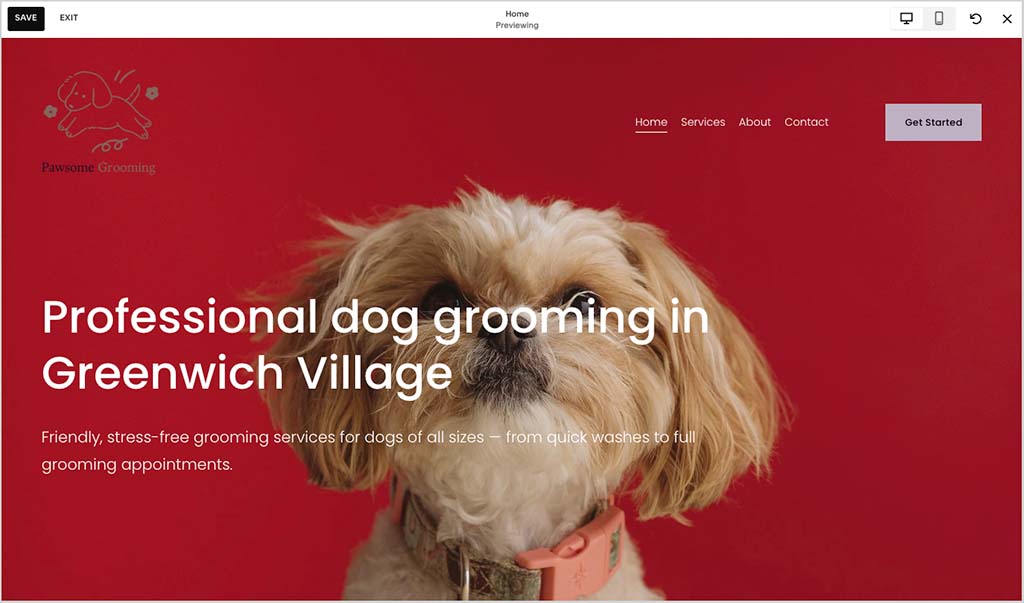
But it doesn’t quite look the part just yet, so I’m going to adjust the layout a little.
One thing I’d like to do is add a “Contact Us” button. I can add elements like this in Squarespace by editing the page and clicking the “Add Block” option. Then it’s simply a case of moving the button to where I want it to appear.
If I like, I can also add more images or copy to the page using the “Add Section” option.
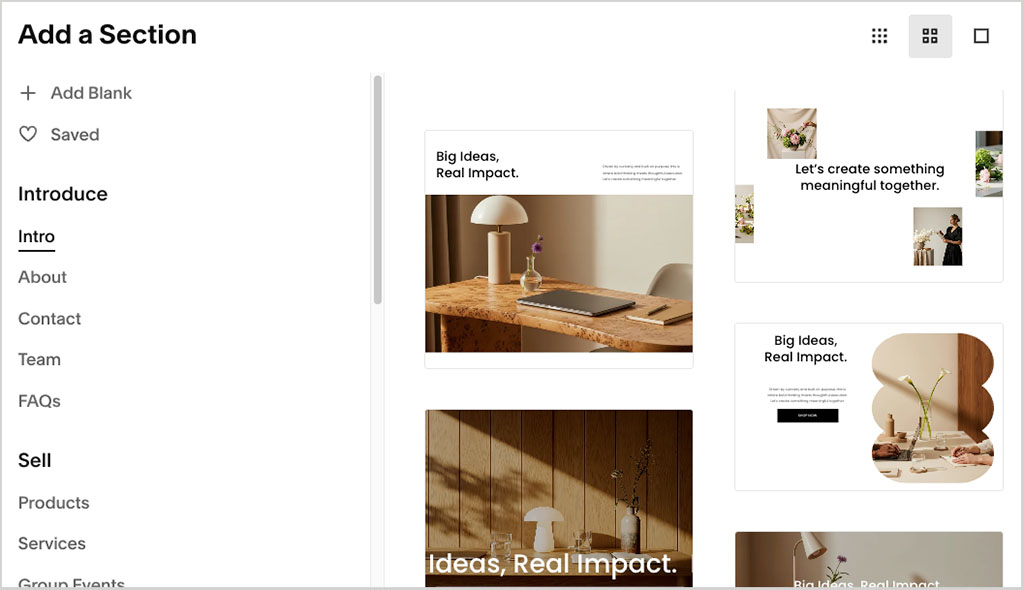
And I can customize the footer so that it contains my business address, social media icons, and links to key pages.
At this point, the site is starting to look good, but the design still feels a bit too corporate for a dog grooming business. So I’m going to adjust the site styles — the fonts, colors, and buttons — to make everything feel warmer, friendlier, and more in keeping with the brand.
This is where site styling comes in…
Site styling
To change the typefaces and colors of my Squarespace site, I need to click the paintbrush icon in the top-right corner of the screen. This gives me access to controls for changing my fonts and color palettes, as well as the appearance of buttons and forms.

I can use these settings to fine-tune the typography and color scheme of my site.
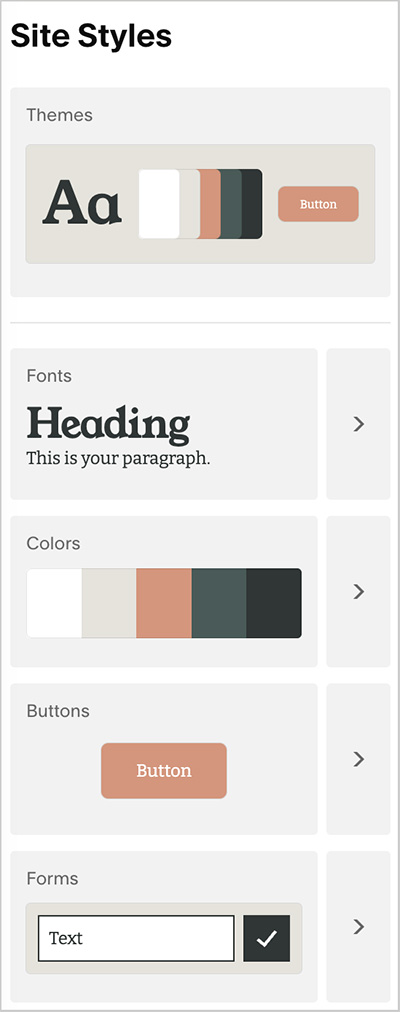
Once I’m happy with how everything looks, I can go ahead and add text and images to the rest of my site pages.
And with that done, it’s time to turn my attention to another important part of the site: making it easy for people to get in touch.
This means making sure my contact form is set up correctly.
Setting up a contact form
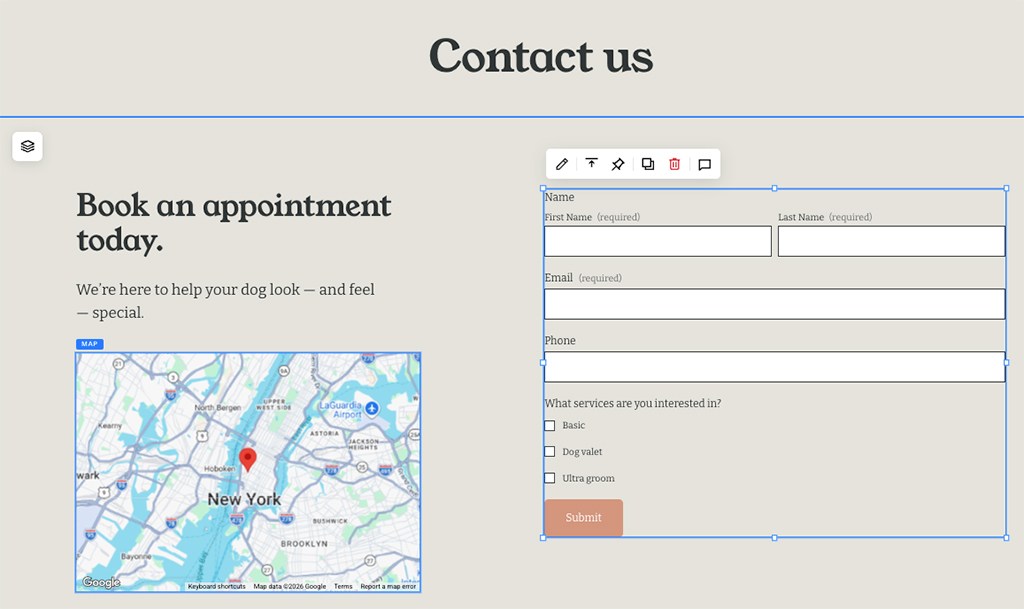
When you create your navigation in Squarespace, you have the option to add a contact page. This comes with a form that you can edit to suit your needs.
It’s important to make sure I receive a notification every time somebody completes this form. So I’m going to check that the correct email address for my business is entered in the email notification settings.
If I like, I can also send the form data to a spreadsheet in Google Drive, pass it to another tool using Zapier, or add it to a Mailchimp mailing list.
With my pages, styling and contact form sorted, the site is nearly ready to go live. Before publishing it, though, there are a few additional Squarespace features worth considering.
Additional key features
Squarespace comes with several additional features that are worth considering when building a small business website. Let’s take a look at some of the most useful ones.
First up are its SEO tools.
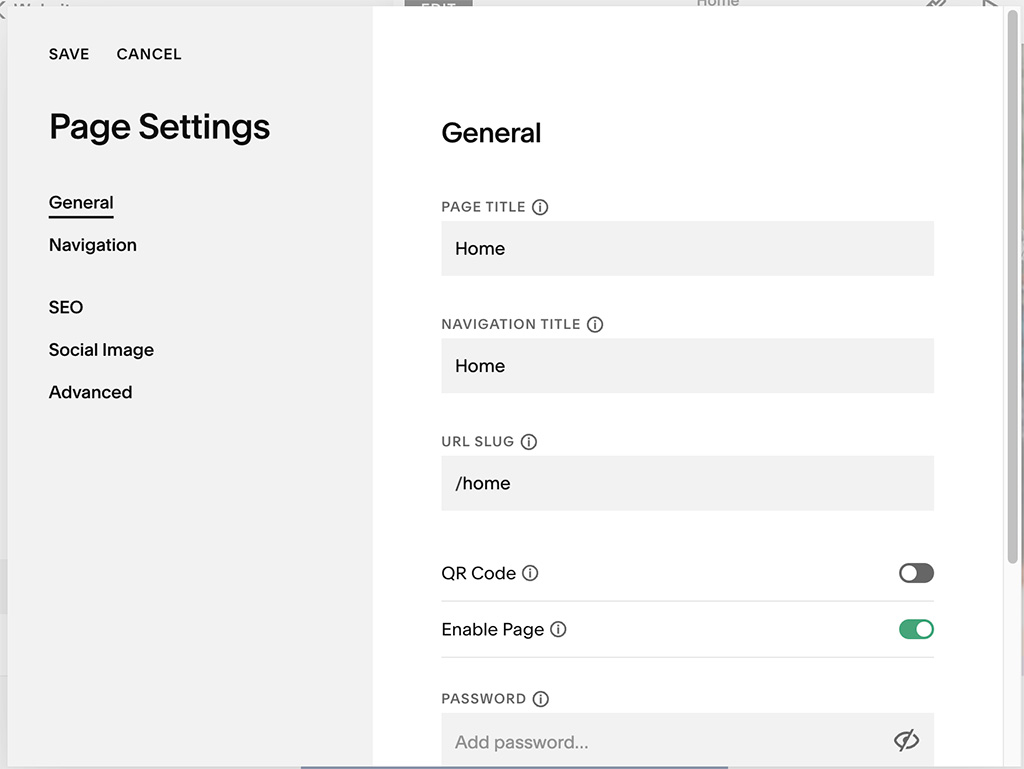
Clicking the cog icon beside any of my site pages brings up controls for editing its URL, title, and meta description. I need to make sure these are all properly optimized for search engines, or I may struggle to attract traffic to my new site.
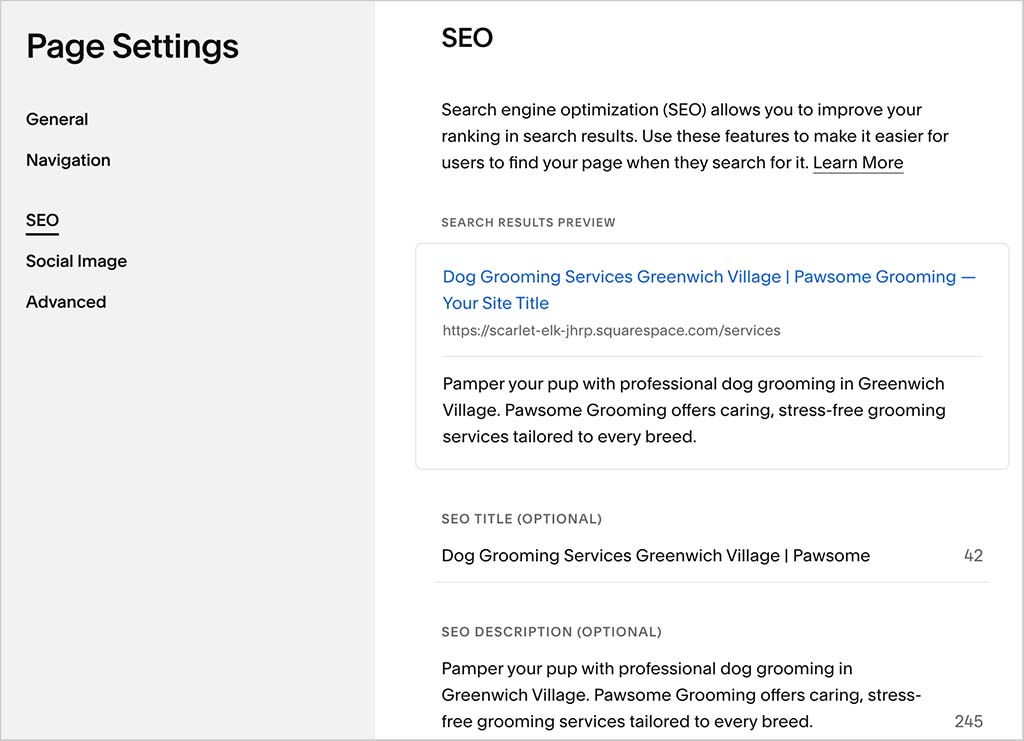
There are quite a few other things you can do to improve your site’s search rankings, however — if you’d like to learn more about these, check out our full Squarespace SEO guide here (or watch our video tutorial below).
Another feature worth exploring is Squarespace’s email marketing tools. These let you send emails to people who complete forms on your site, as well as automated messages to visitors who take certain actions on it.
📚 You can learn more about Squarespace’s email marketing features in our ‘Squarespace Email Campaigns’ review here.
Squarespace’s Scheduling features can be particularly useful for service businesses. They let you display your availability and give site visitors the option to book appointments with you.
And if you’re selling products, Squarespace also provides ecommerce tools that let you take payments and sell through your site.
Finally, you might want to add a blog. Regularly publishing useful content about topics related to your business can help attract relevant visitors to your site, demonstrate your expertise, and potentially improve your search rankings.
Video guide to blogging effectively
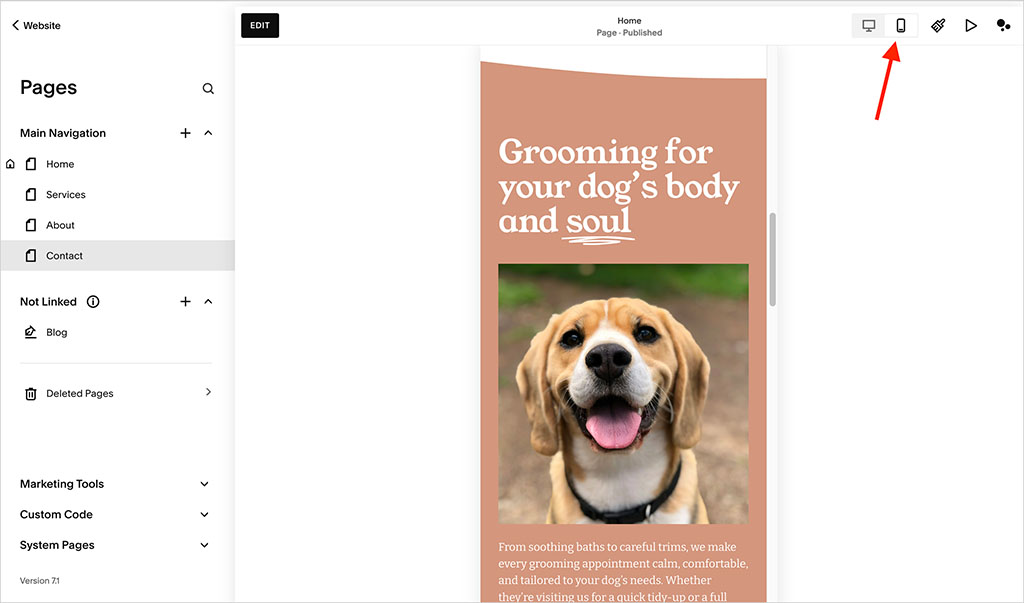
At this point, I’m pretty much ready to publish. But before I do, there’s one final check to make: how the site looks on mobile devices.
This is easy to do in Squarespace — I just click the mobile icon on any page I’m editing to preview how it will appear on a smartphone. If there’s anything I need to adjust, I can use the editing controls provided.
OK, now it’s time to publish my site.
Don’t miss out on our free SEO toolkit
For a limited time only we’re offering our readers some excellent free SEO tools and resources. Sign up now to immediately receive:
- our downloadable cheatsheet containing the 20 key steps to ranking highly in search results
- extended free trials and discounts for leading SEO tools
- our downloadable cheatsheet on how to grow organic traffic to a blog
- 2 in-depth guides to SEO
- ongoing free tips and advice on SEO and growing your business
Publishing
Before I can put my site live, I’ll need to upgrade from a trial to a paid plan. I’ll also need a domain name for it — ideally something that’s short, memorable, and contains my business name.
One way to register a domain name is simply to get one from Squarespace. When you subscribe to an annual paid plan, you get a free domain name for one year. You can also register one through the Squarespace dashboard by going to Settings > Domains and Email.
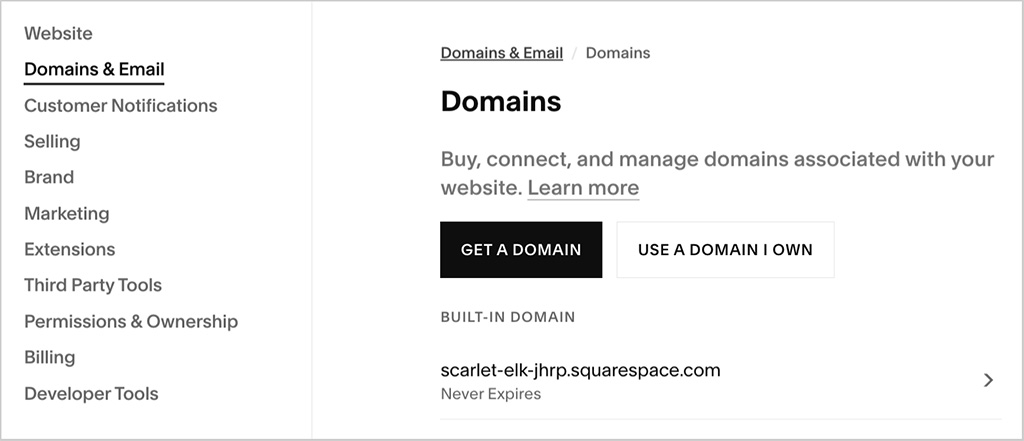
Alternatively, you can connect a domain purchased from a third-party provider to your Squarespace site. Again, you’ll find this option in the Domains and Email section of the Squarespace dashboard.
After that, publishing is straightforward. I simply go to the “Site Availability” settings, change the site from private to public and save my changes.
At this point, my Squarespace site will go live on the domain name I registered. One thing to note here is that, depending on the domain registrar involved, it can take several hours for Squarespace to connect to the domain.
Once I’m confident that the domain name has connected correctly, it’s time to do a couple of final checks. I’ll open my site in a private browser window, test the navigation, check for any typos, and try out the contact form. I’ll also view the site on a phone to make sure everything looks good on mobile devices.
If everything works as expected, my site is ready to share with customers.
Wrapping up
I hope you’ve found this guide useful, and that it’s given you a clear idea of how to go about building a small business website with Squarespace.
As you can see, creating a professional site doesn’t have to be particularly complicated — with a good template and a bit of planning, you can get all the essentials in place relatively quickly.
If you’d like to try the process yourself, remember that you can start building your site with a free Squarespace free trial.
And if you have any questions about building a small business website, leave them in the comments below — we read them all and will do our best to help.
How to build a small business website — FAQ
Can I build a Squarespace website for free?
Squarespace doesn’t offer a free plan, but you can try the platform free for 14 days. During the trial, you can choose a template, build your pages, and try out most of Squarespace’s features. You’ll need to upgrade to a paid plan when you’re ready to publish your site.
How much does Squarespace cost?
Squarespace plans start at $25 per month if you pay monthly, or $16 per month if you pay annually. There are four main plans — Basic, Core, Plus, and Advanced — with prices increasing as you gain access to more advanced business and ecommerce features.
Which Squarespace plan is best?
For many small business websites, the entry-level Basic plan will be perfectly adequate. It gives you the key tools needed to create a professional business website, including templates, hosting, SEO features, and the ability to sell online. However, the Core plan is a better choice if you need more advanced features, including custom code, additional third-party integrations, and more sophisticated selling tools. For more serious ecommerce applications, the Plus or Advanced plans are generally better options.
What’s the best Squarespace template for a small business?
There are lots of Squarespace templates that work well for small business websites among Squarespace’s 200+ template offering, but ‘Almar’ is a particularly good option for service-based businesses. It gives you a strong home page, space to showcase your services, a contact form, and clear calls to action.
Is Squarespace good for SEO?
Yes. Squarespace includes a useful range of built-in SEO features, letting you edit important elements such as page titles, meta descriptions, and URLs. It also automatically creates a sitemap for your site and produces mobile-friendly pages. However, you’ll still need to create useful content, target appropriate keywords, and follow SEO best practices if you want your site to perform well in search results.
Can I use my own domain name with Squarespace?
Yes. You can either register a domain directly through Squarespace or connect a domain that you’ve purchased from another provider. If you sign up for an annual Squarespace plan, you can also get a free custom domain for your first year.

No comments