
In this simple guide, I’m going to show you how to add Schema markup to a Squarespace site — and help search engines understand your content more easily.
What is Schema markup?
Schema markup is code that you can add to your website to make it easier for search engines to understand and categorize the content it contains.
It also lets you enhance your search results with additional information — for example, author information, star ratings, price details and much more.
The below example of a search result containing Schema-generated ‘rich snippets’ highlights the sort of enhancements that Schema can provide:

As you can see, in addition to the main text description of this restaurant, users also see…
- a star rating
- the number of reviews for it
- meal pricing information.
Websites that use Schema to generate these sorts of enhancements can ‘stick out’ a bit more in search results — and happily, this can drive more clickthroughs to them.
Additionally, rich snippets can provide users with a lot more context about a business, a lot more quickly.
What sort of Schema can you add to a Squarespace site?
There is a huge number of enhancements you can add to a Squarespace website using rich snippets.
The sort of information you can add includes…
- location information
- pricing
- star ratings
- authorship details
- publication name
- organization details
- brand details
- FAQ
- preparation time (for recipes etc.)
- number of votes for an item
…and that’s just scratching the surface really!
So before diving in and adding markup to your site, it’s a good idea to take look at the Schema.org website to get a more comprehensive overview of the types of additional information you can add.
Once you’ve decided on what Schema you want on your Squarespace site, there are three steps involved in getting it on there successfully.
You’ll need to:
- Generate your Schema markup
- Add this code to your site
- Test that you’ve implemented your Schema correctly.
Let’s go through these steps now.
1. Generate your Schema markup code
The first thing you need to do to add Schema to a Squarespace site is to generate your markup, and there are quite a few free tools that can help you do this.
Popular options include:
Tip: if you’re a ChatGPT user, you can use the tool to write lots of different types of Schema markup for you too.
All of them work in a fairly similar way — you specify what sort of Schema markup you’d like to add, fill in the necessary details (about your article, product, business etc.) and the code is output for you.
The sort of code that a markup generator creates typically looks like this (with the exact markup depending of course on the sort of structured data you’re adding):
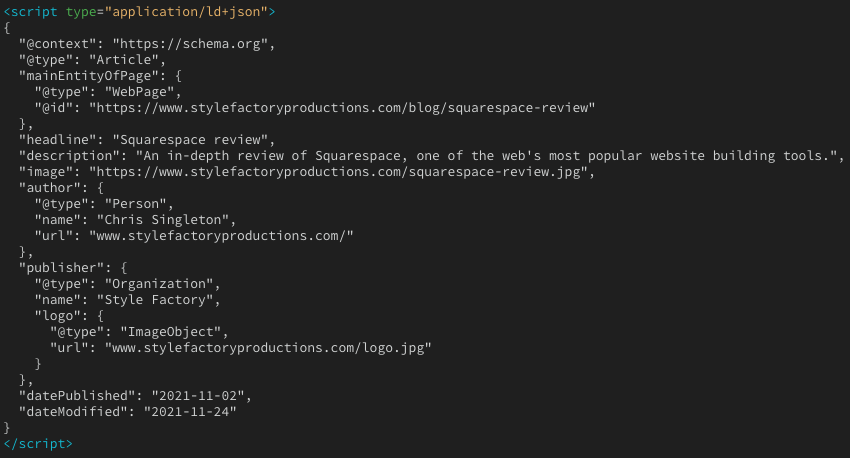
Once you’ve got this code, you need to add it to your Squarespace site.
Let’s see how to do that.
2. Add your Schema code to your Squarespace website
Adding your Schema code to your Squarespace site is pretty straightforward — in essence, it simply amounts to copying and pasting it onto the pages you’d like to apply it to.
The process differs slightly for pages, blog posts and products, however.
So, let’s look at each in turn.
Adding Schema to Squarespace pages and blog posts
To add Schema to Squarespace pages and blog posts:
1. Copy the code you generated using a markup generator tool (see above for details).
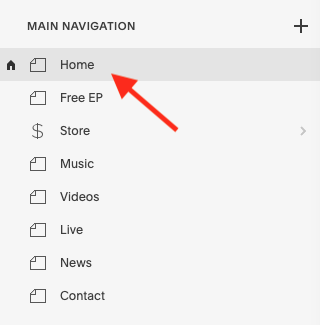
2. Click ‘Website > Pages’ in the Squarespace dashboard, then navigate to the page or post you want to add your Schema to.
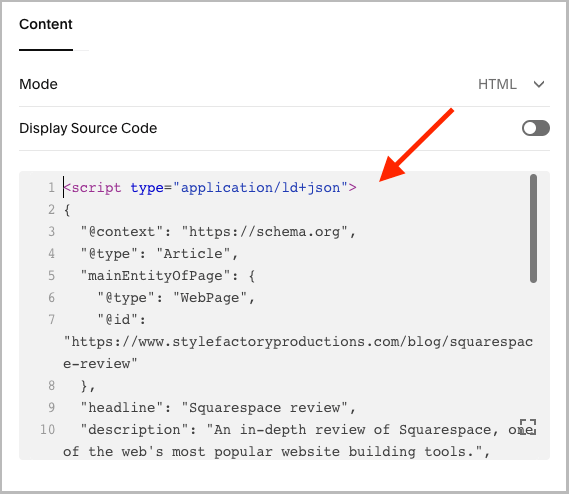
3. Click ‘Edit’, and then add a code block at the top of the page or post.

4. Then paste your Schema markup code into the box that appears.
6. Click Save.
Adding Schema to Squarespace products
To add Schema markup to a Squarespace product,
- Copy and paste the code from your Schema markup generator (see above).
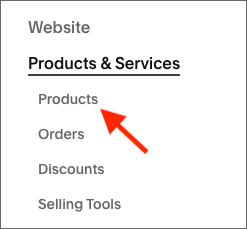
- Go to Products & Services > Products in your Squarespace dashboard.
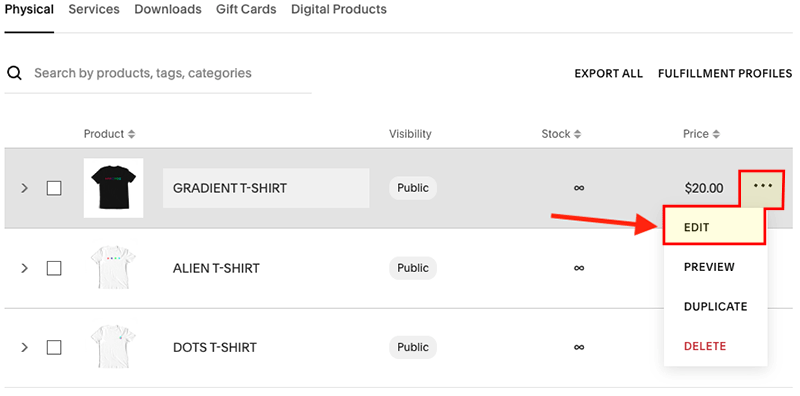
3. Locate your product, click the three dots to the right of it, and then click ‘Edit.
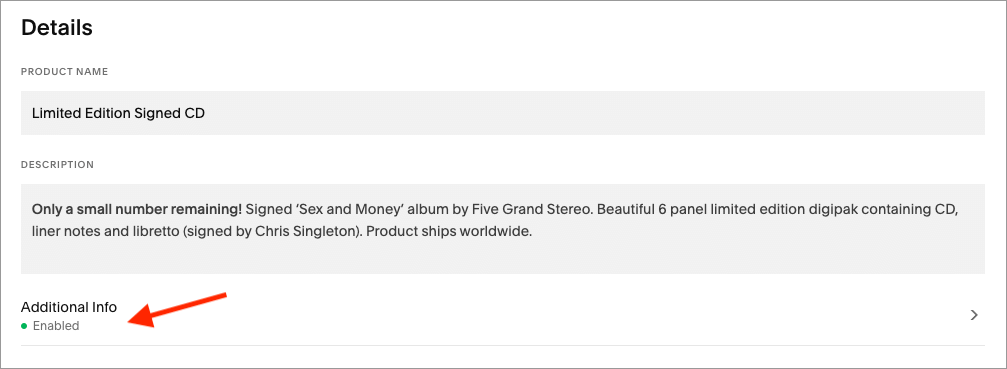
4. Scroll down to the ‘Additional info’ option in the Details section.
5. Hover over your product’s description and click the ‘plus’ sign to add a new block.
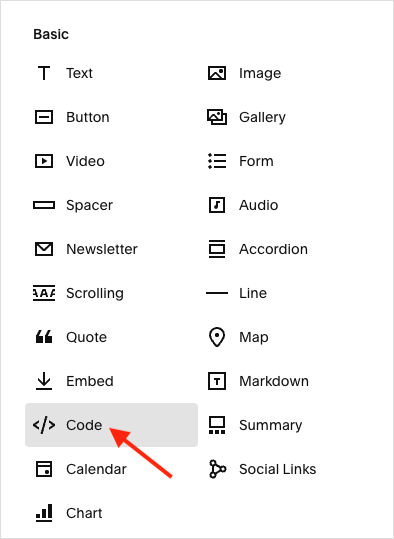
6. Copy and paste your code into the box that appears.
7. Click ‘Apply’ and then ‘Save’.
3. Test your Schema code is working
Now that you’ve added your Schema code to your Squarespace site, it’s time to make sure that you’ve implemented it correctly and that search engines can read it okay.

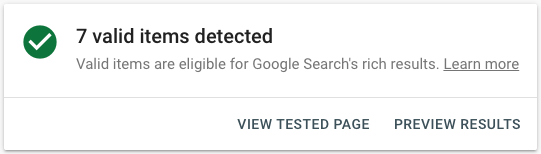
To do this, you can use Google’s ‘Rich Results Test’ tool. This lets you enter a URL which will then be checked for markup errors.
If all is well with your implementation, you will be informed that your items are valid; if not, errors will be highlighted and you will need to revisit your Schema code and fix the mistakes.
Note that you may need to wait a few days — until your content has been recrawled — before you see any rich snippets appear in search results.
(You can occasionally speed this process up by submitting your pages to Google Search Console for reindexing).
And that’s it!
If you have any questions, feel free to add them in the comments section below — we read them all, and will do our best to help.
For more tips on how to improve your search rankings for a Squarespace website, do check out our Squarespace SEO checklist or download our free SEO toolkit.
Related resources from Style Factory
Squarespace resources
- Guide to the Squarespace free trial
- Squarespace GDPR guide
- Squarespace SEO guide
- Squarespace review (YouTube)
- Squarespace vs Shopify comparison (YouTube)
- Squarespace vs Wix (blog post)
- Squarespace vs Webflow (blog post)
- How to change your Squarespace template
- The best Squarespace alternatives in 2025
Comments (5)