We have a strict honest review policy, but please note that when you buy through our links, we may receive a commission. This is at no extra cost to you.
In this Squarespace tutorial for beginners, I’m going to show you how to create a Squarespace website in ten simple steps.
There are two ways to use this resource. For a quick and visual guide to getting a Squarespace website off the ground, you can watch the video version of our Squarespace tutorial, below.
Or, for more detailed instructions on how to use Squarespace, read the whole of this post, which features a more extended tutorial and a deeper dive into how certain aspects of Squarespace work.
Ready? Let’s go!
The first step in a Squarespace build involves getting prepared.
1. Make sure you have everything you need for your Squarespace website
Before building your Squarespace site, it’s a good idea to have everything you need for it ready — this will speed up the process and give you a better looking result.
The main things you’ll usually need are:
- a logo
- a color scheme (brand guidelines)
- a list of site pages
- content for each page
- any necessary product details (images, descriptions, pricing etc.).
2. Choose a Squarespace template
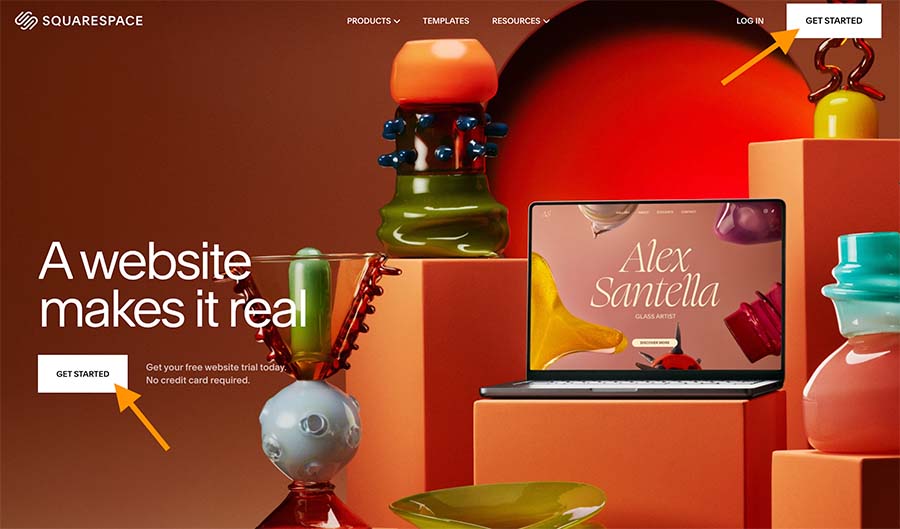
The next thing you’ll need to do is select your Squarespace template. To do this, just go to the Squarespace website and click the ‘Get Started’ button.
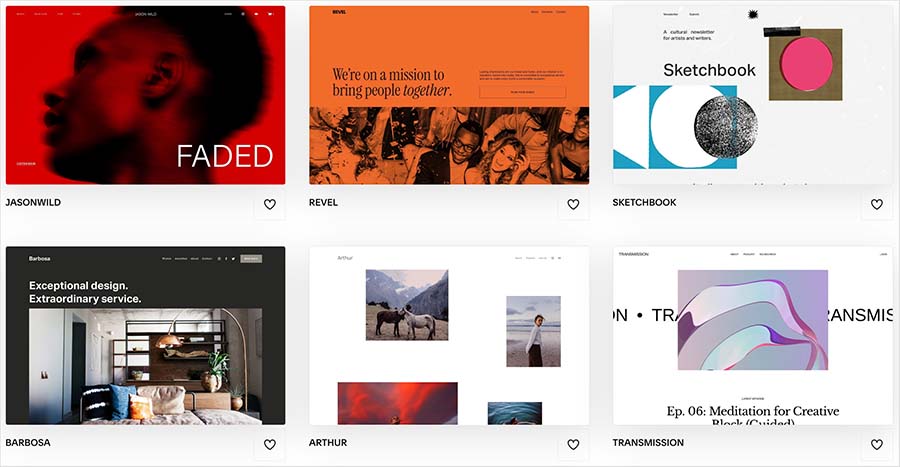
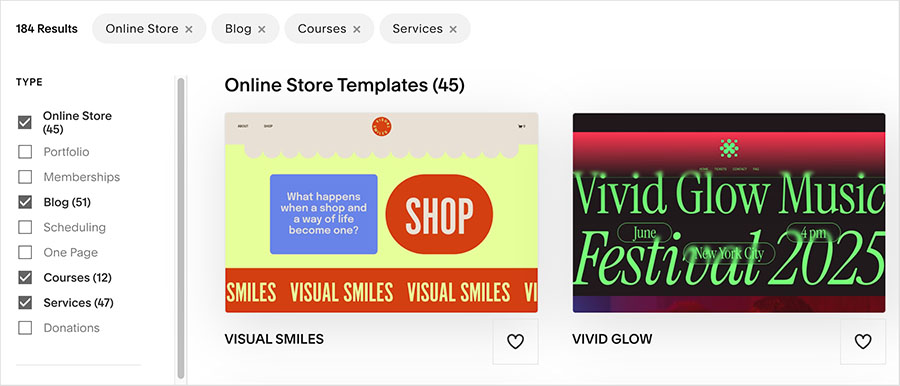
You’ll then be taken to the Squarespace template library, where you can browse the available templates (you can choose from around 168).
It’s important to take your time during this selection process, because although you can rebrand Squarespace templates easily, once you’ve picked one, you can’t switch to another one.
So, use all the filters and categories provided to help you find the right Squarespace template for your project.
3. Add your business information
Once you’ve chosen your template, it’s time to enter key information about your business or project into your Squarespace settings.
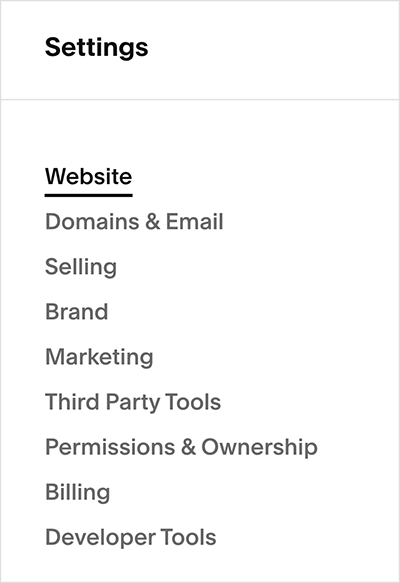
You’ll find these in the appropriately-named ‘Settings’ section of your Squarespace dashboard (represented by a cog icon).
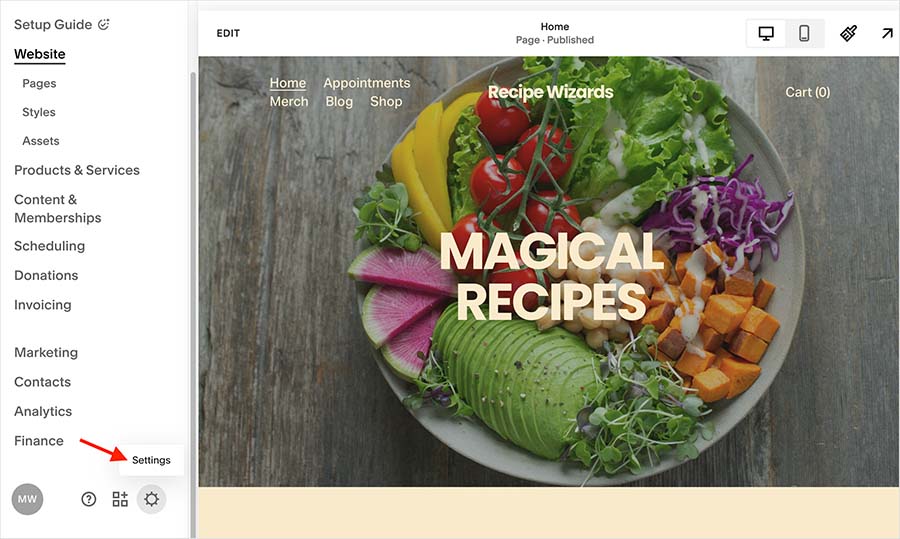
Once you’re in this section, you’ll find quite a few different options that let you provide Squarespace with information about different aspects of your business or project.
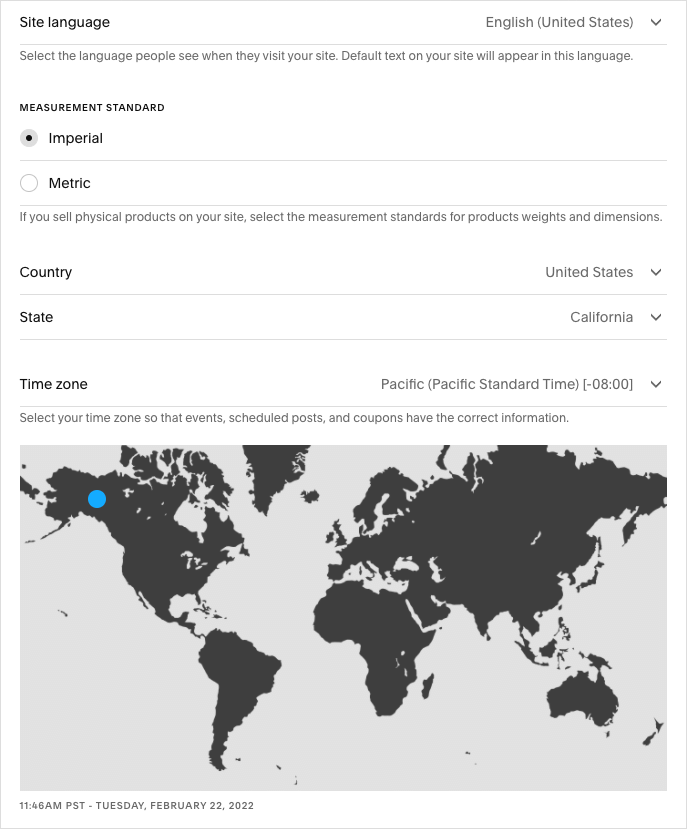
The key ones to focus on at this stage are usually ‘Site Languages,’ ‘Regional Settings’ (both under the ‘Website’ tab) and ‘Business Information’ (under the ‘Selling’ tab).
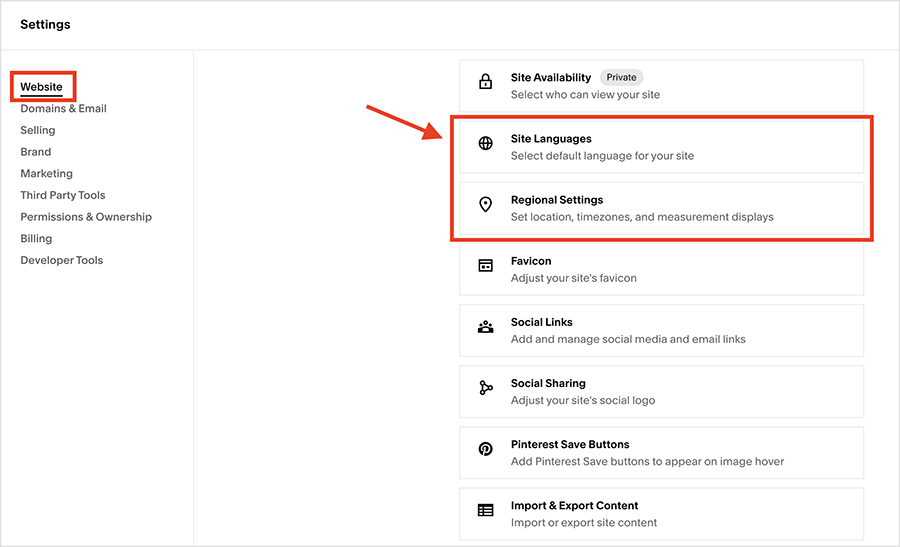
In the ‘Site Languages’ and ‘Regional Settings’ sections, you can set your default site language, metric system, country, state and time zone.
These sections also lets you connect your Squarespace site to Weglot, a third-party app that lets you translate your site into other languages.
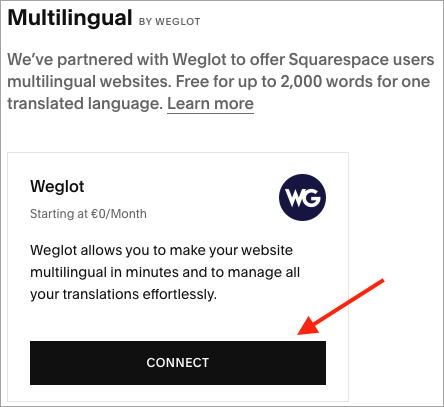
Using Weglot, you can translate your website into one language for free — so long as it contains less than 2,000 words. Fees apply if your word count exceeds this limit.
In the ‘Business Information’ section (under the ‘Selling’ tab), you can enter your phone number, email and address.
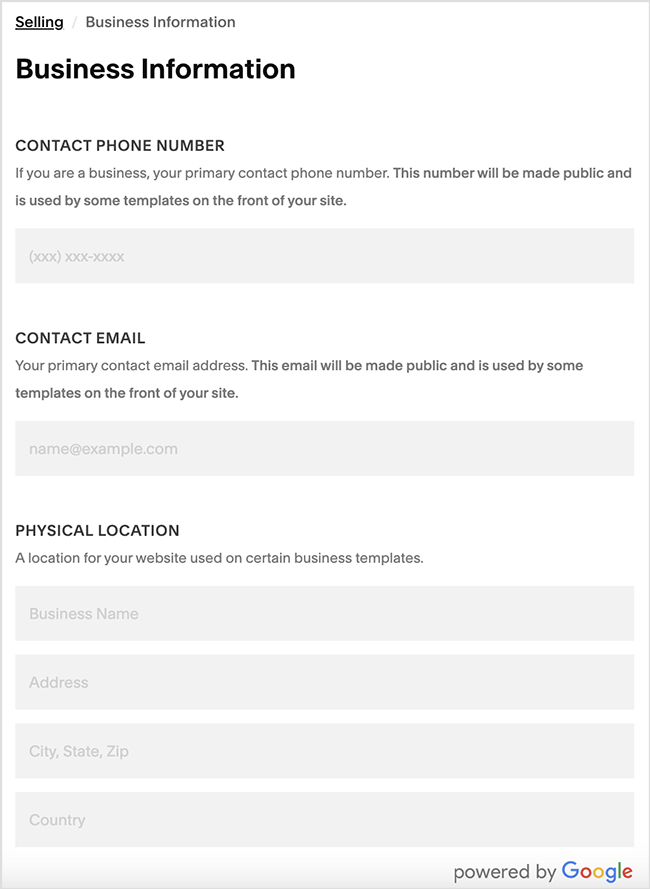
One thing to be aware of is that some Squarespace templates publicly display the information provided in this section.
So, be careful here, especially if you operate an online business from home — you might not want personal details appearing on your website.
As for the other options in the settings section, most of them you can leave for now. However, if you already have social media profiles set up, you might want to add their details to the ‘Social Links’ and/or the ‘Connected Accounts’ sections.
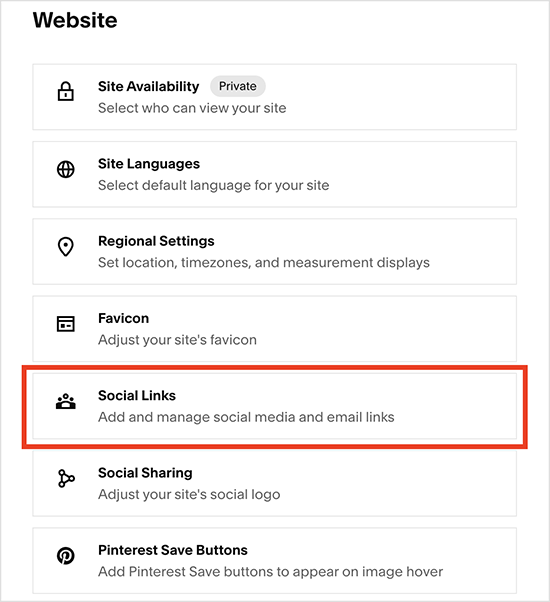
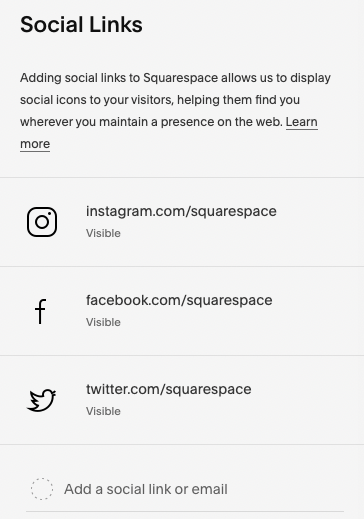
The ‘Social Links’ section (under the ‘Website’ tab) lets you add icons for / links to your social media presences to your Squarespace site.
You just enter the relevant URLs for your Facebook, Twitter pages etc., and Squarespace will display them on your site any time you use its ‘Social Links’ block (more on blocks later).
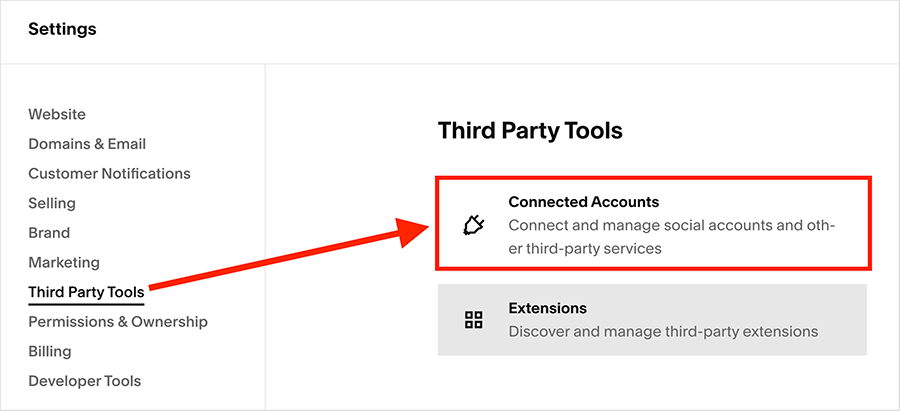
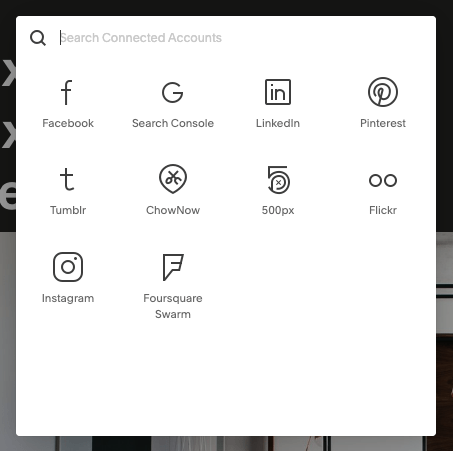
A more sophisticated way of adding your social media presences to Squarespace involves using its ‘Connected Accounts’ option (located in the ‘Third-Party Tools’ section of the ‘Settings’ menu.
Depending on the social network involved, this lets you:
- display content from your social profiles on your site (tweets, Instagram posts etc.)
- automatically share content from your site when you publish it.
To connect your social accounts, just click the ‘Connected Accounts’ section of your Squarespace settings, choose the account type you want to connect, and follow the instructions provided.
4. Build your site navigation
With your template chosen and key business information provided to Squarespace, it’s now time to build your site’s navigation (also known as a ‘main menu’).
Top tip: before you create your navigation within Squarespace, it’s worth sketching out a few navigation ideas on a piece of paper first. Spend some time thinking about how to create a menu system that lays out your content in a coherent way and is really easy for your site visitors to use.
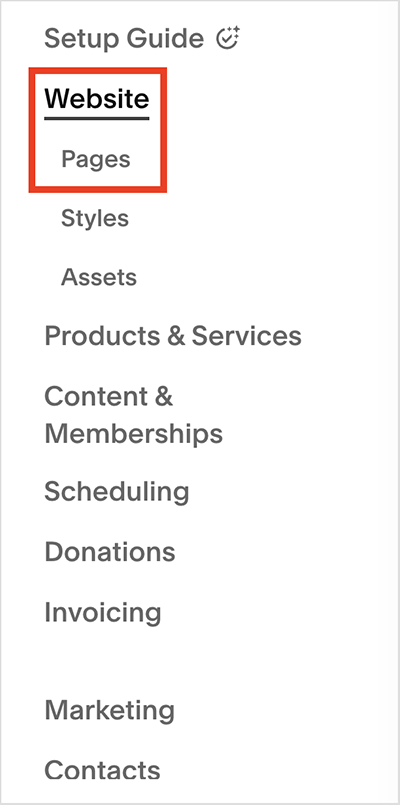
To start creating your site’s navigation, go to the Website > Pages in your Squarespace dashboard.
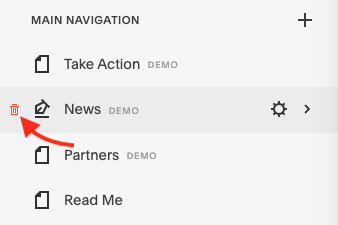
When you go there for the first time, you’ll usually find some demo pages. You can delete these by hovering over page titles and clicking the trash can icon that appears beside them.
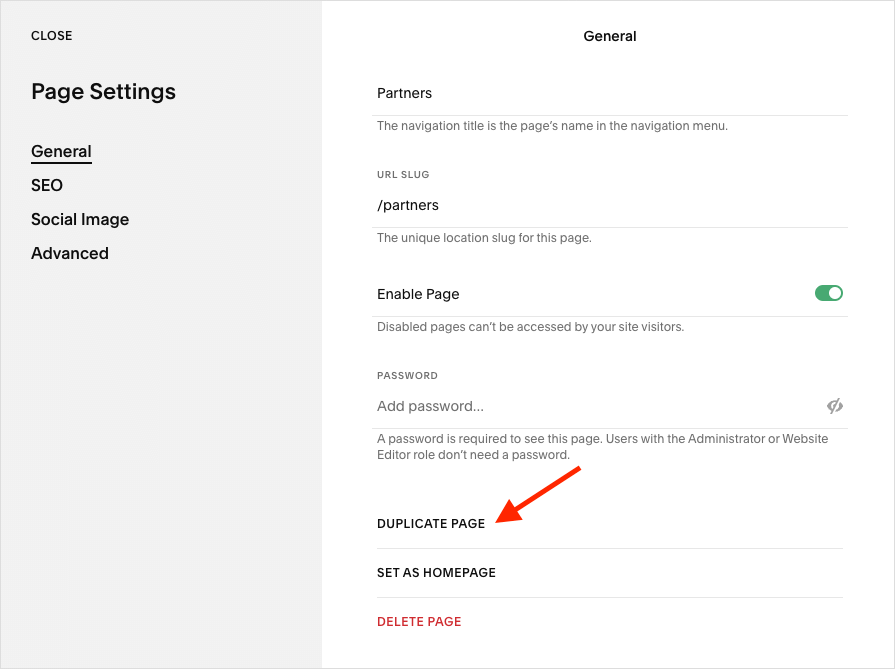
Alternatively, if you want to use a demo page’s layout as the basis of a new page, click the cog icon beside it to access that page’s settings.
Then, scroll down to the ‘Duplicate Page’ option to make an editable copy of that page.
To add a new page to your main navigation, click the ‘plus’ icon beside the ‘Main Navigation.’
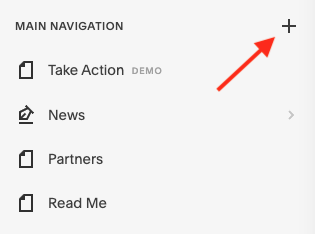
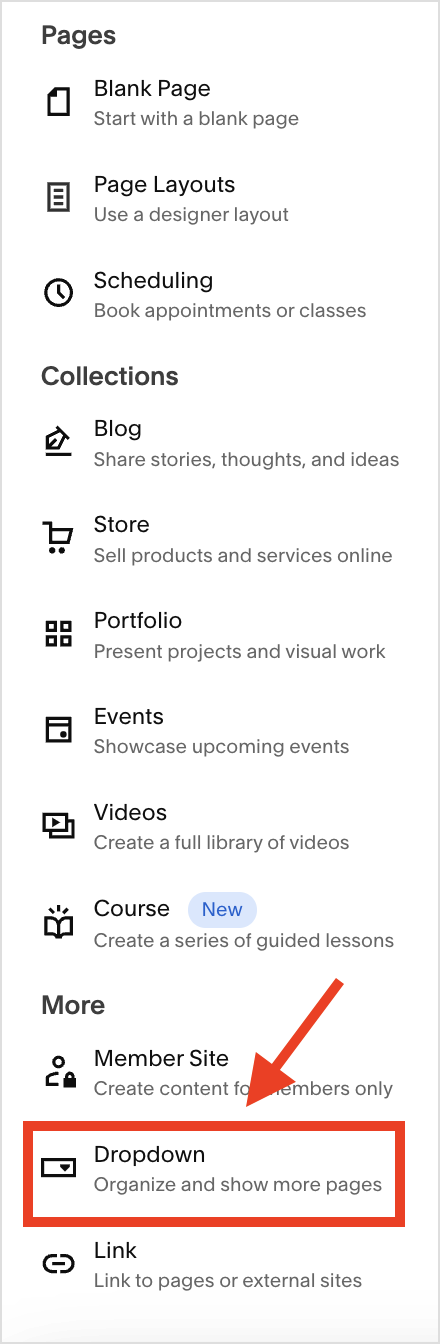
You’ll then be prompted to choose the type of content you’d like to add to your navigation.
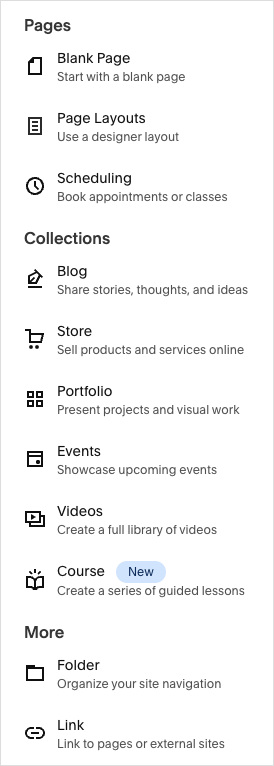
As you can see from the screenshot below, you can choose between ‘pages‘ (broadly speaking, this is static content), ‘collections‘ (groups of content, like blog posts or products) or a ‘more‘ category (folders and external links).
Depending on what you’re creating, you’ll then be presented with various options regarding its setup. Just follow the instructions provided — but remember you don’t need to add any content to a page or collection at this stage (I’ll come onto all that in a moment!).
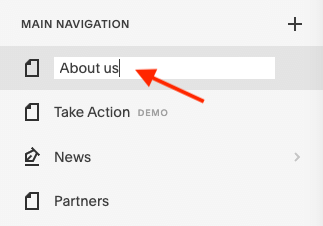
After creating your navigation item and sorting out its basic configuration, you’ll be prompted to name it — simply enter the relevant page title in the box provided.
If you want to create a section in your navigation that contains a dropdown list of pages, you can use the ‘Dropdown’ option to do so. Just click the ‘plus’ icon beside the main navigation, and then ‘Dropdown’.
You can just keep adding items to your navigation until you’re happy — and if you’d like to re-order your menu items, just click on the relevant one and drag it to where you’d like it to sit in the navigation.
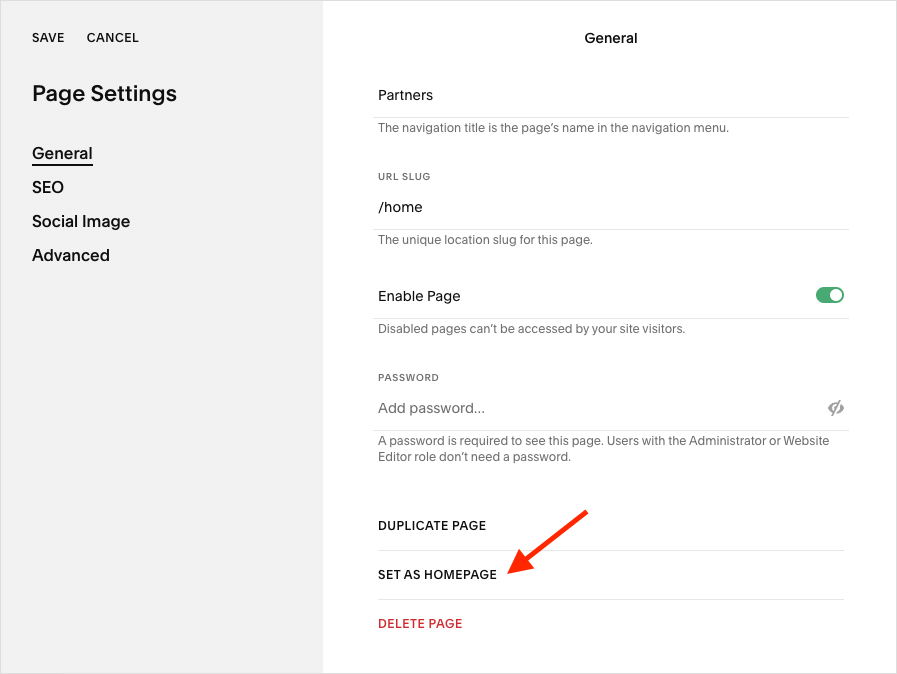
Once you’re all done, you can then assign one of your navigation items as your home page. To do this, click on the cog icon beside the relevant page / collection and then, in the settings that appear, scroll down and click the ‘Set as Homepage’ option.
Finally, it’s worth noting that you can also add items to a ‘not linked’ section that sits underneath your main navigation in the Squarespace dashboard.
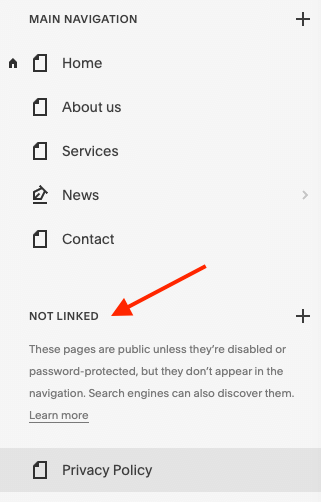
This is usually used for content that you want to have on your site but not in your main menu. You’d usually put things like privacy policies and website terms and conditions in here (which you can link to from footers, contact forms etc.).
Top tip: once you’ve added pages or collections to your site navigation, you can edit their settings at any time by clicking on the ‘cog’ icon beside them. This lets you change things like page name, URL, SEO descriptions and more.
5. Add a logo to your Squarespace site
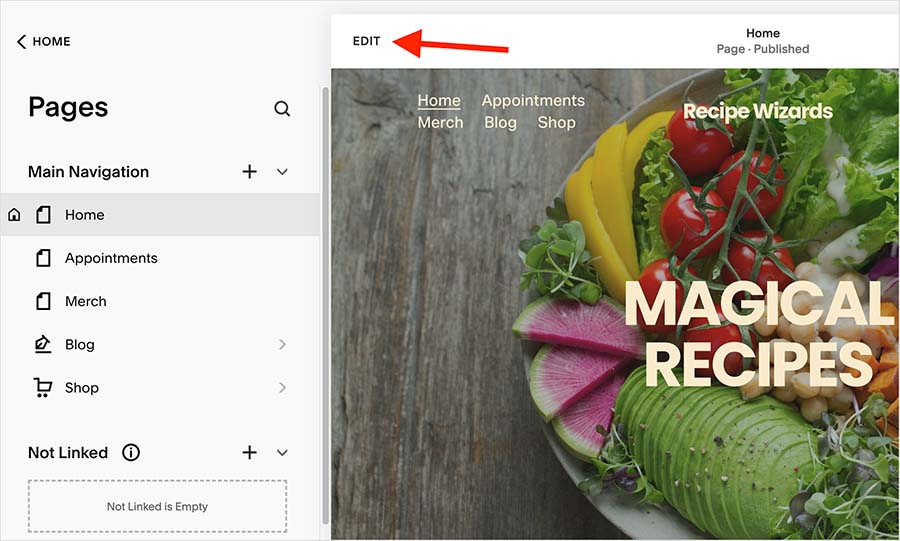
To do this, go to the ‘website’ section of your dashboard, click on one of your pages in the ‘Main navigation’ section, and then click on the ‘edit’ button that appears.
Then, hover over your navigation and click ‘Edit site header’.
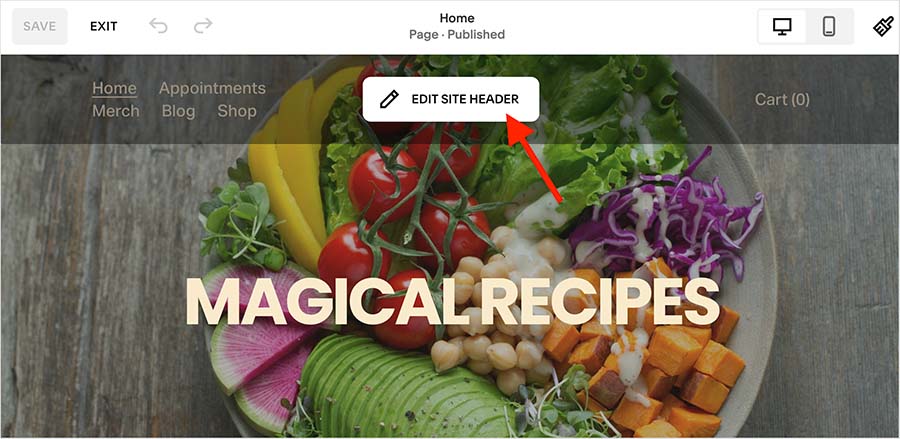
You’ll then get the option to upload your site logo — click the ‘site title and logo’ option.
You’ll then be able to upload logos for both the desktop and mobile versions of your website. Or, if you’d prefer to display your site logo as text, you can use the ‘Site Title’ field provided to do so.
Now, let’s move on to adding content!
Top tip: if you don’t have a logo (or a graphic designer!) you can use Squarespace’s logo making tool to create one fairly easily. Or alternatively, you can use browser-based graphic design apps like Canva to do so.
(You can read our guide to making a logo on Canva here).
6. Add your content
With your template, navigation and logo all sorted, it’s time to start adding content.
To add content to a Squarespace page, just go to Website > Pages in your Squarespace dashboard, then click on the page that you’d like to add content to, followed by the ‘Edit’ option.
Once you’ve done that, click an ‘Add Section’ button (these appear above and below existing sections of content).
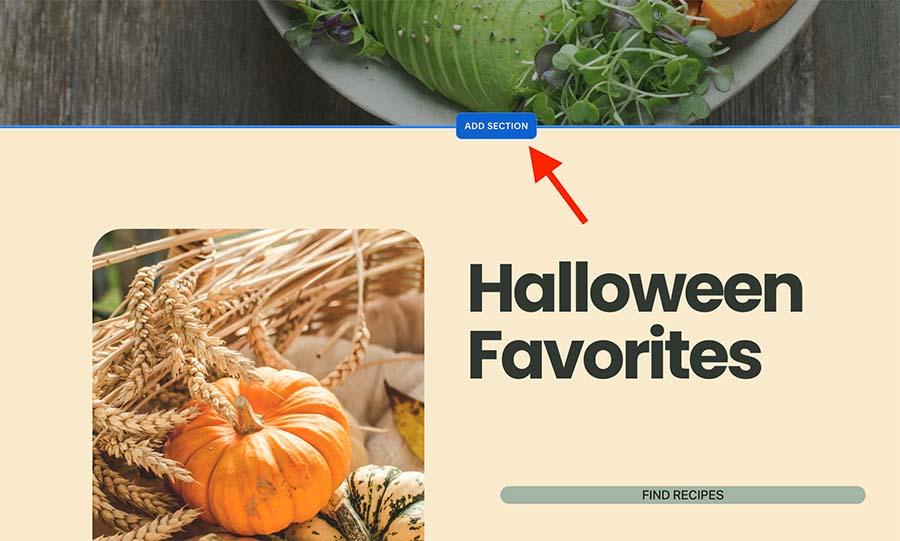
You’ll then be able to choose the layout type that you’d like to use for that section. There are lots of different options to choose from here, so if you’re new to the platform, you may want to spend quite a bit of time exploring these.
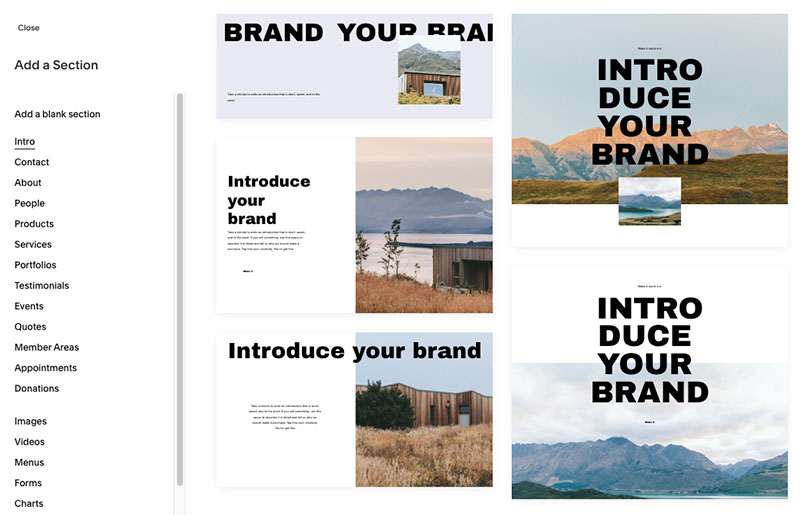
When you’ve decided upon your section type, just click it to add it to your page.
With your new section in place, it’s time to learn about content blocks. These are drag-and-drop site elements that you can move around your page, and they display various types of content on your Squarespace site — like text, images, buttons, and forms.
For a quick overview of how content blocks work in Squarespace, I’d really recommend taking a quick look at the below video about them.
To edit a content block in the the section you’ve just added, just hover over it then click on the content it contains to start editing it.
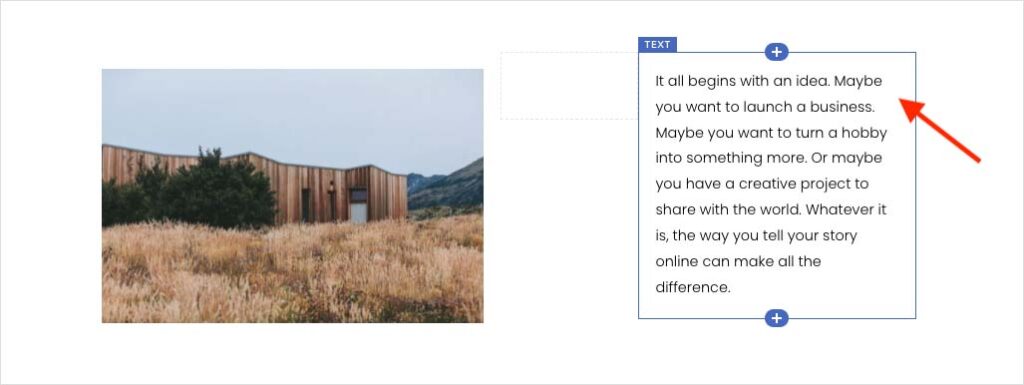
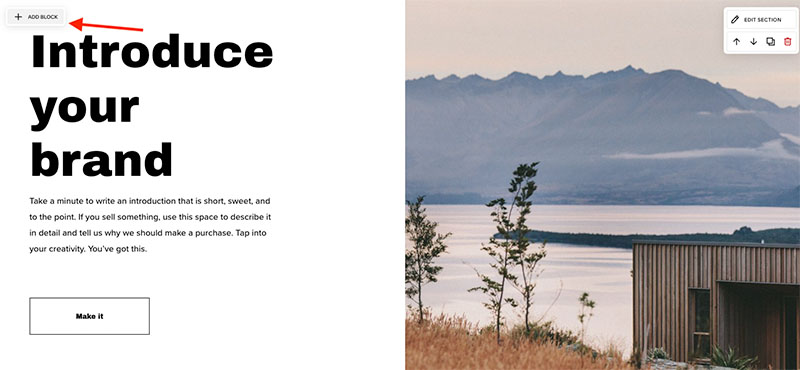
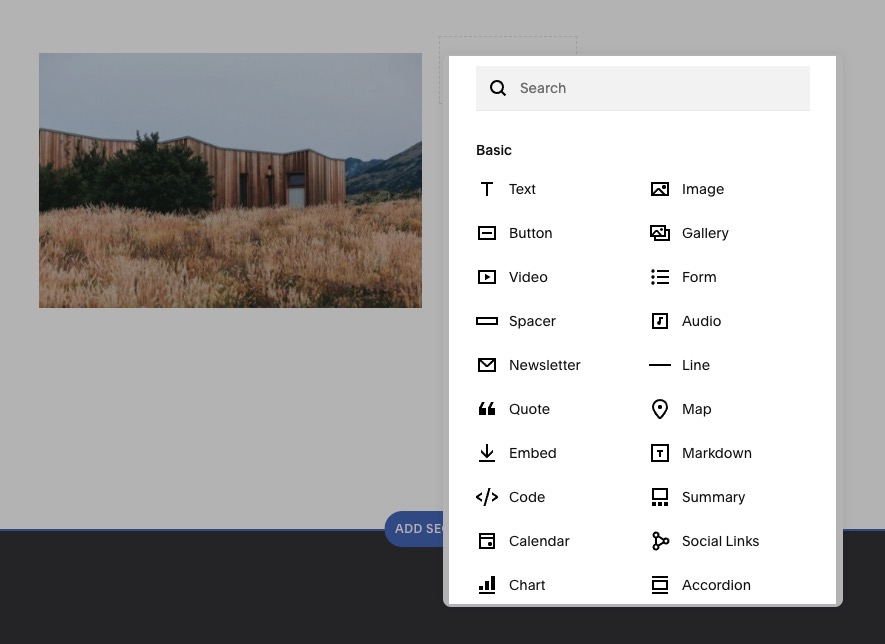
Alternatively, you can add new blocks to your section. You do this by clicking on the ‘add block’ button on the top left corner of the section you are editing.
Then, you’ll be able to choose what sort of content block you’d like to add. There are a wide variety of blocks available in Squarespace — just pick the type you’d like to insert, and add the relevant content.
If you’d like to move any of your content around your page, just hover over the content block you’d like to reposition.
When you see the ‘hand’ icon appear, you can click and drag that piece of content to a new location on the page.
Squarespace’s ‘Fluid Engine’ drag-and-drop content editor gives you precise control over block placement — and allows you to easily resize elements, duplicate blocks and get creative with overlapping content blocks.

Now, we’ve just taken you through the process of adding content to a regular Squarespace page. But as we saw earlier, there are quite a few different types of content that you can create, including blog posts, event pages, and online store pages.
Creating and editing many of these involves a similar process to the one I’ve just outlined, but for more specific instructions on how to edit other key types of Squarespace content, you can follow the below links:
7. Style your Squarespace site
When you’ve added your content, it’s a good time to consider styling your site.
Now, it’s important to note that don’t have to do this. It might be that you’re perfectly happy with how your chosen Squarespace template looks, and don’t want to bother changing any of its fonts or colors — in which case, great!
But in many cases, you may wish to style your Squarespace site so that it reflects your brand identity more accurately.
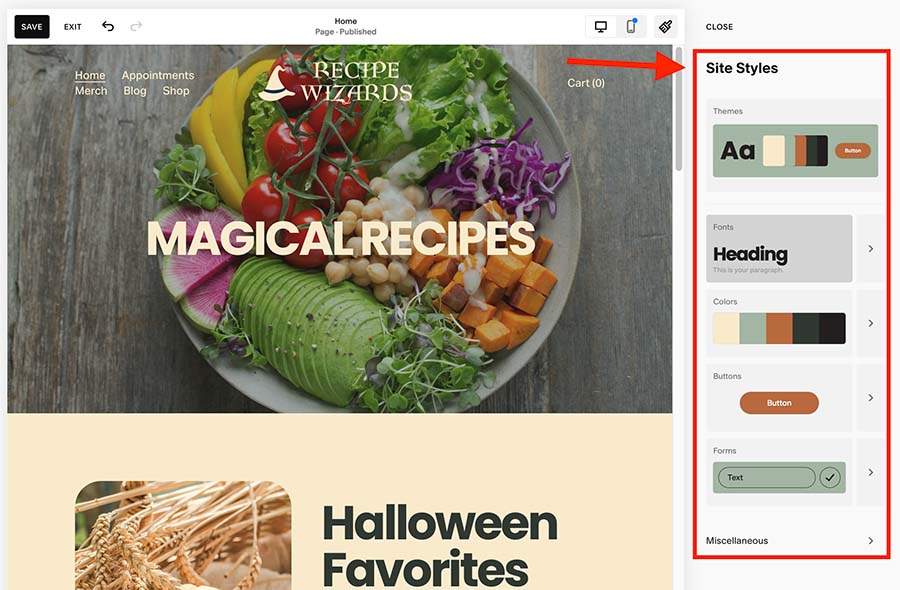
To do this, click the paintbrush icon at the top of the Squarespace page editor.
This opens up the ‘Site Styles’ options.
This section lets you choose which site elements you’d like to style: fonts, colors, animations, spacing, buttons, forms and image blocks.
Let’s take a look at all these.
Themes
The theme section in Squarespace’s style controls provides a quick and effective way to style your site with minimal effort. It controls font styles, colors, and button designs, allowing you to apply a polished look instantly.
If you’re happy with preset styling combinations, this option ensures a cohesive design without the need for manual adjustments.

One key feature of the theme setting is that all related elements are interconnected. When you select a theme, fonts, background colors, text colors, and button styles adjust globally in one click. This means you don’t have to change each setting individually—everything updates together to maintain visual harmony across your site.
However, if you want more control over individual design elements, Squarespace allows you to fine-tune settings like fonts, animations, and spacing. These more granular adjustments let you refine specific aspects of your site’s appearance while still maintaining the cohesive foundation set by your chosen theme.
Let’s look at font settings next.
Fonts
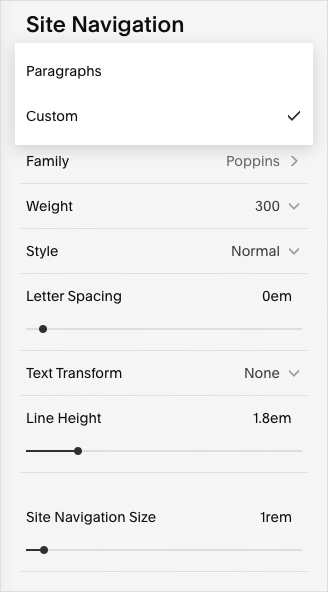
The ‘fonts’ section lets you specify the typefaces for the various types of text styles you can use on your site.
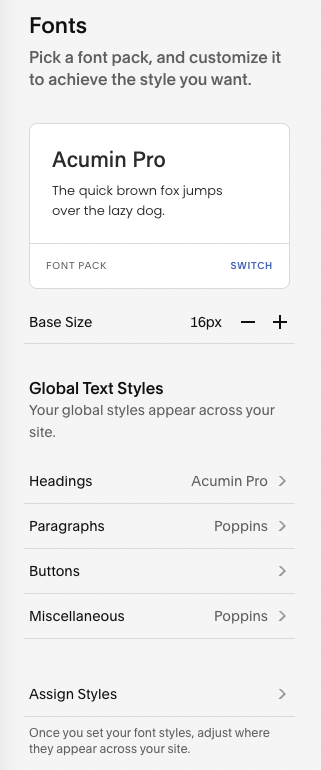
These are headings, paragraphs, buttons and what Squarespace refers to as ‘miscellaneous’ text — for example, product prices and blog post tags.
The ‘Assign Styles’ option lets you choose which fonts to use in elements contained within your headers and newsletter blocks (site title, navigation items, fields, sign-up buttons etc.).
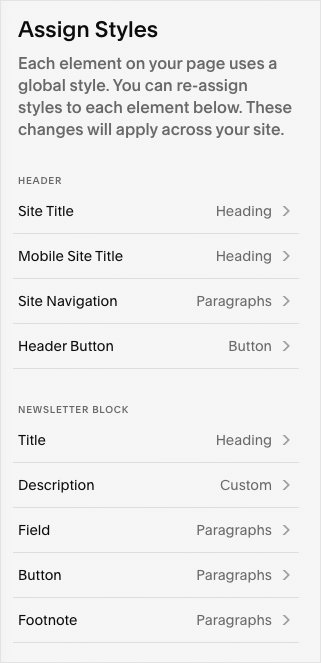
You can apply your ‘global’ styles to these, or define a custom style for each of them.
The key thing to remember about fonts is to try not to use too many of them, as over-use of web fonts can negatively affect Squarespace site speed. Generally it’s best to use just one or two typefaces on your site.
Colors
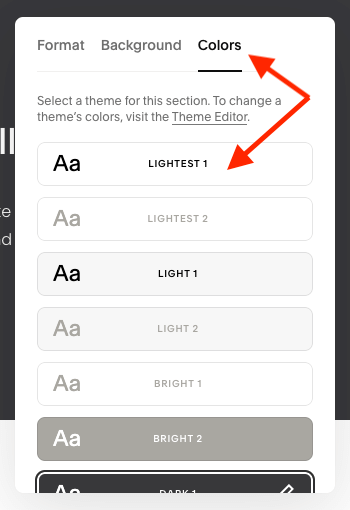
In the ‘colors’ section, you can define ‘color palettes’ for your site. These contain color settings for backgrounds, text, buttons and much else besides. You can format these so that the colors used adhere to your brand guidelines.
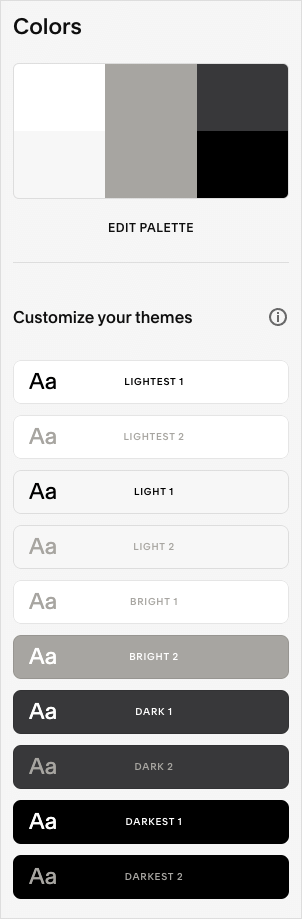
You can configure up to 10 color palettes (ranging from ‘Lightest 1’ all the way to ‘Darkest 2’) — to edit one, just click on it.
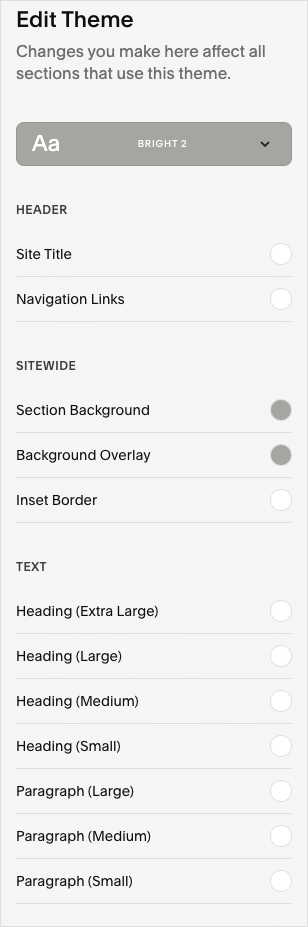
Then, you’ll be able to assign different colors to all the sections of your site that use that palette (I discuss how to assign palettes in a moment).
When you’re happy with your color palettes, you can apply them to content sections on your site’s pages. To do this, go to ‘Pages’ in your Squarespace dashboard, locate the relevant page, click ‘Edit’, hover over the section you want to apply the palette to, and click the ‘Edit section’ button beside it.

Then, click ‘colors’ and apply the relevant color palette.
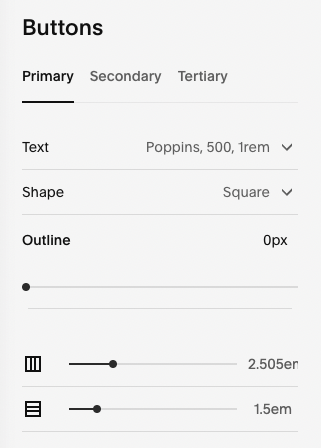
Buttons
The ‘buttons’ styling option is very easy to use, allowing you to specify the shape of your buttons, whether you’d like to have curved edges or not, and the space between the edge of the button and the text it contains.
Forms
The ‘Forms’ styling option lets you style form blocks to match your brand by altering fonts, colors, and element styles like text fields and buttons.
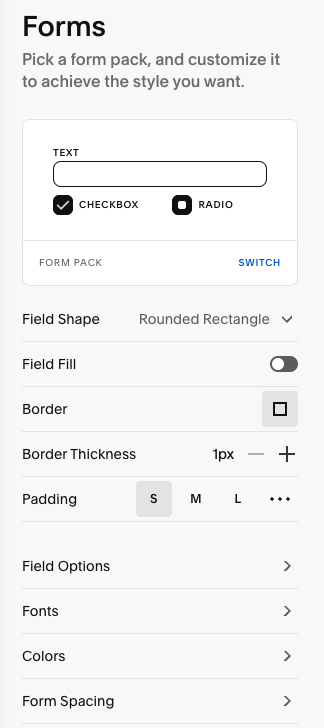
This section lets you choose from four preset ‘form packs,’ which you can then customize further in the ‘Forms’ panel settings. Font customization options are available for various form elements like title, input, description, caption, placeholder, option, survey title, and select dropdown.
Form blocks default to your site’s color palette, but you can manually adjust these for different sections.
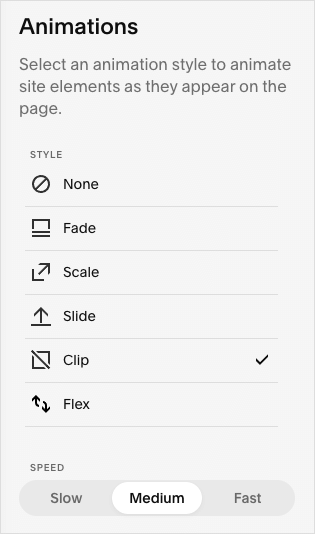
Animations
The ‘Animations’ section lets you specify what effects you’d like to apply to your content as it appears on the page. However, to ensure that your content loads as fast as possible, we usually recommend choosing the ‘none’ option (a faster page loading time is much better from a user experience point of view, and can result in higher rankings from search engines).
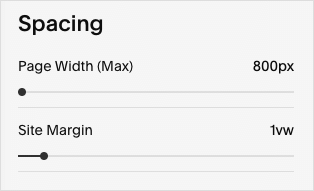
Spacing
The ‘site spacing’ section lets you adjust your site’s width and page margins — you can adjust the sliders provided to see how your site will appear when different spacing widths are applied (as you do so, you see a preview of the results).
Images
Styling image blocks can be a little bit complicated, as the images section lets you define the styling of five different types of images you can embed on a Squarespace site — ‘poster,’ ‘card,’ ‘overlap,’ ‘collage’ and ‘stack.’
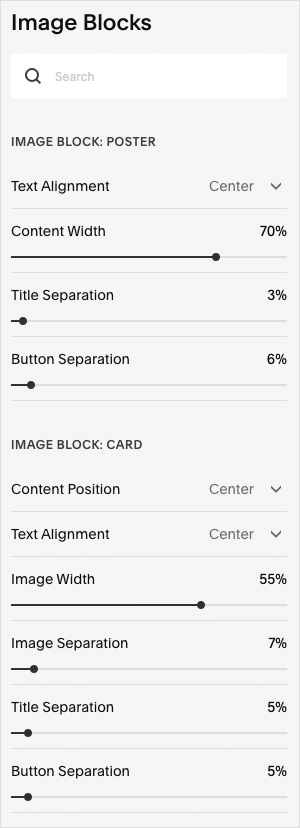
There are quite a lot of tweaking options here — but again, remember you don’t need to adjust anything here unless you feel very strongly about how the images on your site are currently being presented.
8. Connect your domain to Squarespace
At this point you should have your navigation, logo, content and styling all sorted — so it’s a good time to start thinking about where you’d like your site to ‘live’ once you’ve launched it.
Your site can either sit on a ‘squarespace.com’ address like yoursitename.squarespace.com (which are provided to all Squarespace users for free), or a custom domain name — yoursitename.com, yoursite.co.uk etc.
Of the two options, a custom domain name is generally best, as having your own site name / brand will generate considerably more trust in your website amongst your site visitors.
You can purchase a custom domain from a domain name provider – for example Namecheap, Gandi or Network Solutions.
Alternatively, you can buy one direct from Squarespace. In fact, if you pay on an annual basis for your website, Squarespace will give you one for free for the first year of your subscription.
Top tip: for security reasons, it’s arguably better to use a third-party provider for your domain name. Having your domain name and your website under the same account means that you are placing both ‘in the same basket’, which can be risky: if you lose access to your Squarespace account, you will be deprived of both your website and your domain name.
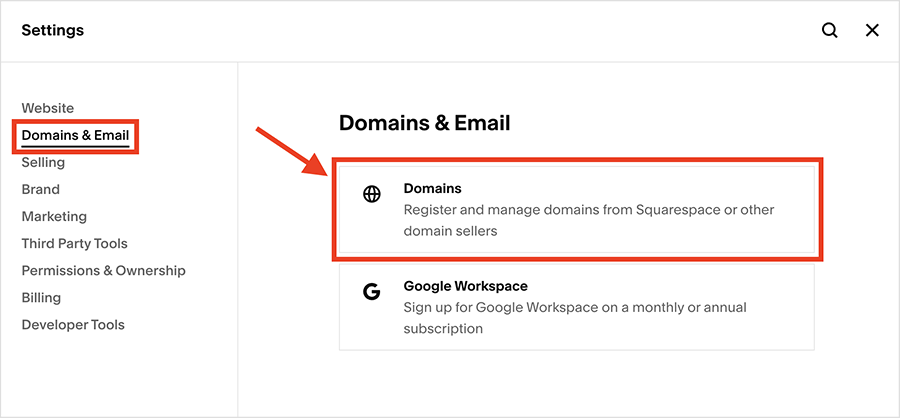
To get a domain from Squarespace, or connect an existing one, go to Settings > Domains & Email > Domains in your dashboard.
Then, choose whether you’d like to buy a domain from Squarespace (using the ‘get a domain’ option) or use your own.
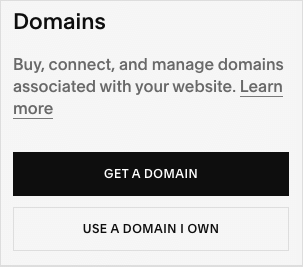
Then it’s a case of following the instructions provided.
9. Prepare your website for launch
Once your domain is connected, you could technically launch your Squarespace site right away!
But it’s much better to check that all aspects of your website are working as expected first — and that’s where a Squarespace ‘pre-launch checklist’ comes in.
Below you’ll find some of the key checks we suggest that you run through before launching your site (for a full set of QC tasks, check out our detailed Squarespace launch checklist).
Squarespace pre-launch checklist
Check that…
- all demo pages have been deleted (or disabled if you intend to use them as templates in future).
- image file sizes are not too large (aim for no more than 100KB per image).
- all copy has been correctly added and is error free.
- all the pricing, shipping and tax information has been entered correctly for any products on your site.
- all hyperlinks have been checked and are working correctly.
- all relevant social media accounts have been added correctly and social icons are displaying okay and linking to correct profiles
- a ‘contact us’ call to action has been added to each page on your site.
- all forms are capturing data correctly / sending to right email address.
- a favicon has been added.
- a GDPR compliant cookie banner has been added correctly (see our Squarespace GDPR guide for a useful resource on this).
- a GPDR compliant privacy policy, terms of use and cookie notice pages have been approved and added (again, see our Squarespace GDPR guide for more details on all this).
- key SEO checks have been completed on the site (i.e., headings, page titles, meta descriptions, alt text etc. have all been added according to best practice — see our Squarespace SEO checklist for more help with this).
- your domain has been correctly mapped.
- your site has been registered with Google Analytics.
- your site has been registered with Google Search Console.
- the site is displaying correctly on desktop computers, tablets and mobile devices.
10. Publish your Squarespace website
When you’re done with your pre-launch checks, you can publish your Squarespace site!
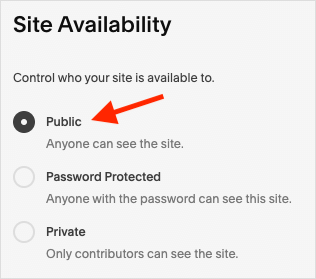
By default, each new Squarespace website is password protected, and you need to remove this password in order to make your site publicly visible.
To do this, go to Settings > Website > Site Availability in your Squarespace dashboard, choose the ‘Public’ option and follow any instructions provided. If you haven’t purchased a Squarespace plan yet, you’ll need to do so as part of this process.
And that’s it! Your Squarespace website is live.
I hope you’ve enjoyed this Squarespace tutorial, but your web design journey doesn’t stop there! Check out the Squarespace resource center on the Style Factory website, which contains a host of useful Squarespace resources, including:
Finally, if you have any questions about our Squarespace tutorial, or building a Squarespace website, do leave a comment. We read them all and will do our best to help!
Comments (2)